A table with a heavy duty concrete top
The story
A few years back, I bought a bunch of concrete for a footing for our above ground pool. That was a hell of a project, but after it was done I found myself with four 80lb bags of concrete left over. I poked around on the internet and found that you could make slabs as table tops if you were willing to make some moulds. With visions of many wonderful outdoor-ready sturdy tables built I went off and bought some supplies.
The plan
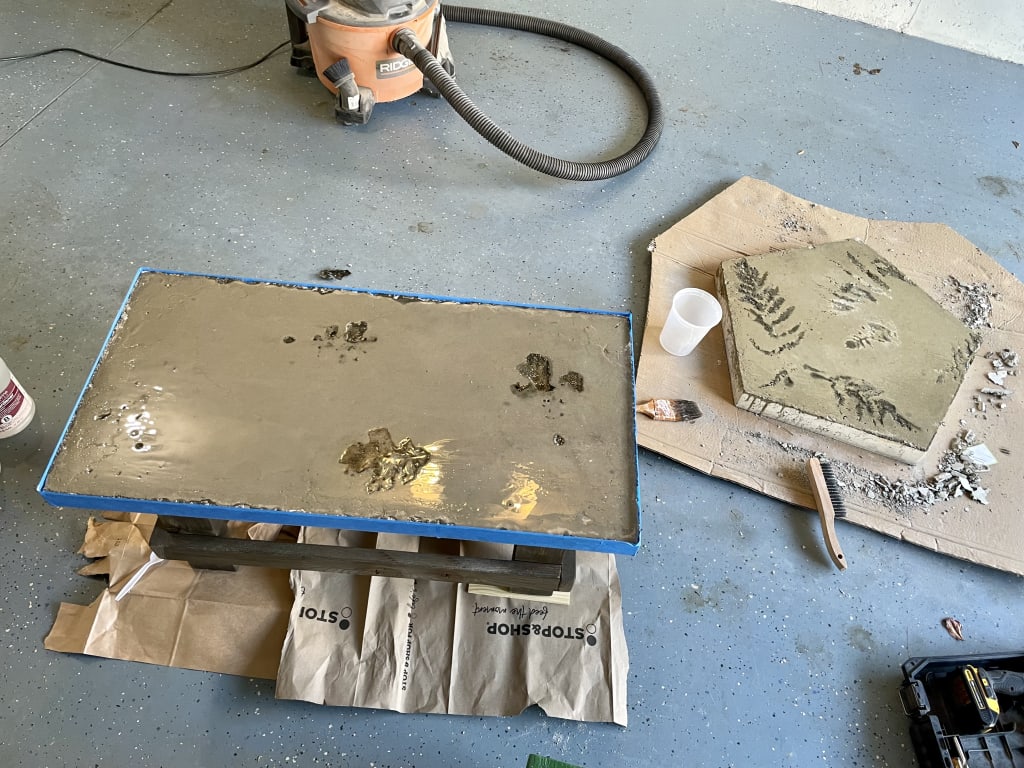
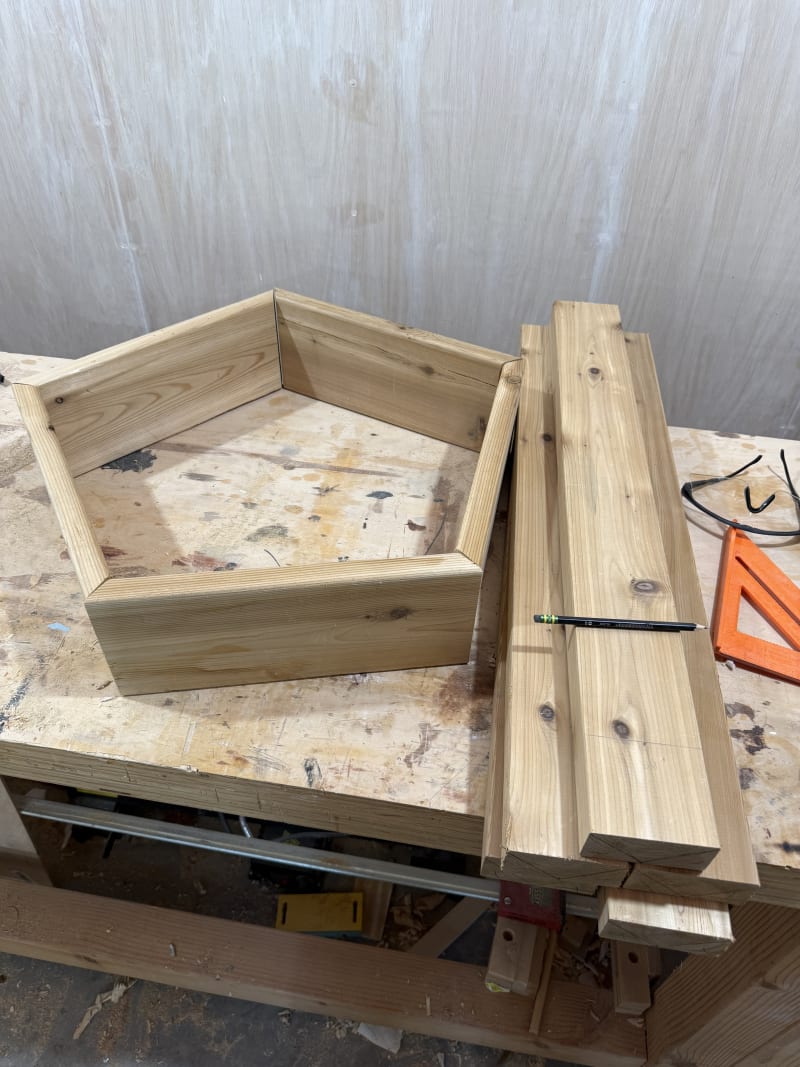
First I needed to build the form for the slabs. I decided to try two rectangles, one of two inches thick, and one closer to three. As I measured things out, I realized I could make a third table top with five edges. Madness. I decided then to also make a pentagon table top, because why not. Without much more than one article online that I read from someone who made a beautiful table, I got to work. I wanted to try to imprint some leaves and ferns into my table like the one I found online.
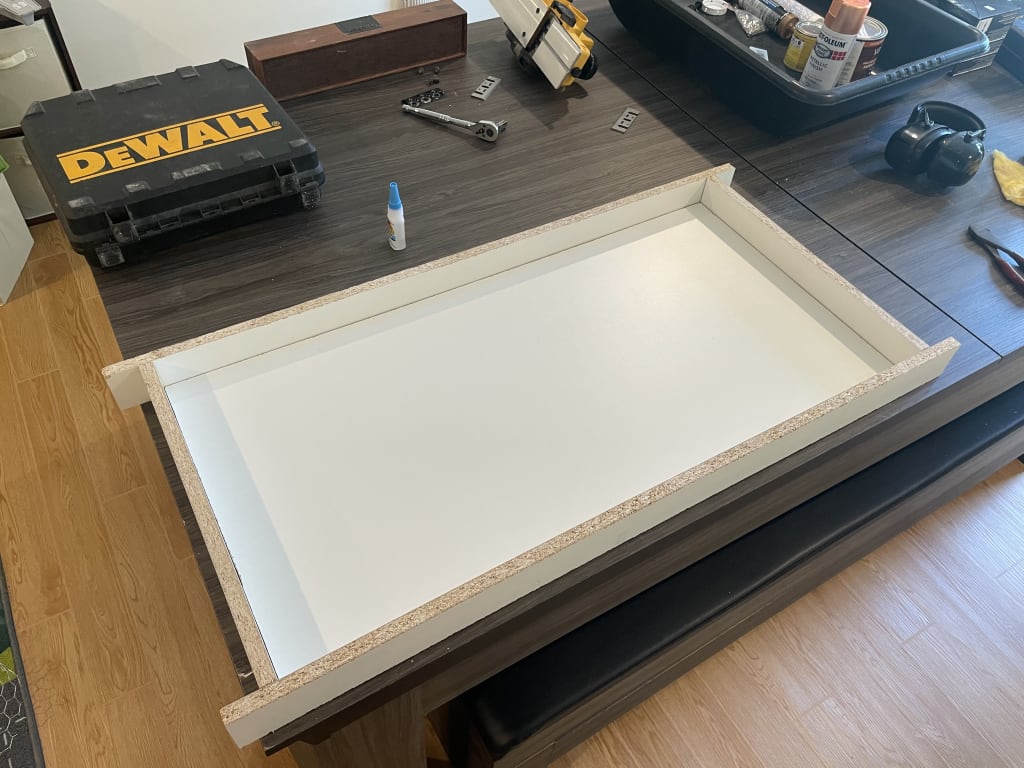
The ideas was to build a melamine form and caulk all the corners, then fill with concrete. Easy peasy, right?
The build
Concrete and I are not great friends. I made a horrendous mess while mixing and pouring the concrete, and didn't take any pictures of the process. I did end up with three tables and let them sit and cure for about a week before messing around.
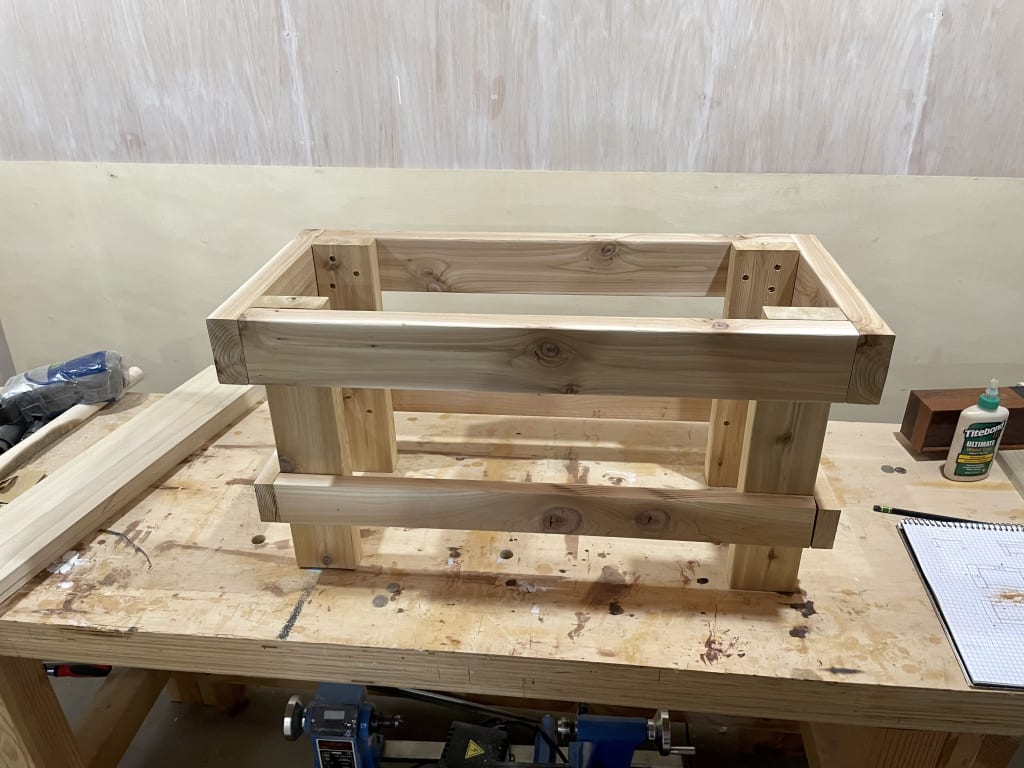
In the mean time I built a nice sturdy base with cedar 2x4s. I wanted this whole thing to really scream "sturdy" at anyone who looked at it. I thought a coffee table height would be pretty good. I was envisioning this sitting outside on a deck between two Adirondack chairs or something similar.
The day of removing the forms from the concrete came and... one of the rectangular tables broke. Annoyed, I cleaned it up and tossed it. I pulled the other two out of their forms and was less than pleased. They did not take the imprints well at all and they were pretty ugly overall.
I was pretty bummed by how they came out, and I already had a table leg assembly ready to go. I wanted to make this work, but how?
Epoxy saves the day
I happened to have bought some epoxy to play around with recently and I had a variety of metallic colors I could add. Before I got started messing with colors, I wanted to seal the top surface with a clear layer see how that looked.
It was ... functional, but not really looking great. I decided to forge ahead with a coppery-colored top coat. I finished the rectangular table and gave it to my brother, Adam. Then I tucked the weird pentagon top away for another day.
Three years later
I was cleaning the garage the other day and came across my silly pentagon shaped concrete table top. I decided now was the time to build the table for this. I figured it'd be a nice place to work on tools outside when the weather was good for such things. I took some measurements and had enough cedar on hand to get to work. I cut everything to length and starting figuring out how to put it all together.
Why a pentagon? Why not something easier and symmetrical like a square, rectangle, circle, or nearly anything else. I don't know. It seemed fun at the time. Five sides means five corners, which really wanted five legs. It's tricky enough getting four legs to be the same exact length. Five is just silly. Anyway, I plowed onward.
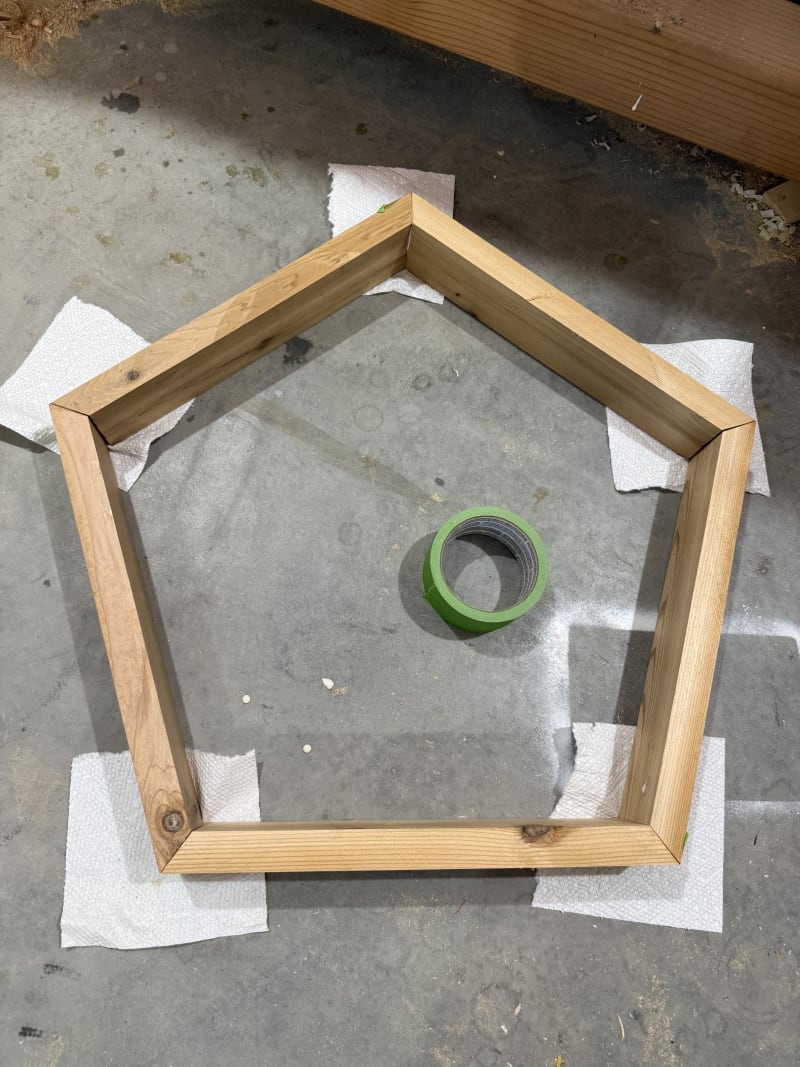
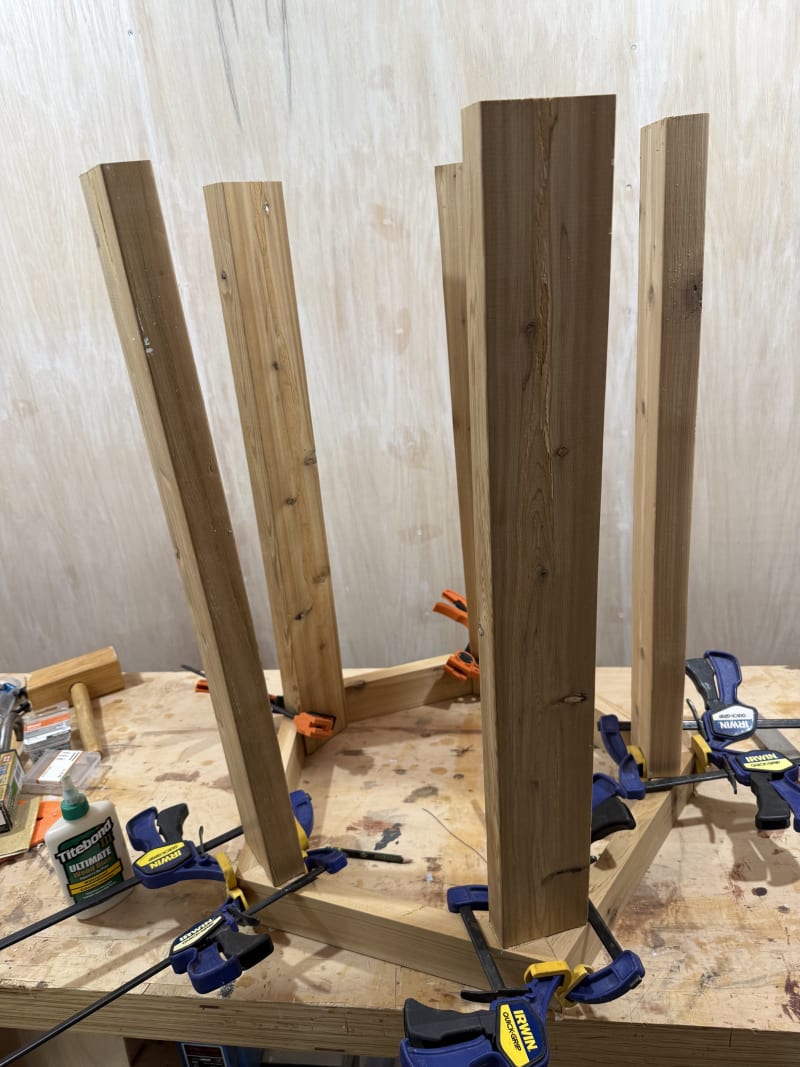
I had both a few 2x4s and a piece of cedar decking to work with. I decided to cut the decking in half length-wise and use that as the top horizontal bracing, and at about 1/3rd up. I glued up the top pentagon and got to cutting the legs.
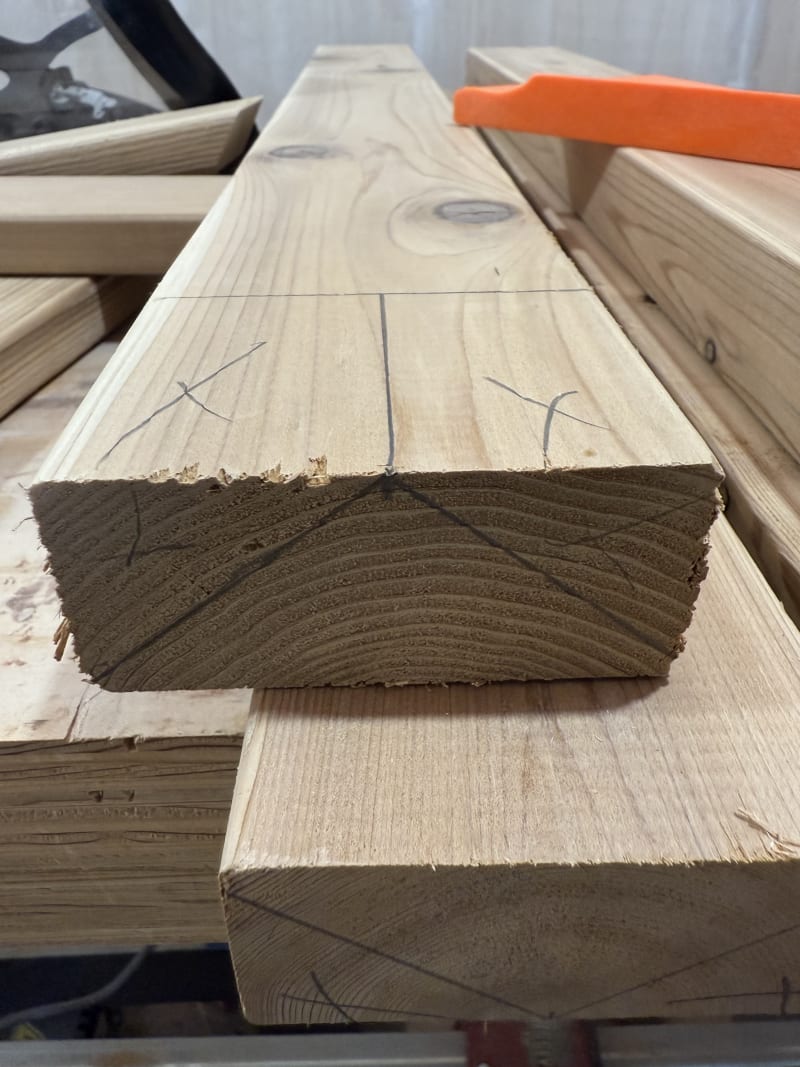
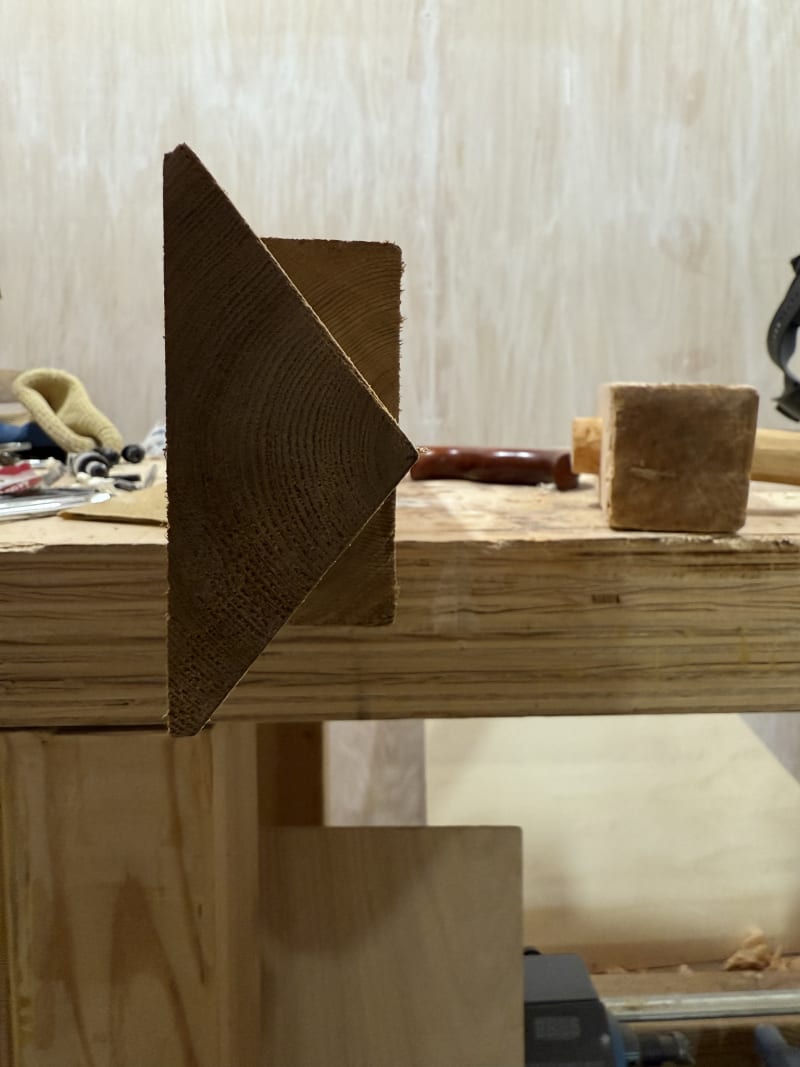
I wanted the outside part to not protrude out from the legs, so I had to cut the tops of the legs into a triangle. First I had to measure and mark the angle.
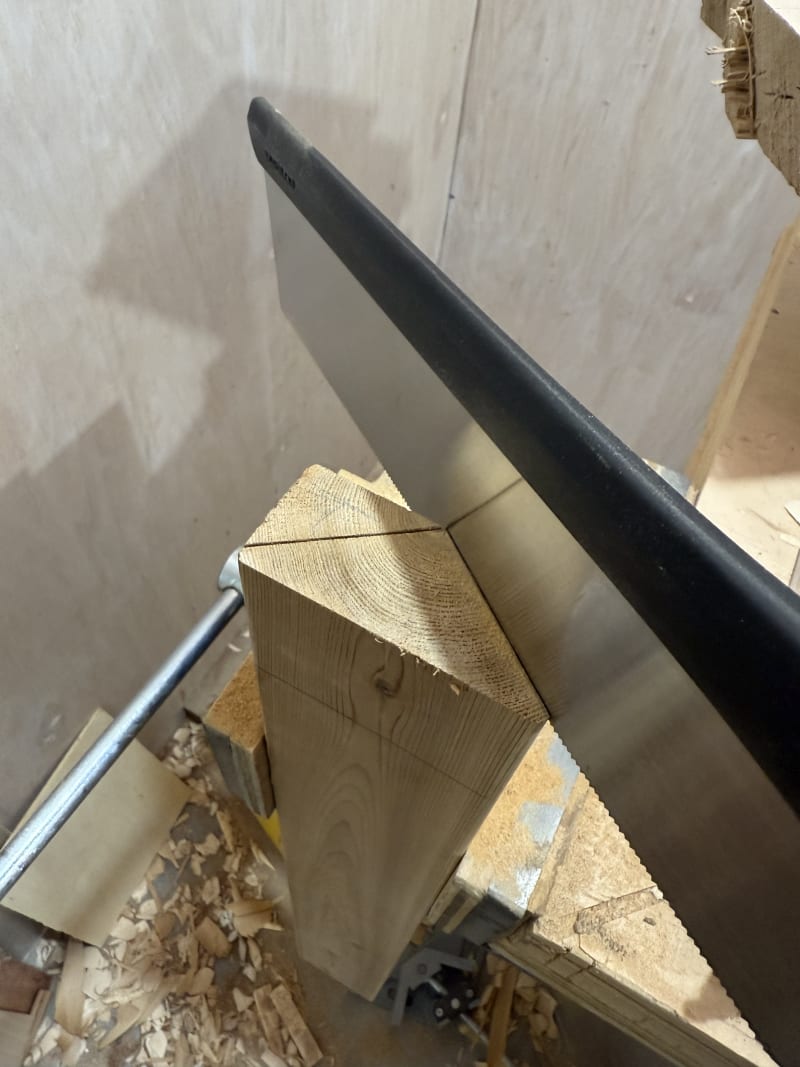
Then we cut the angle.
Then we remove the waste.
Next I had to connect the legs to the upper pentagon.
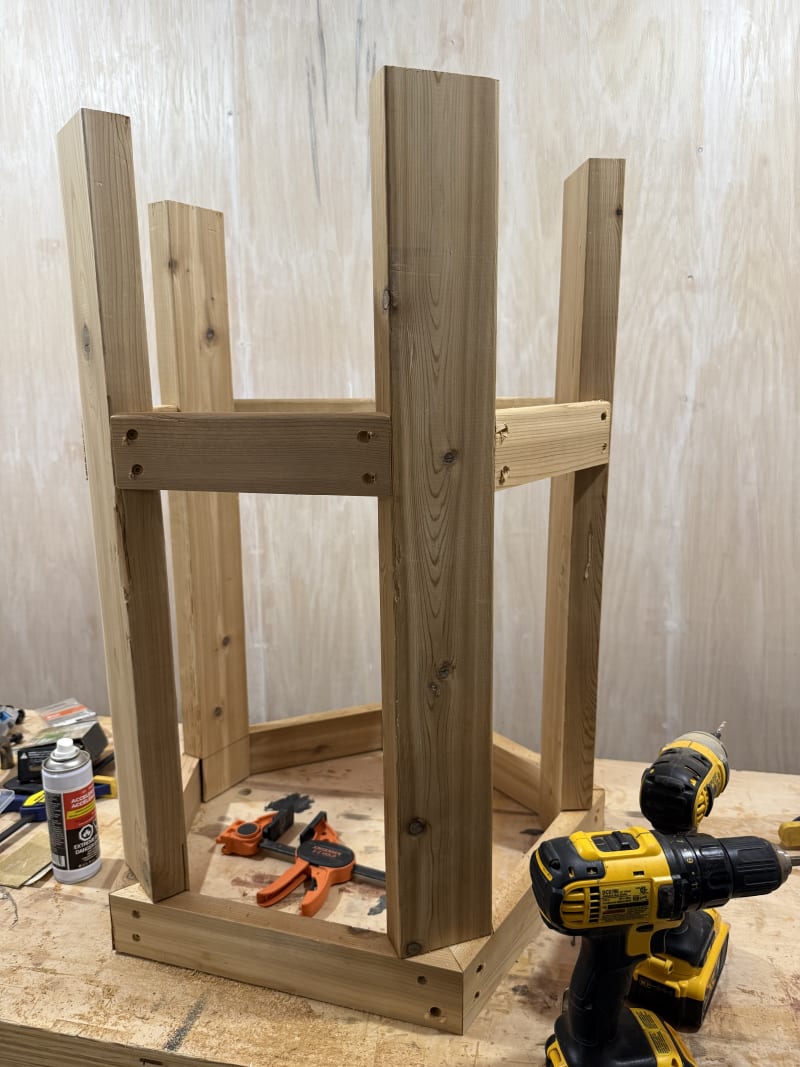
I really did not enjoy cutting those angles so I decided to do the lower reinforcement differently. I connected it directly to the legs and screwed it in place with counter-sunk screws.
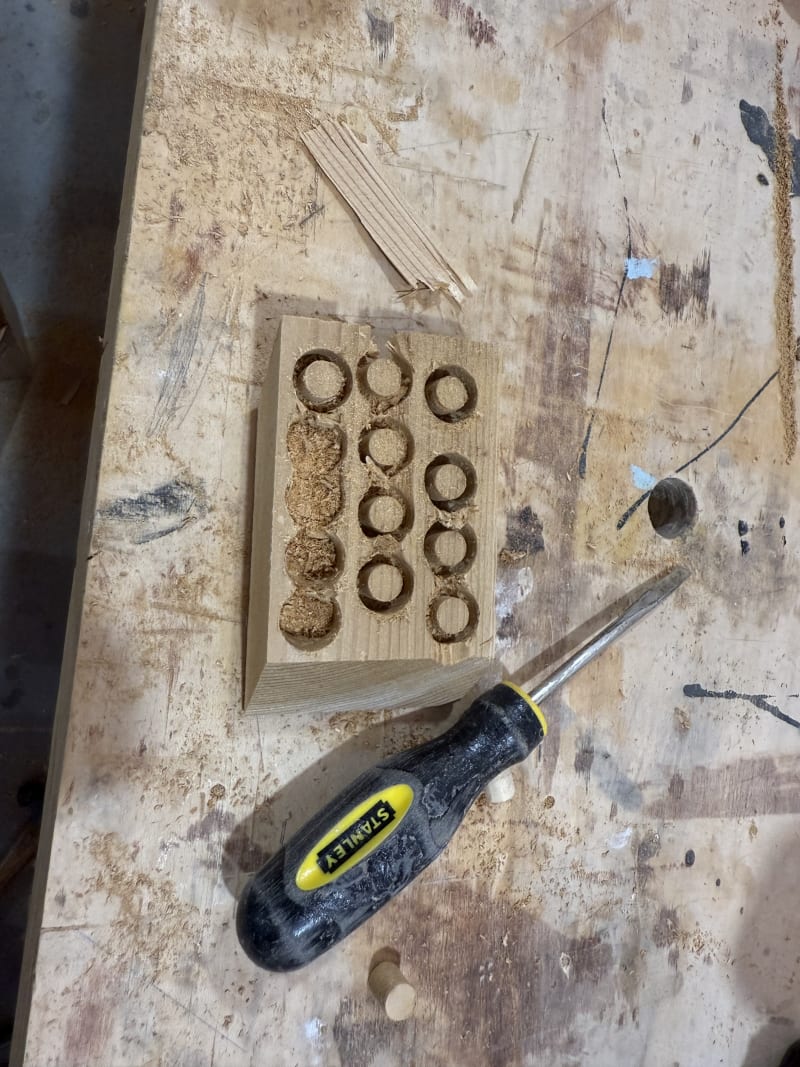
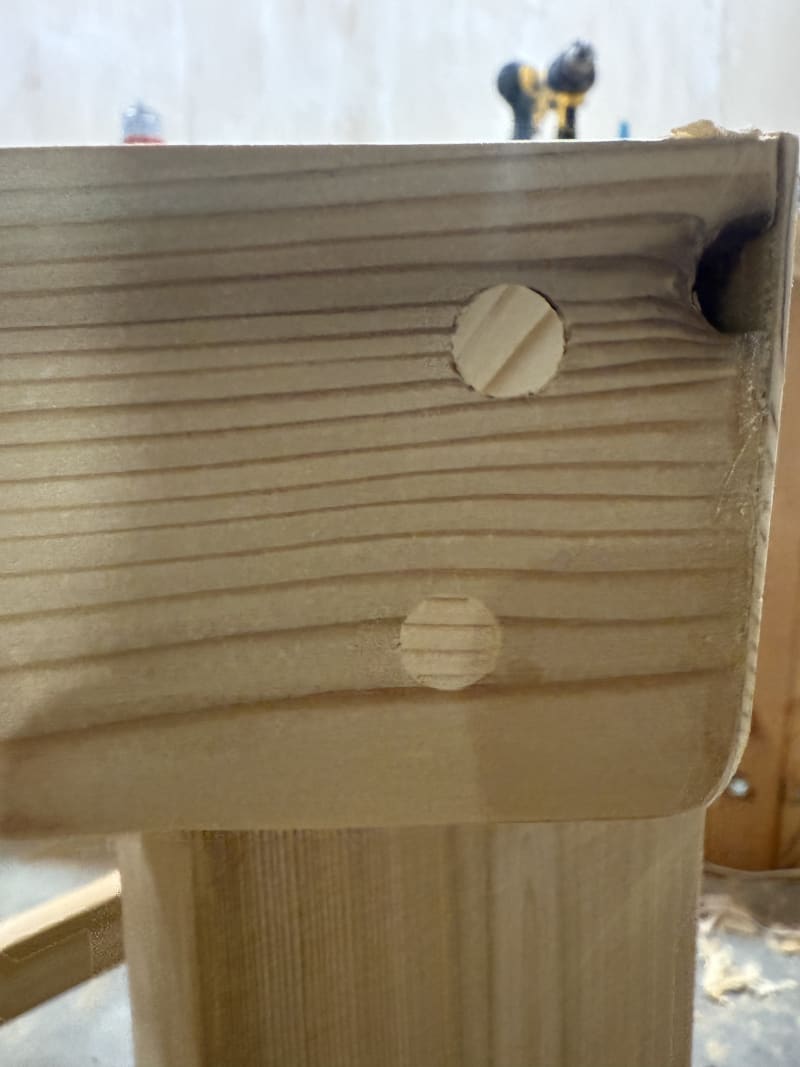
Don't mind those gaps you see there, I filled them with wood and woodglue. I cut some plugs to fill in the counter-sunk screw holes and hammered them in.
Not bad. Not great, but not bad.
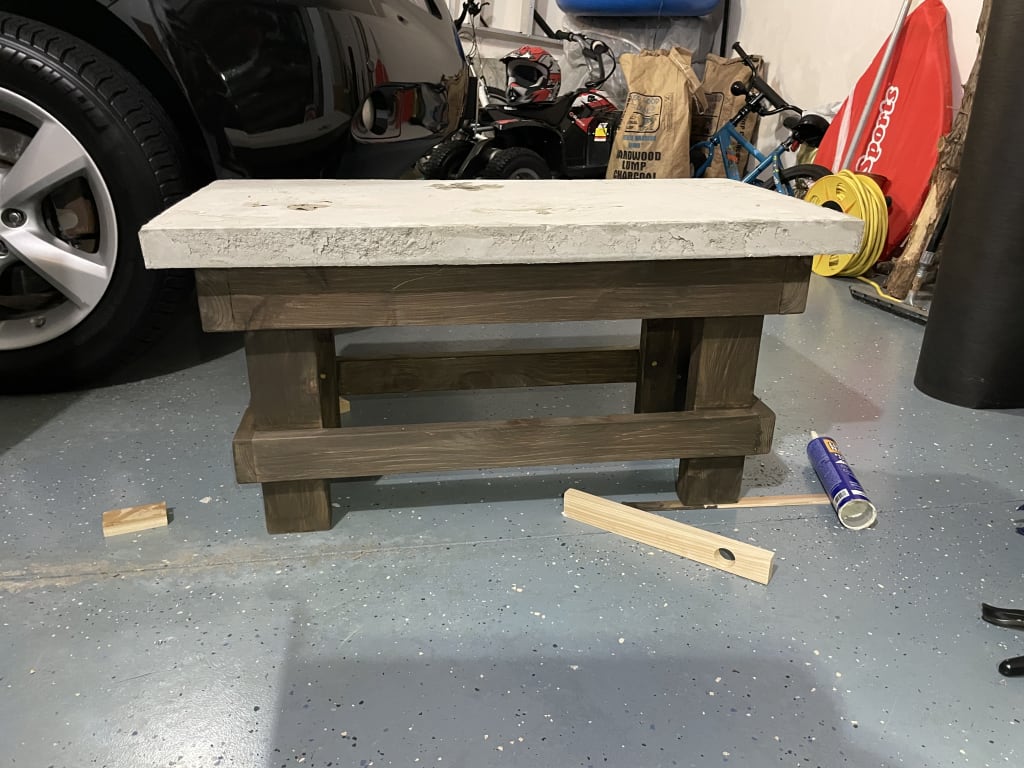
I sanded it all smooth and stained it a nice dark color. Finally it was time to put the top on.
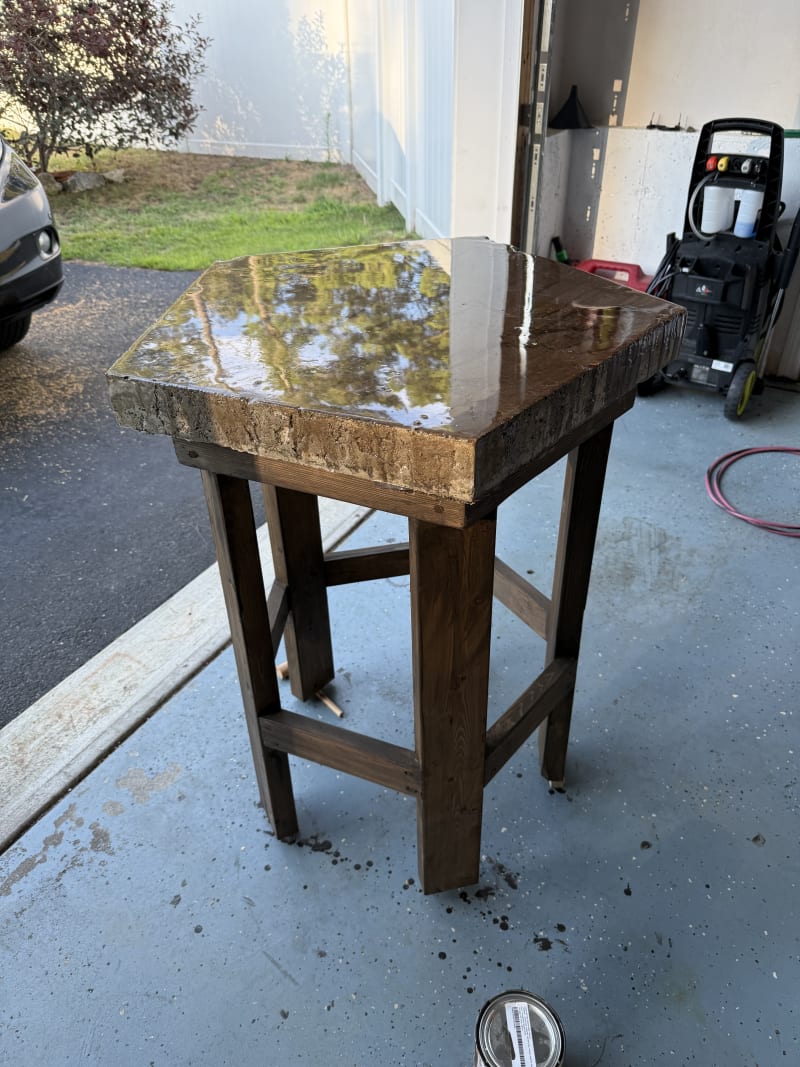
The final touch was to paint the bare edges black to hide the boring concrete.
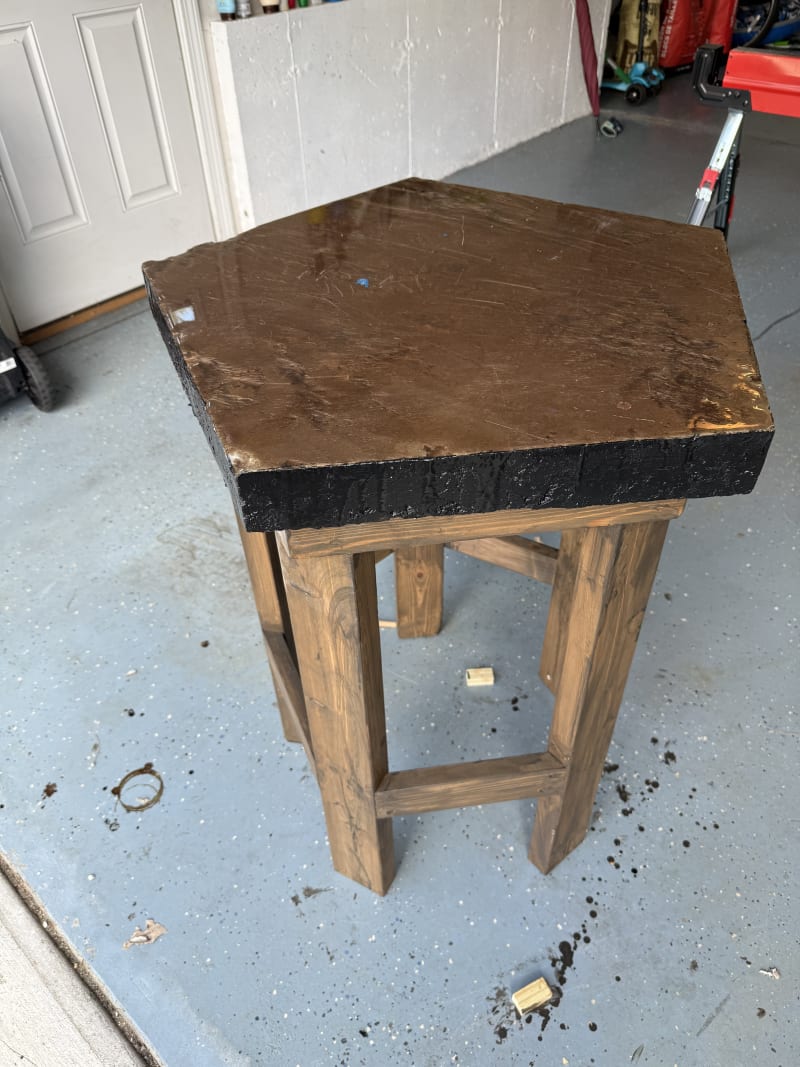
Did it accumulate damage and paint spots from years sitting in the garage? Yes. Does it work as a sturdy table? Also yes. Is it a wonderful work of art? No. No it is not. This table is meant for work, and I don't need it to be beautiful. I still wish it was though.
Conclusion
I got two tables out of this. One was fairly normal, and the other was tricky. The second one is weird, and funny looking, but hey, it was a learning experience.
Concrete
This was my first time trying to use concrete in a way other than as a structural component that interacted with the ground. I was woefully unprepared, and it showed. I will try again, but maybe with a different mix, and with different mould. I would like to try again sometime soon.
Weird angles
Why do I do this to myself? A pentagon? Well, I have built things in octagons, hexagons, and plain old quadrilaterals so why not go for the five sided fiend? It was hard though. Free hand cutting the legs was really not that easy, and I had to do a few math problems to get my angles right in the first place. I think next time I will try a slightly easier shape. ...Or maybe a circle, we'll see.