Under the deck
This project took three years.
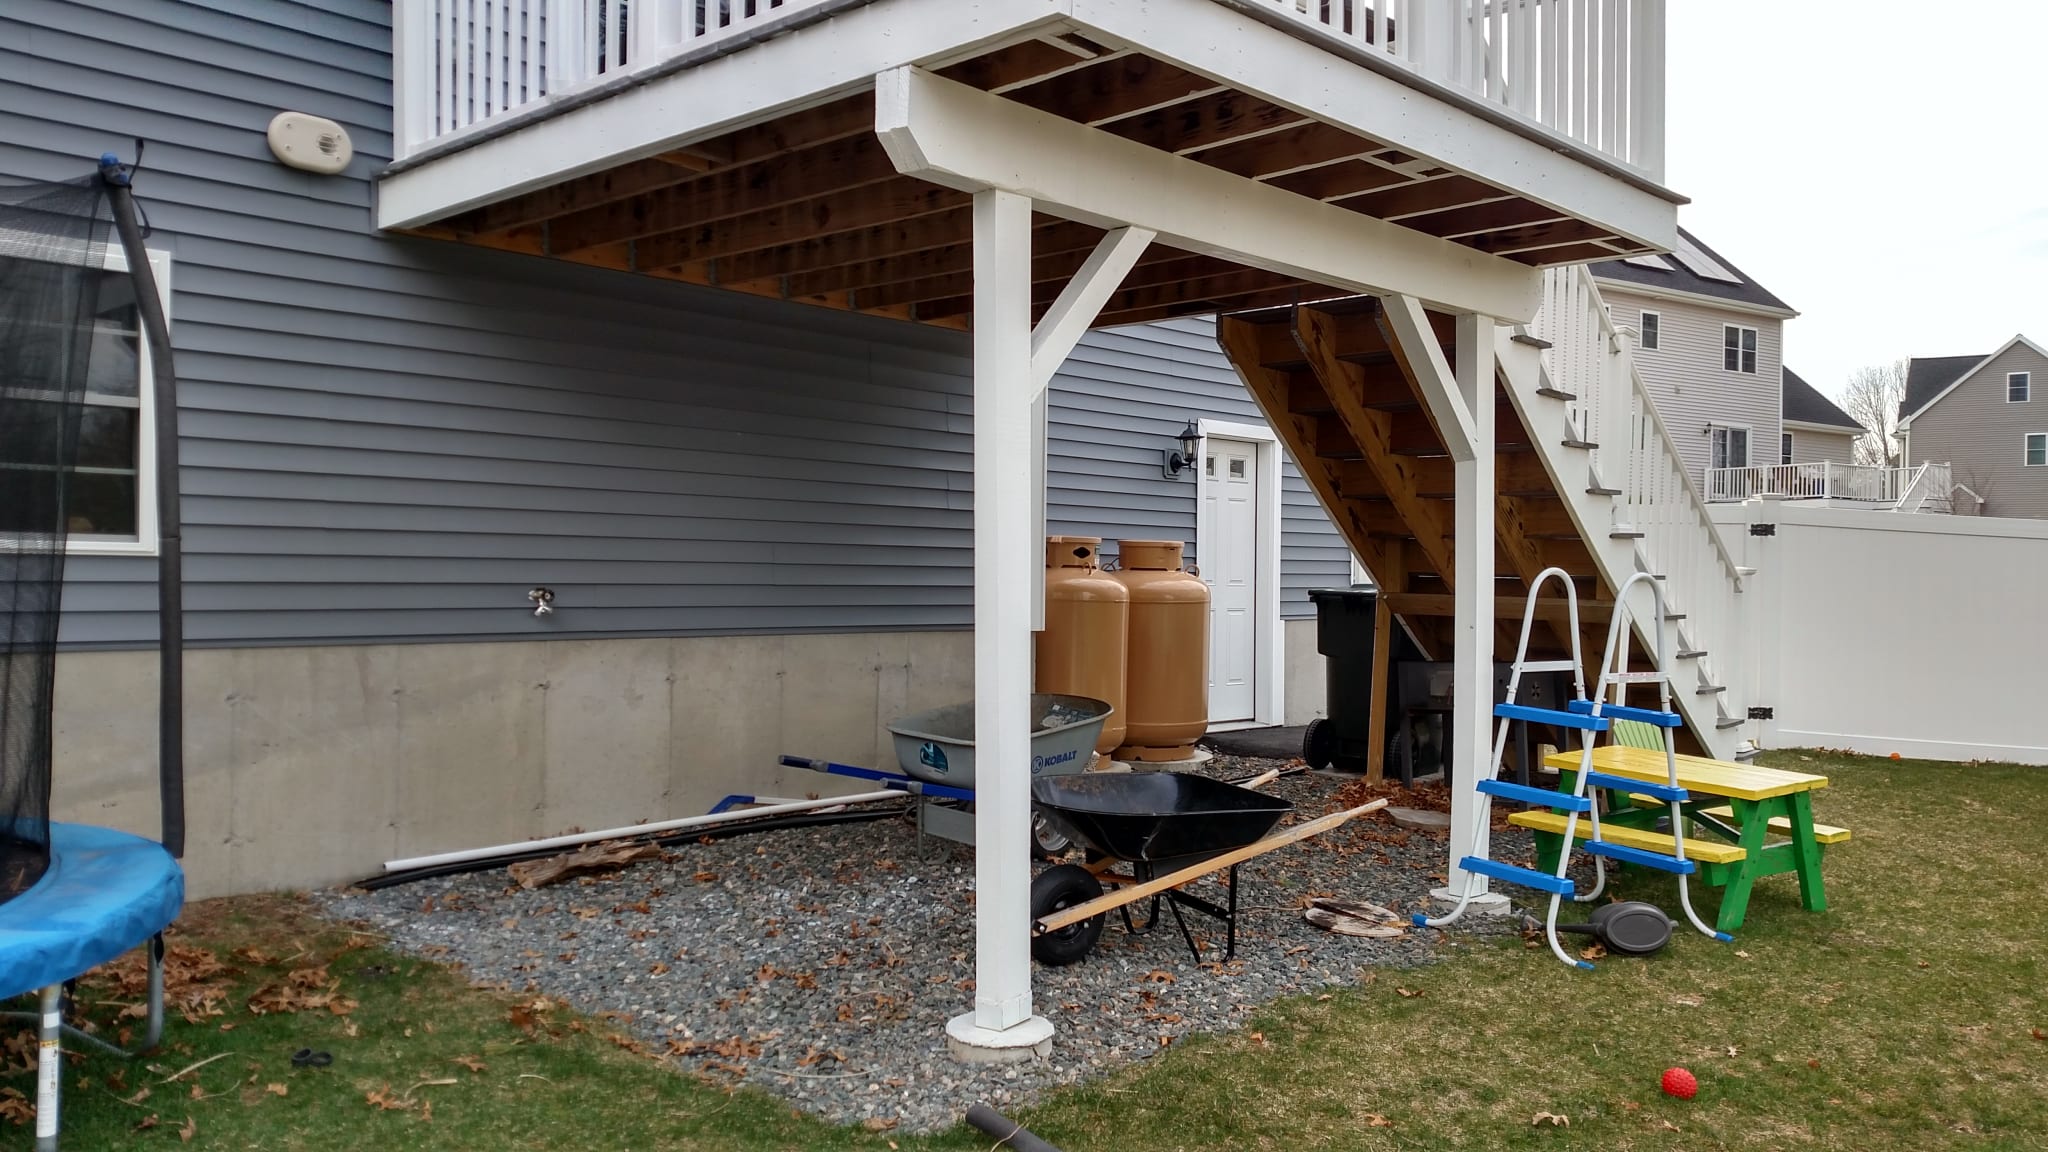
Our house is built on a hill. The back-yard is lower than the front by the height of one floor, and the deck comes off the back of the house. This means I've got a rectangular space under the deck that is perfect for storing stuff. For a while I used this space for general storage, totally unorganized, and just mixed up together.
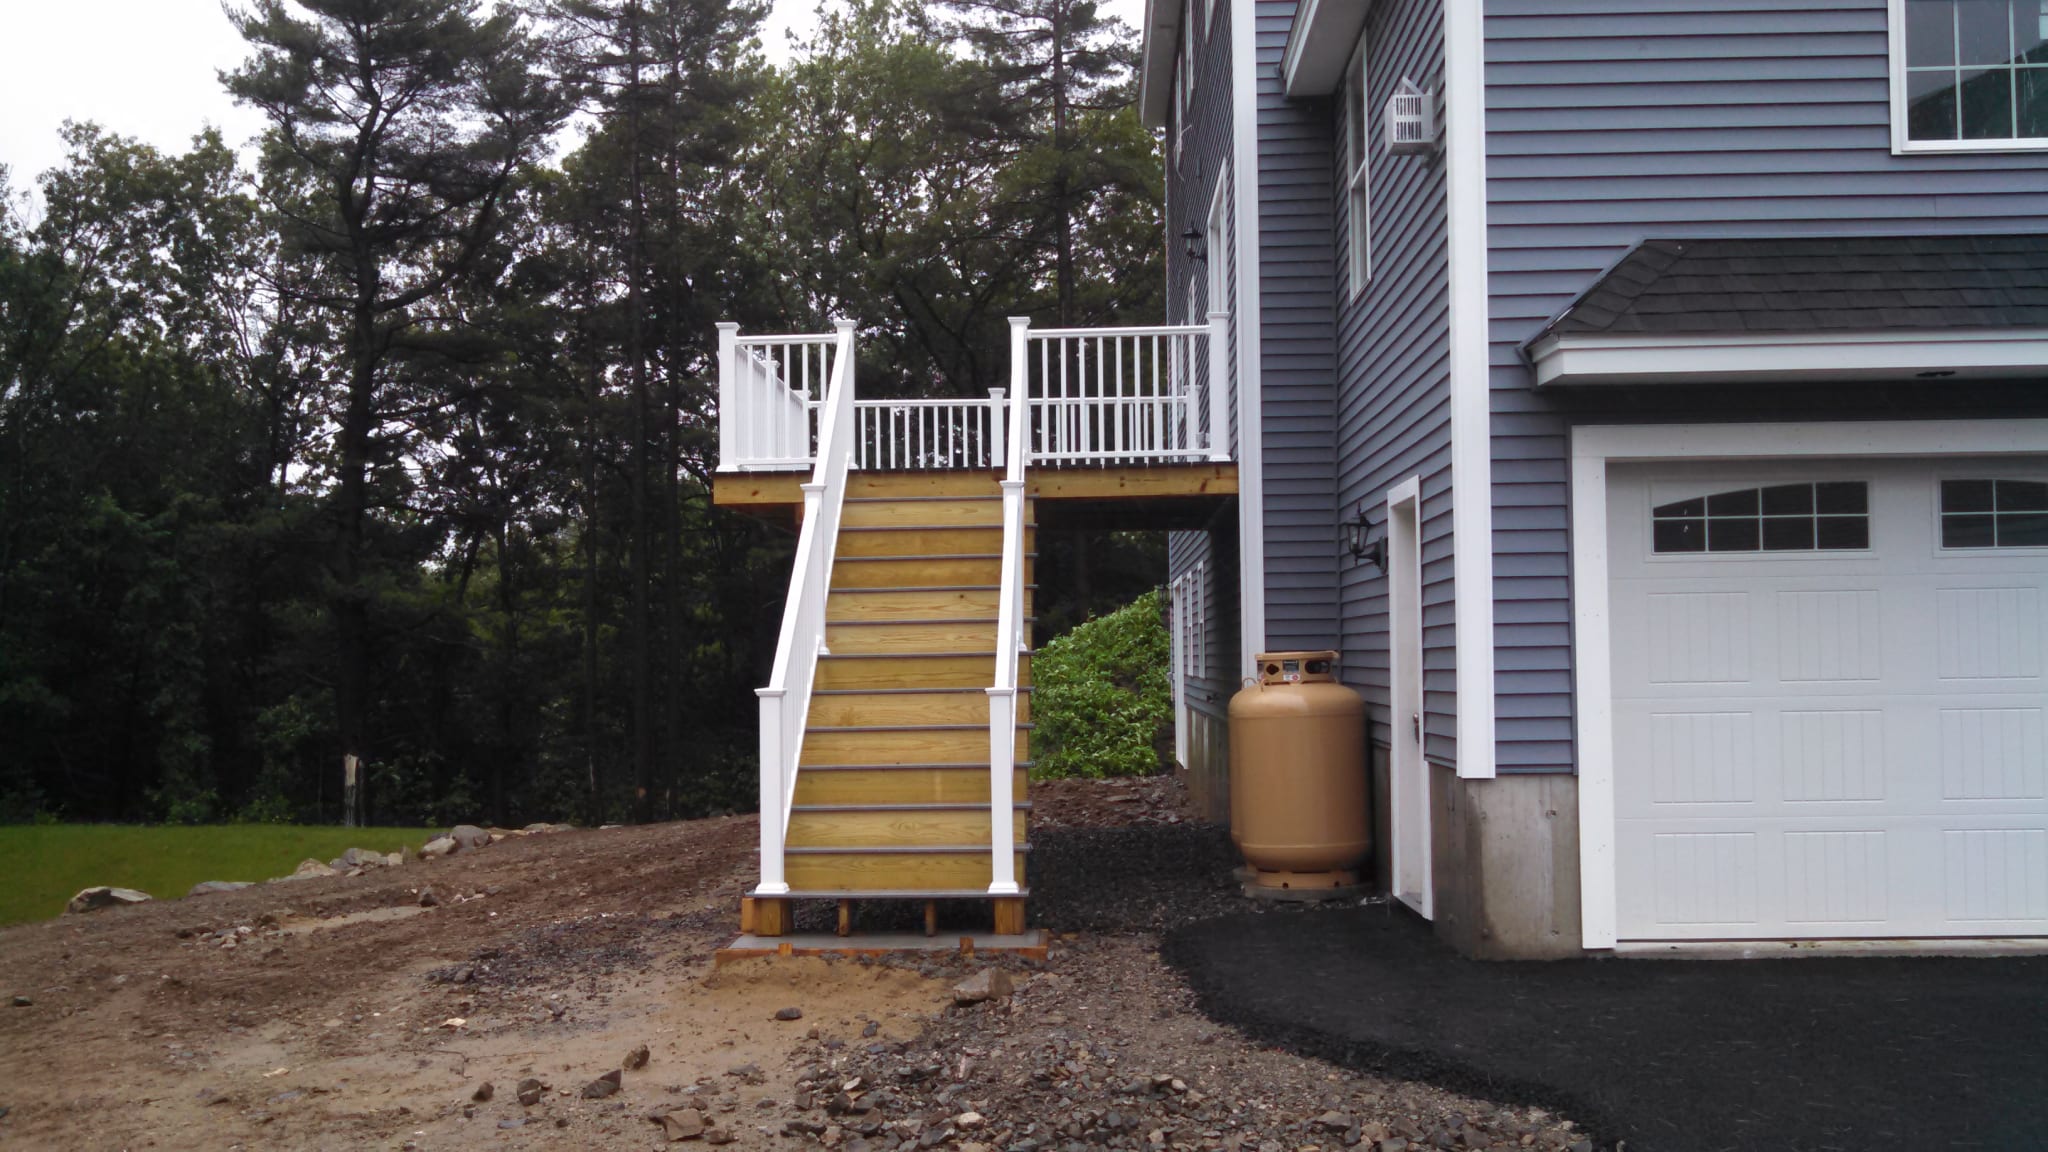
The deck is really nice, but the wood wasn't painted. That's the first change I made. I used a simple white exterior semigloss. Once it was painted I starting thinking, maybe there was more I could do here. A friend of mine had good luck with one of those vinyl/plastic sheds, so maybe I could build one too.
The Shed
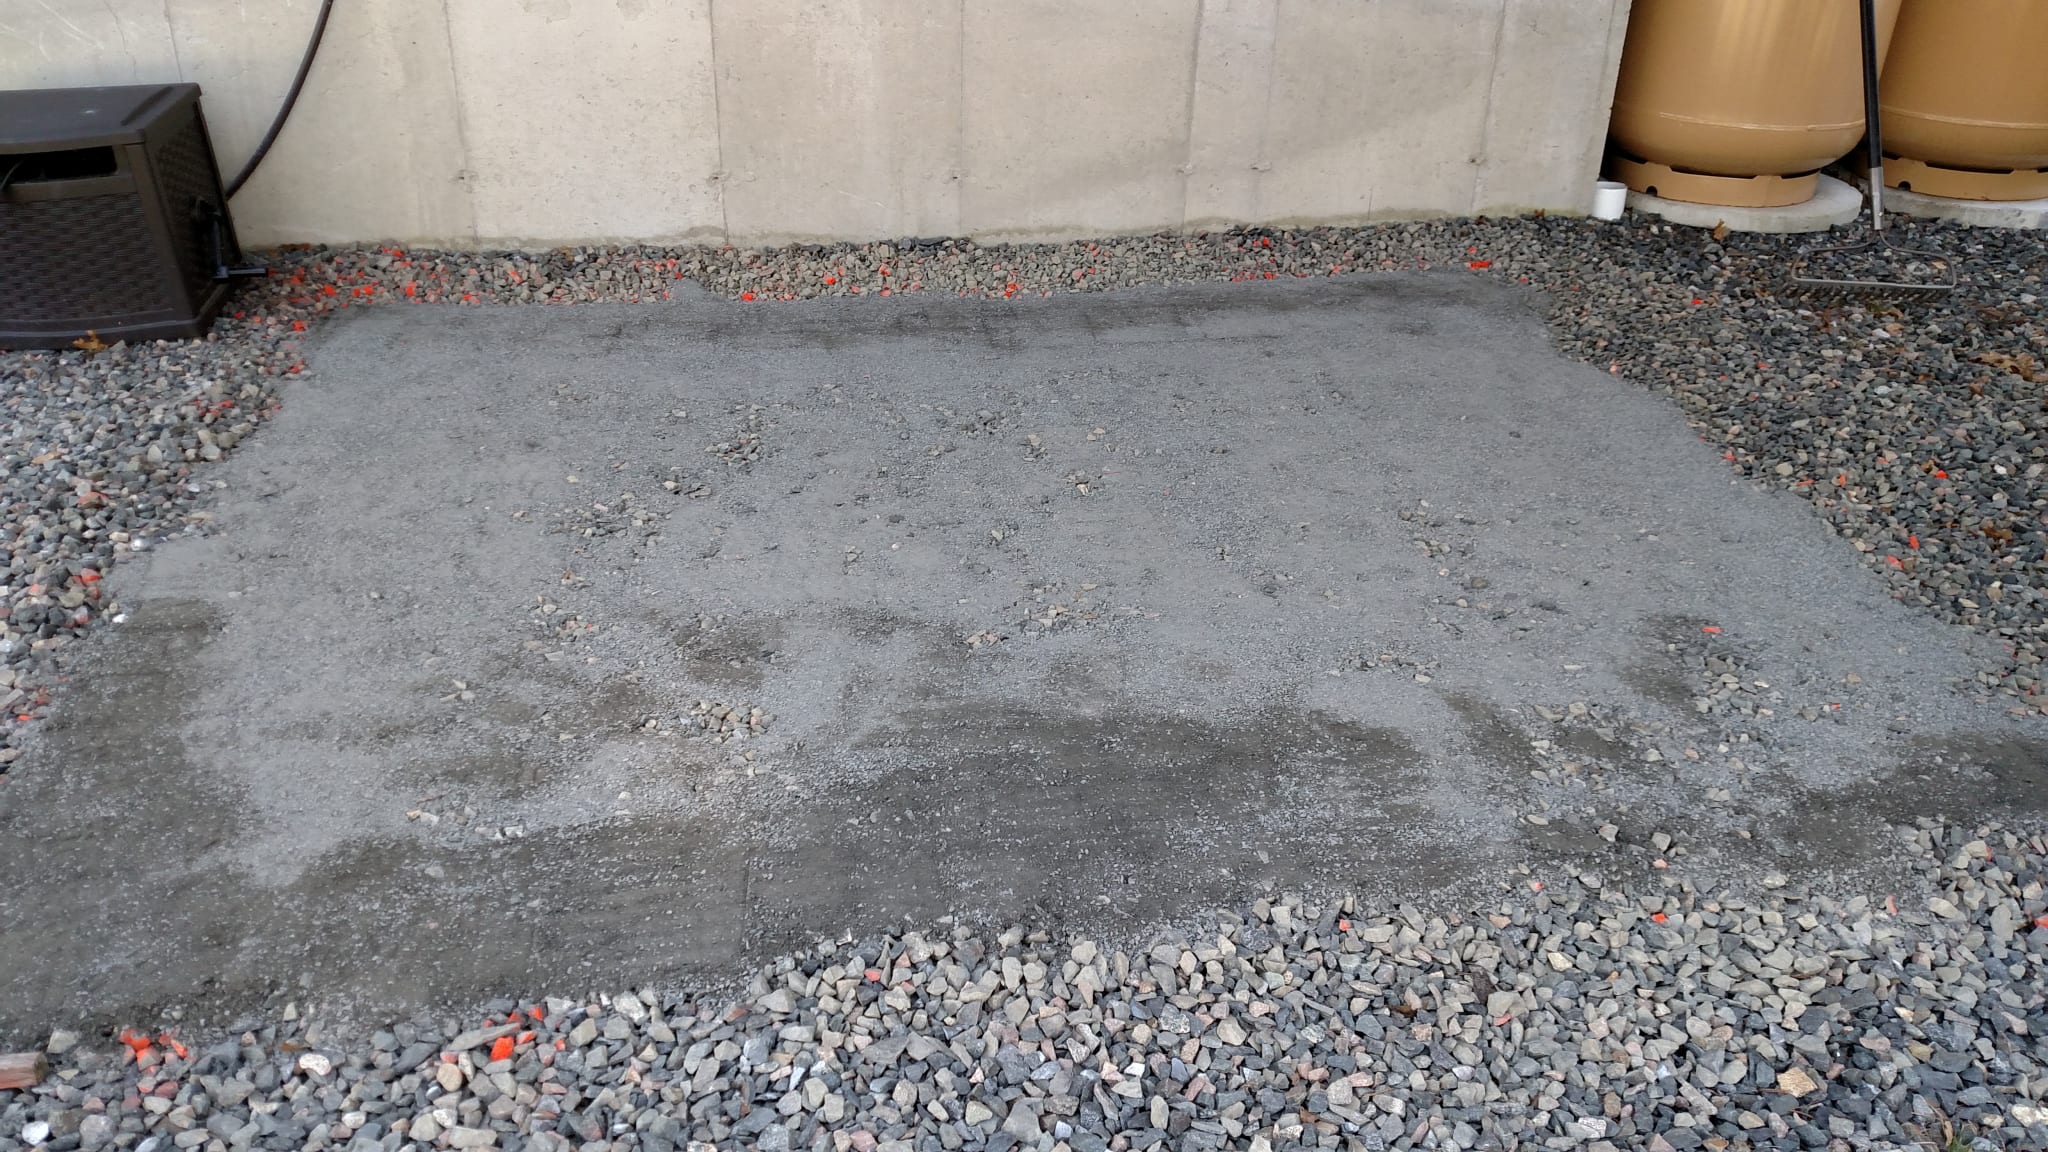
After a few measurements and research we had a match! The shed was ordered and arrived in what felt like 1000 pieces. Fortunately, my dad was able to come over and help assemble it. Prior to assembly, I pounded some masonry sand into the existing broken stone to supply a stable platform to build on.
Unfortunately I don't have a bunch of pictures of my dad and I building it, but here's a fisheye view of the inside during construction.
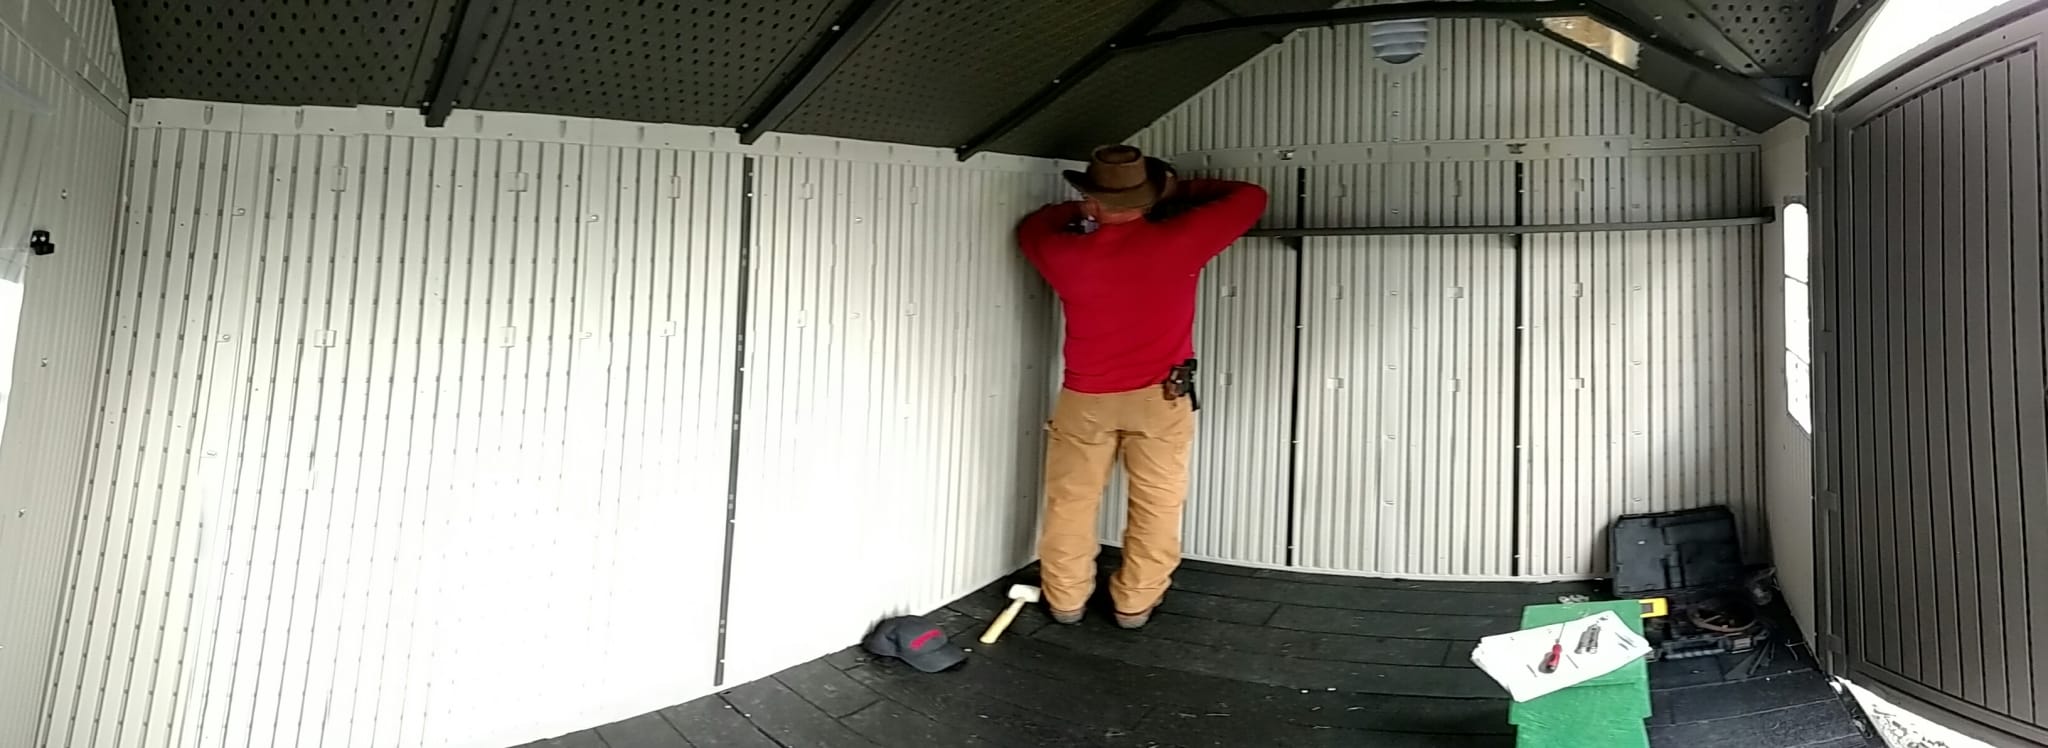
It took a full weekend of work, but thanks to my dad's seemingly-magical ability to just make things work we were able to get it all done without a problem.
Here we can see a nice front-on view after I started the next stage of the project.
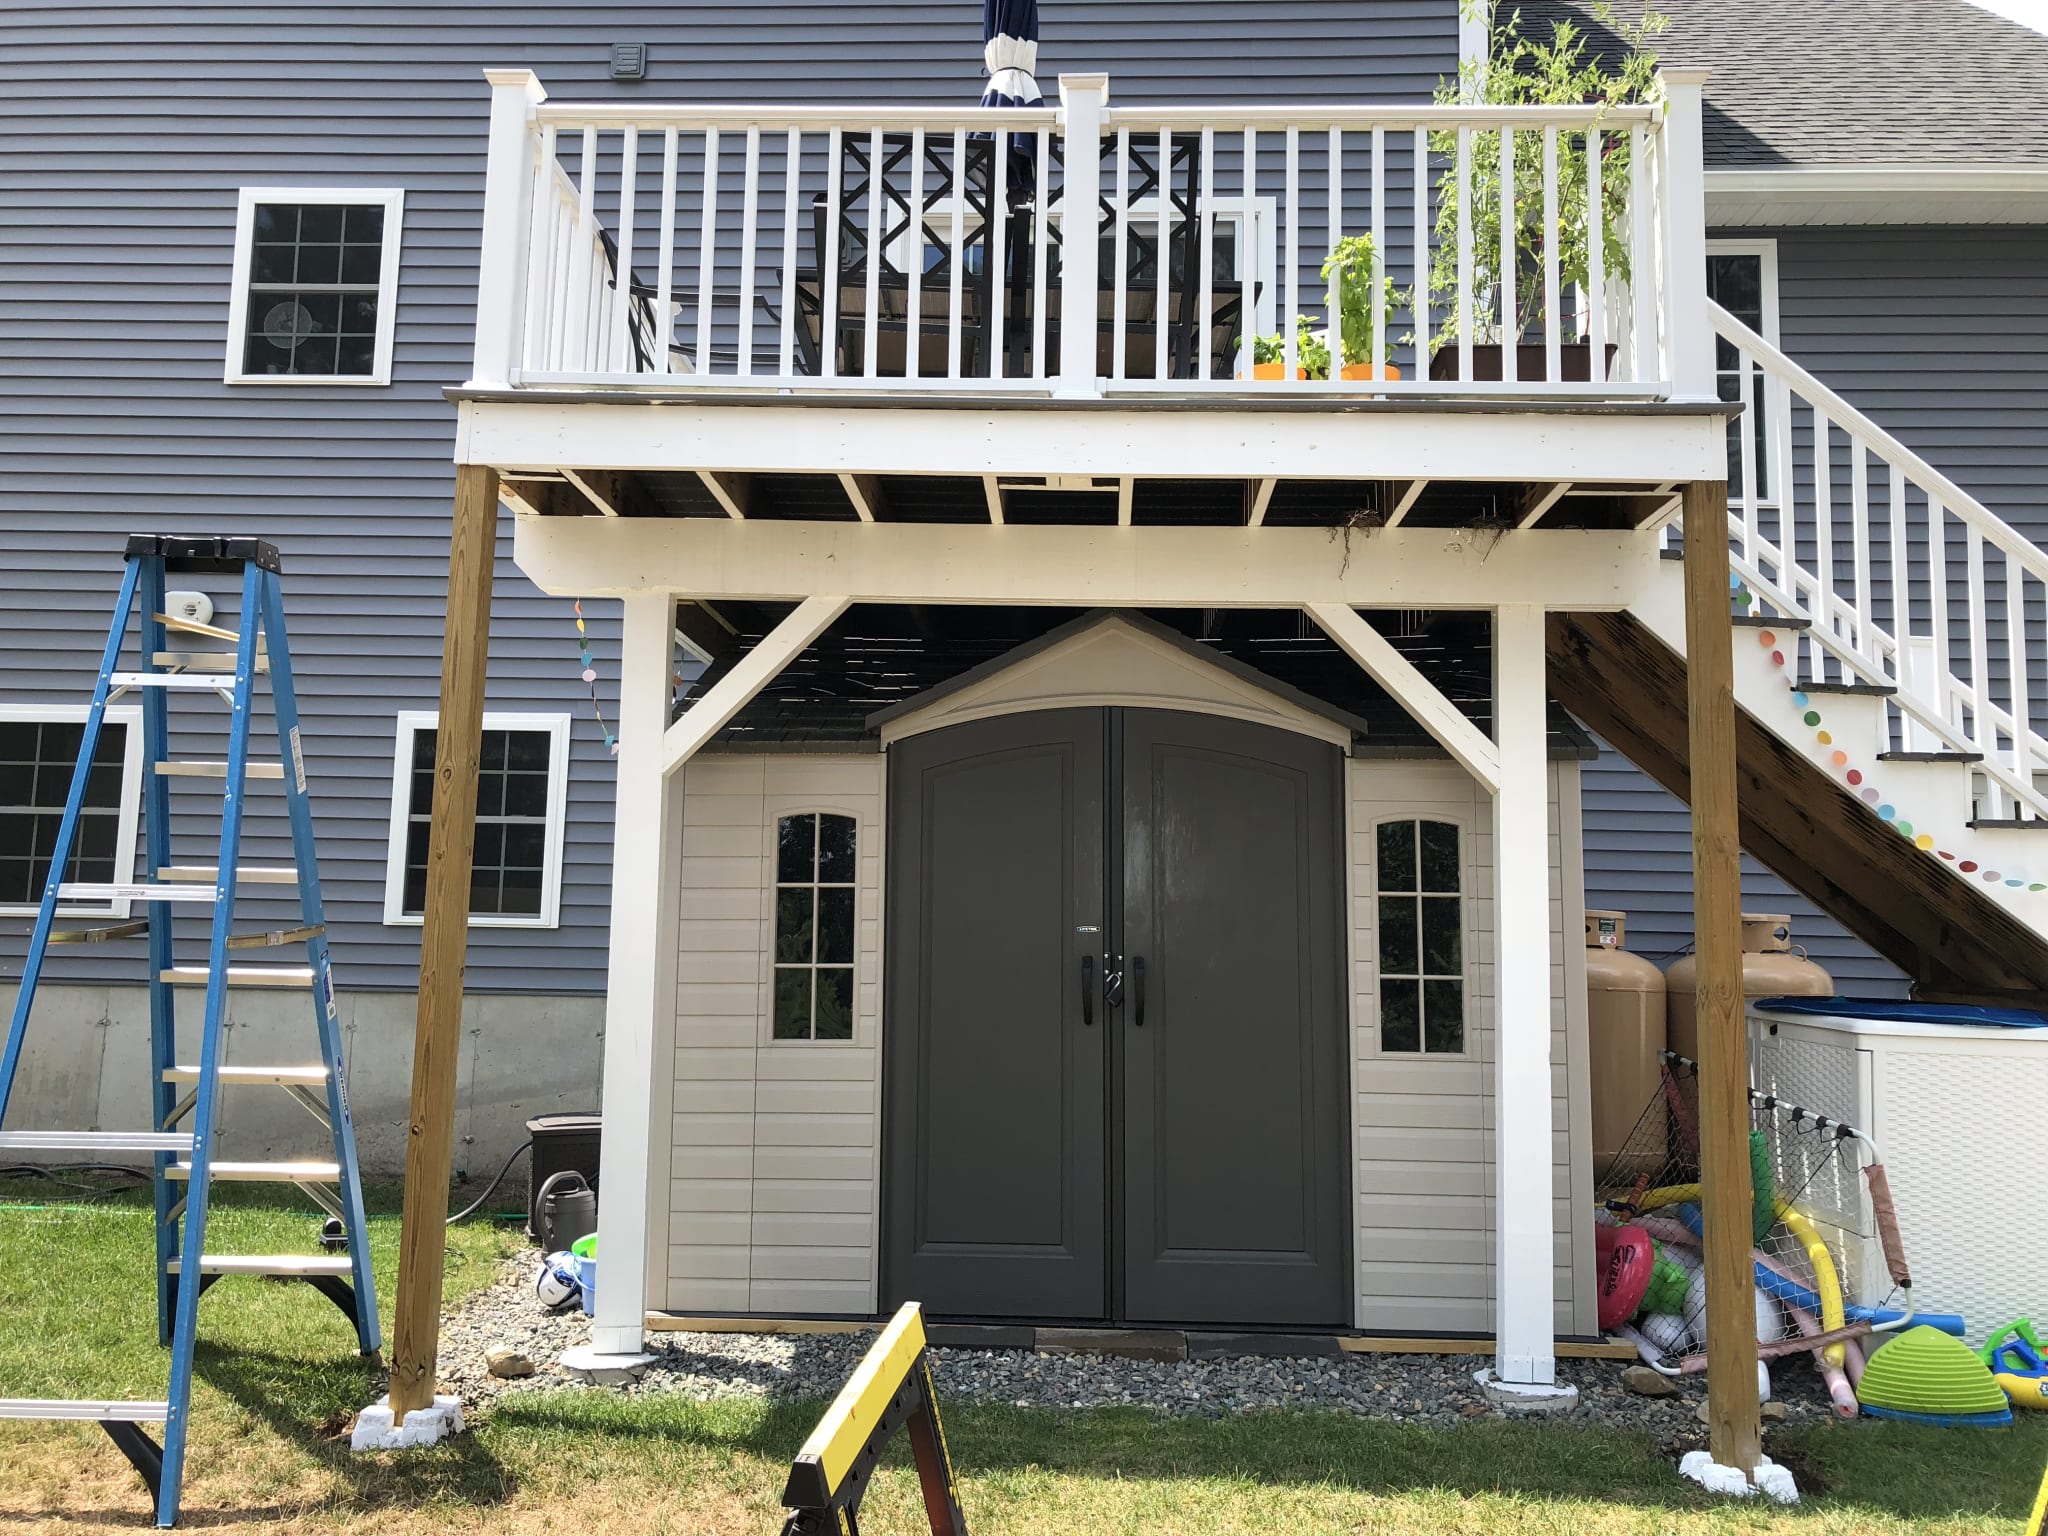
After the shed was all set, Natallia asked if we could dress up the outside with some lattice.
The Lattice
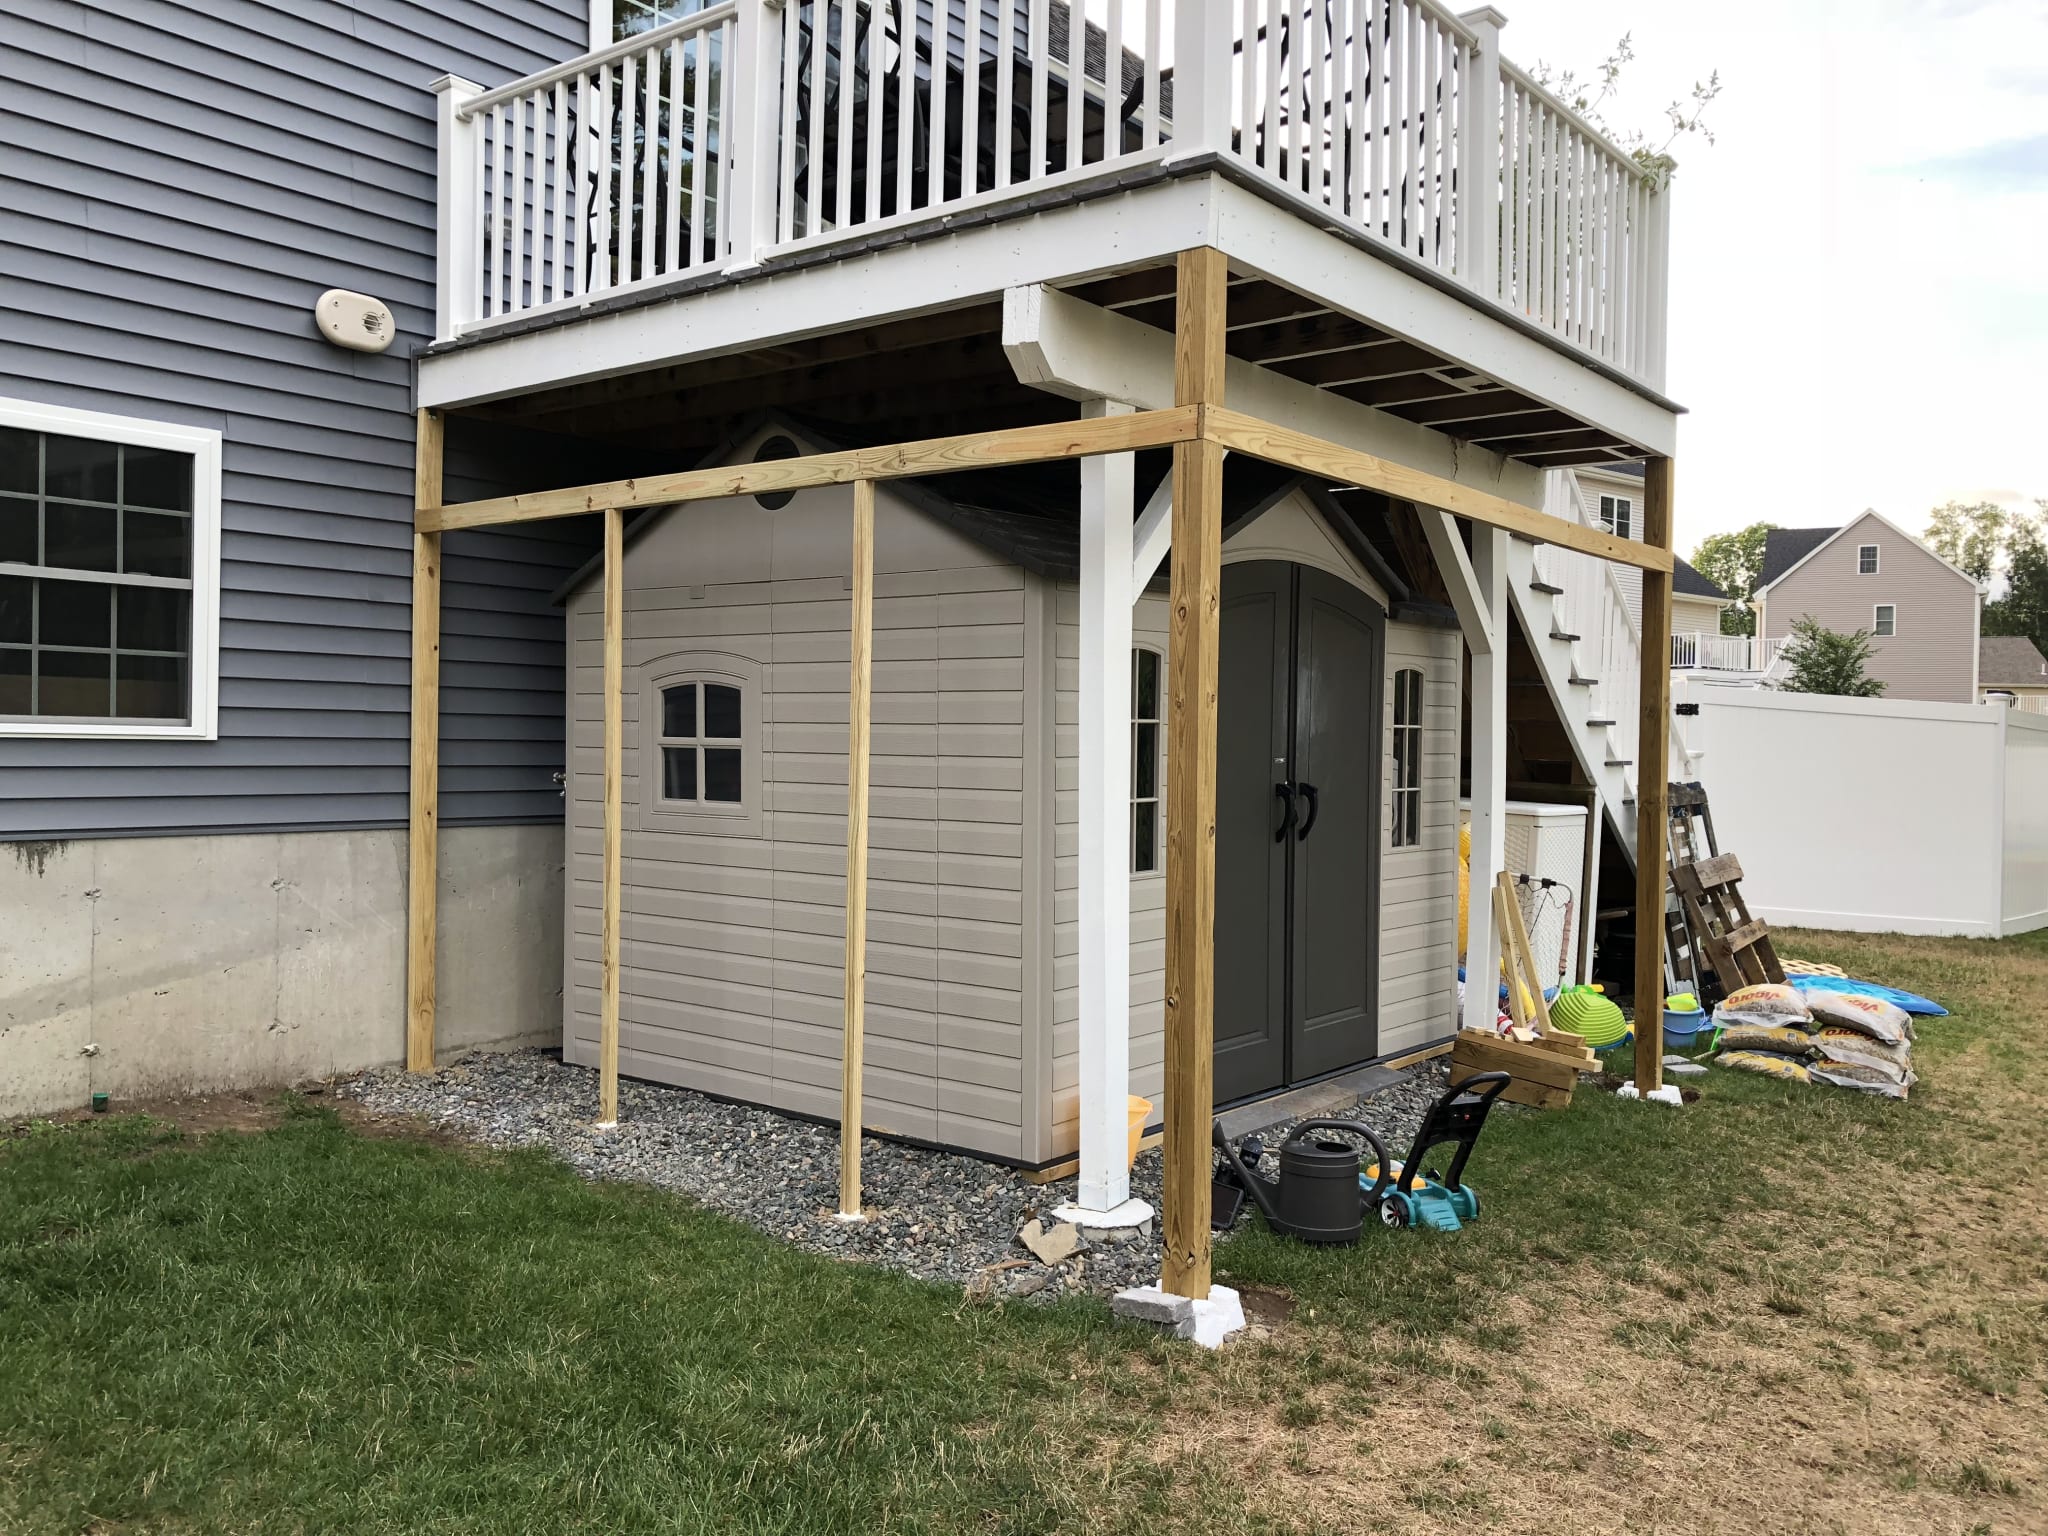
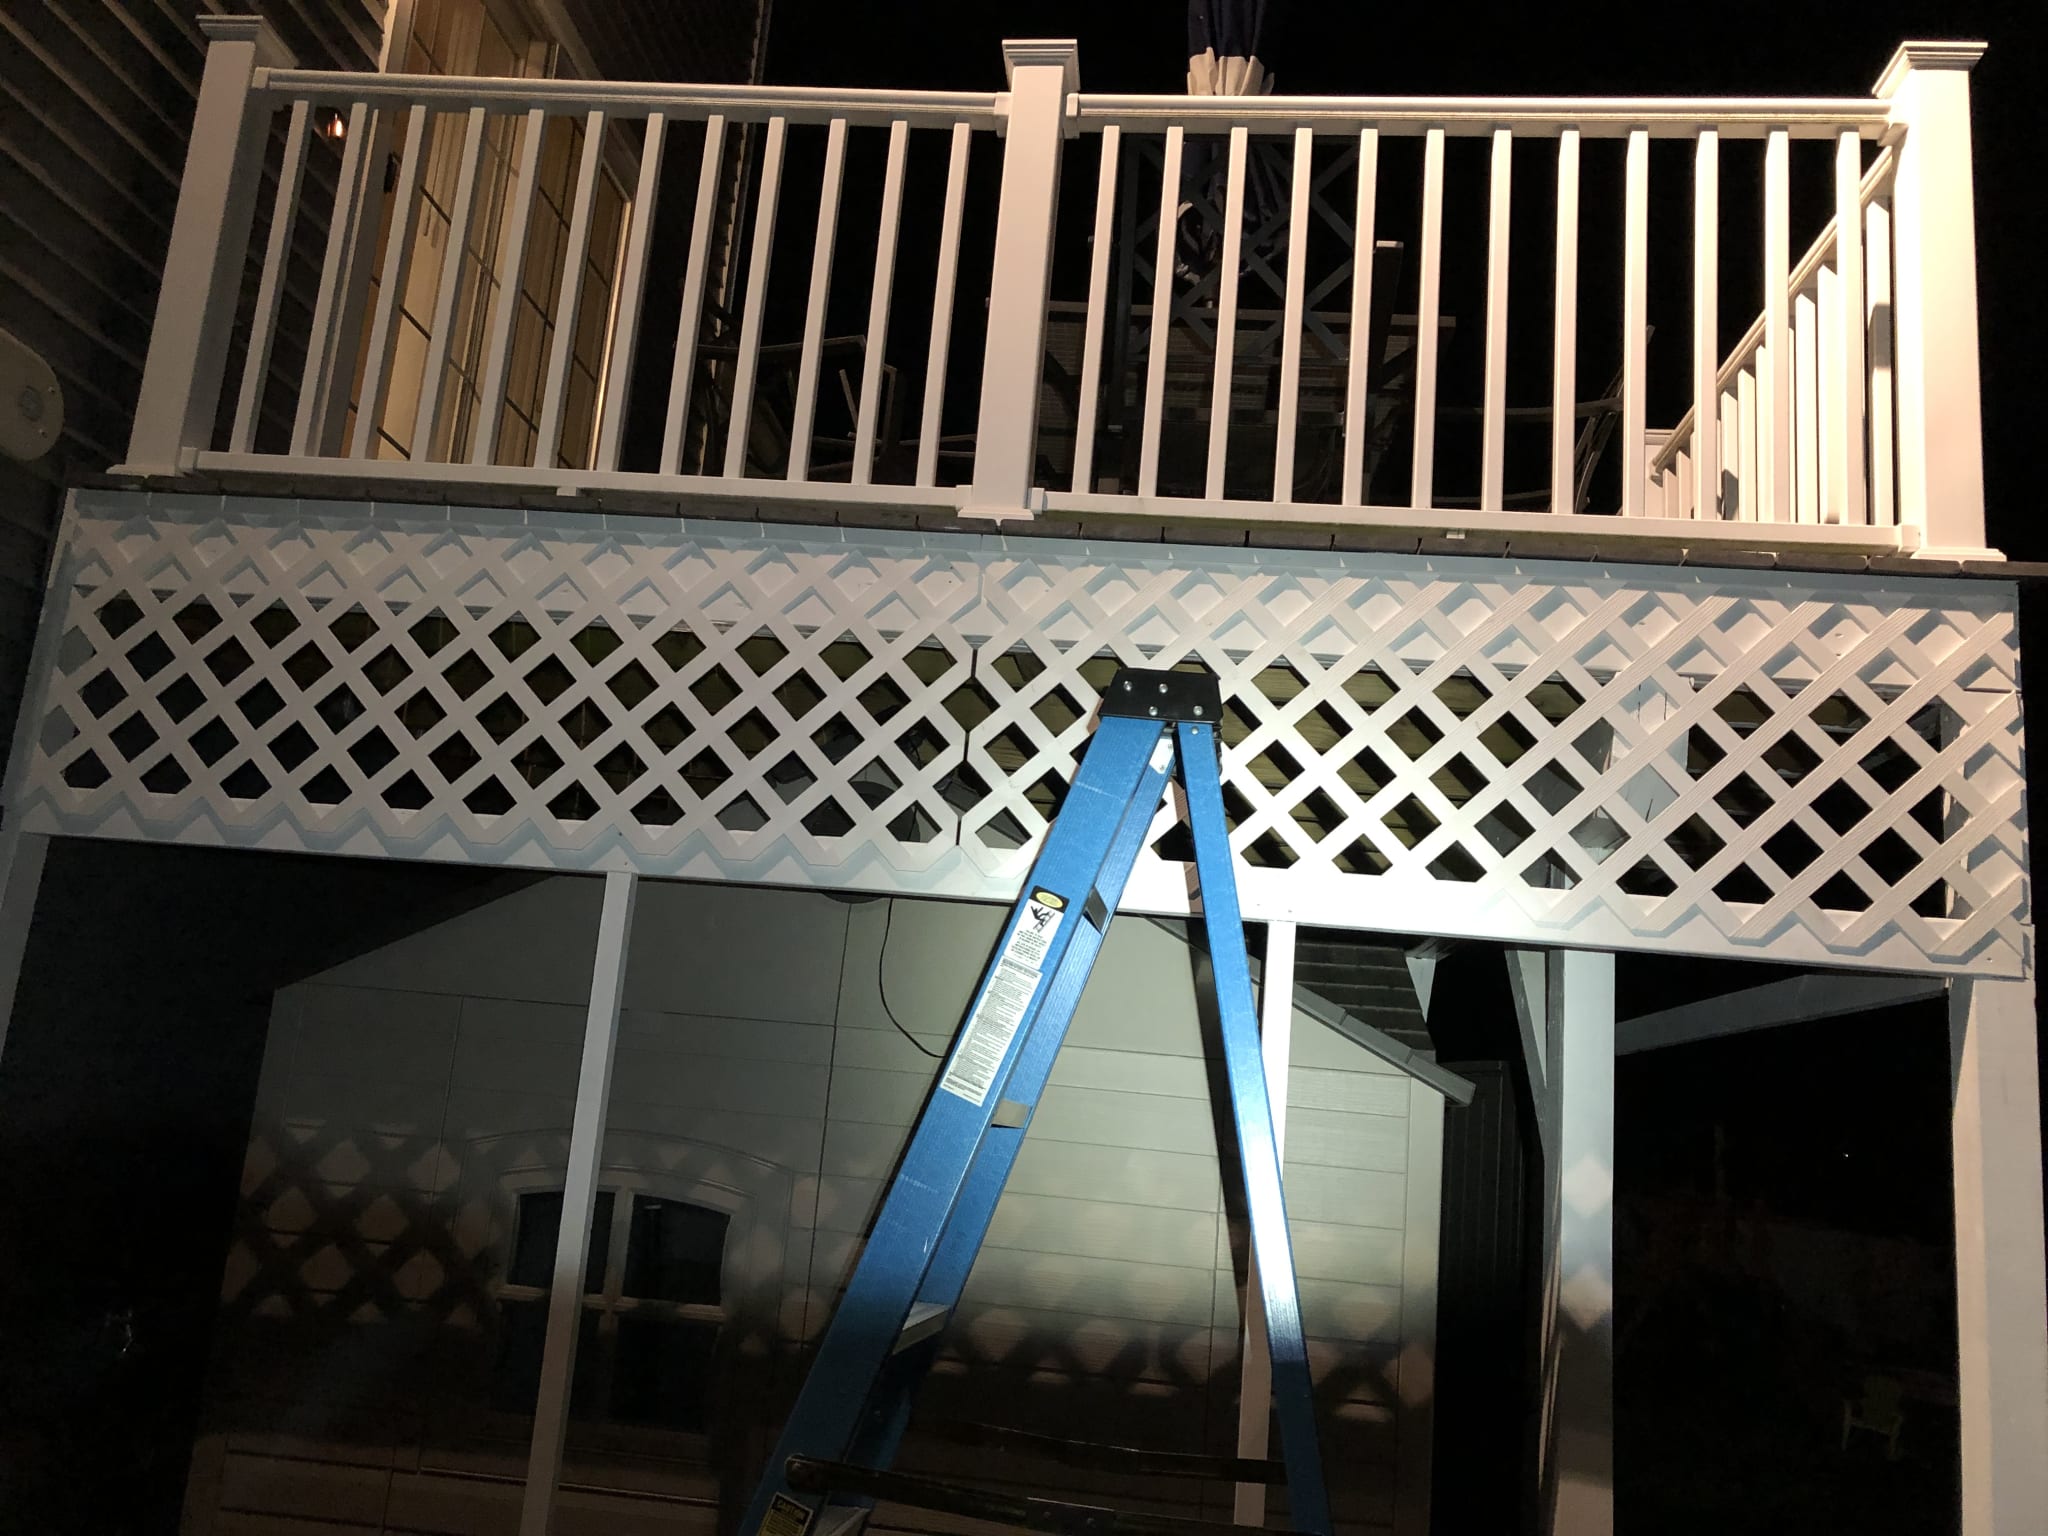
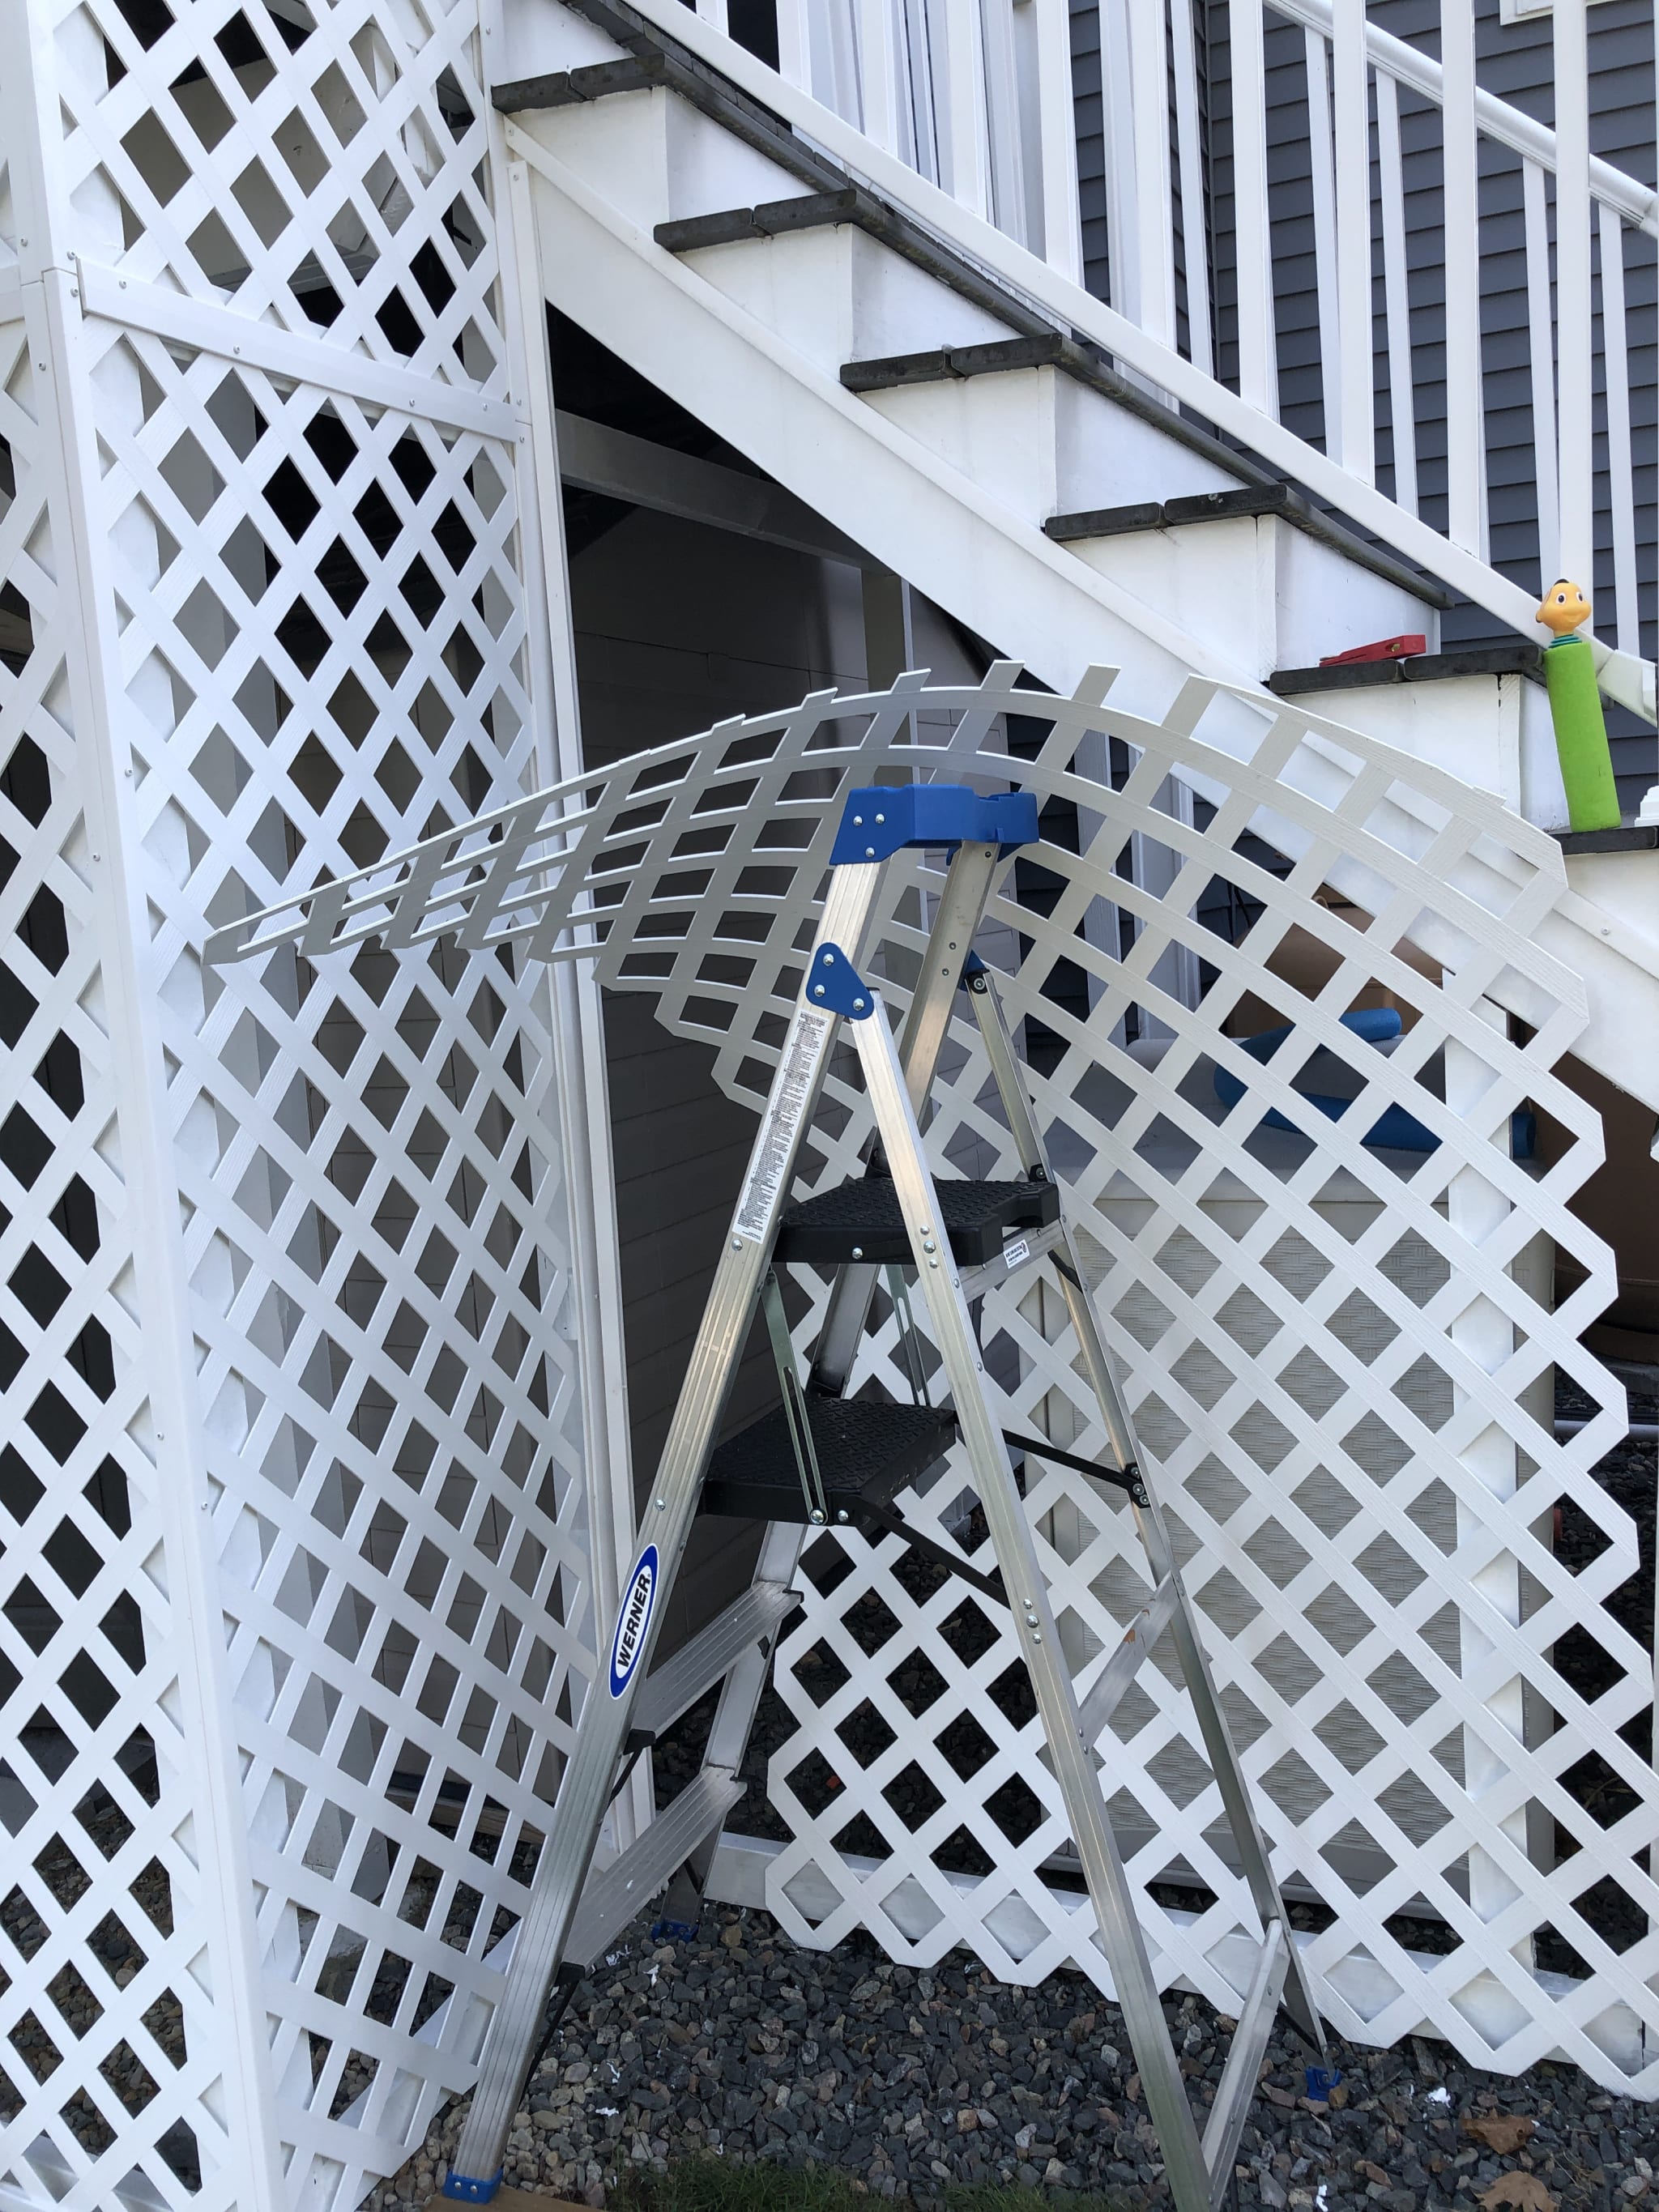
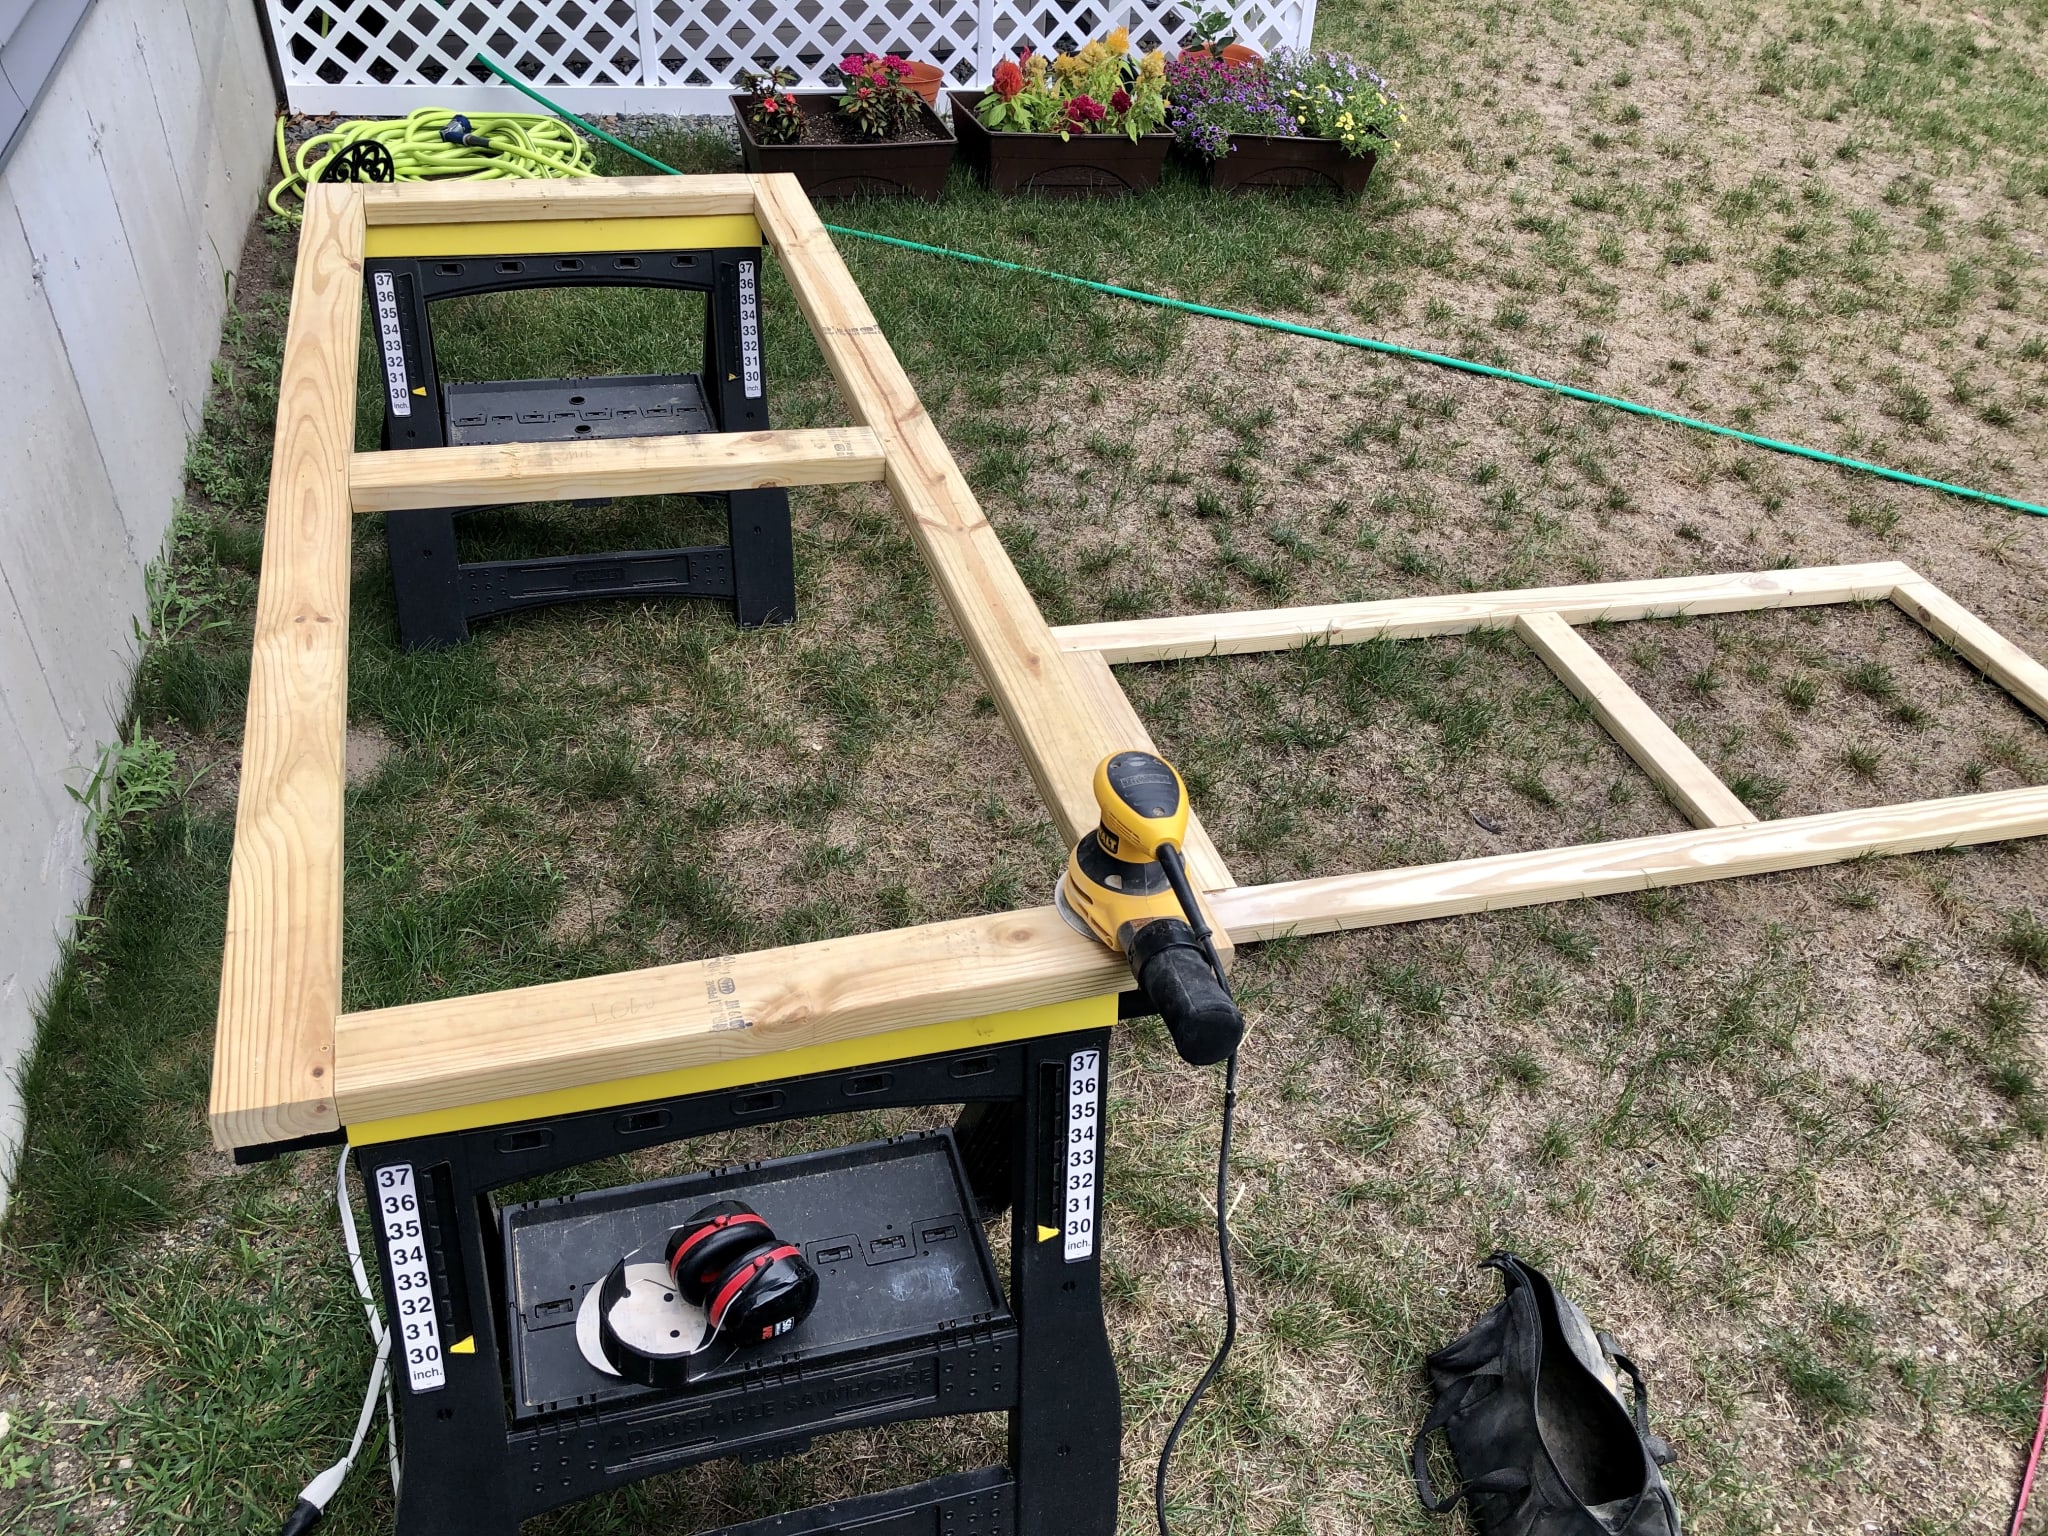
This part took a little bit of planning. The framing under the deck was all about support, and didn't quite reach the full rectangular footprint that I would need to cover. In order to put in a nice lattice, I would first need to install some extra support structure to fix it to.
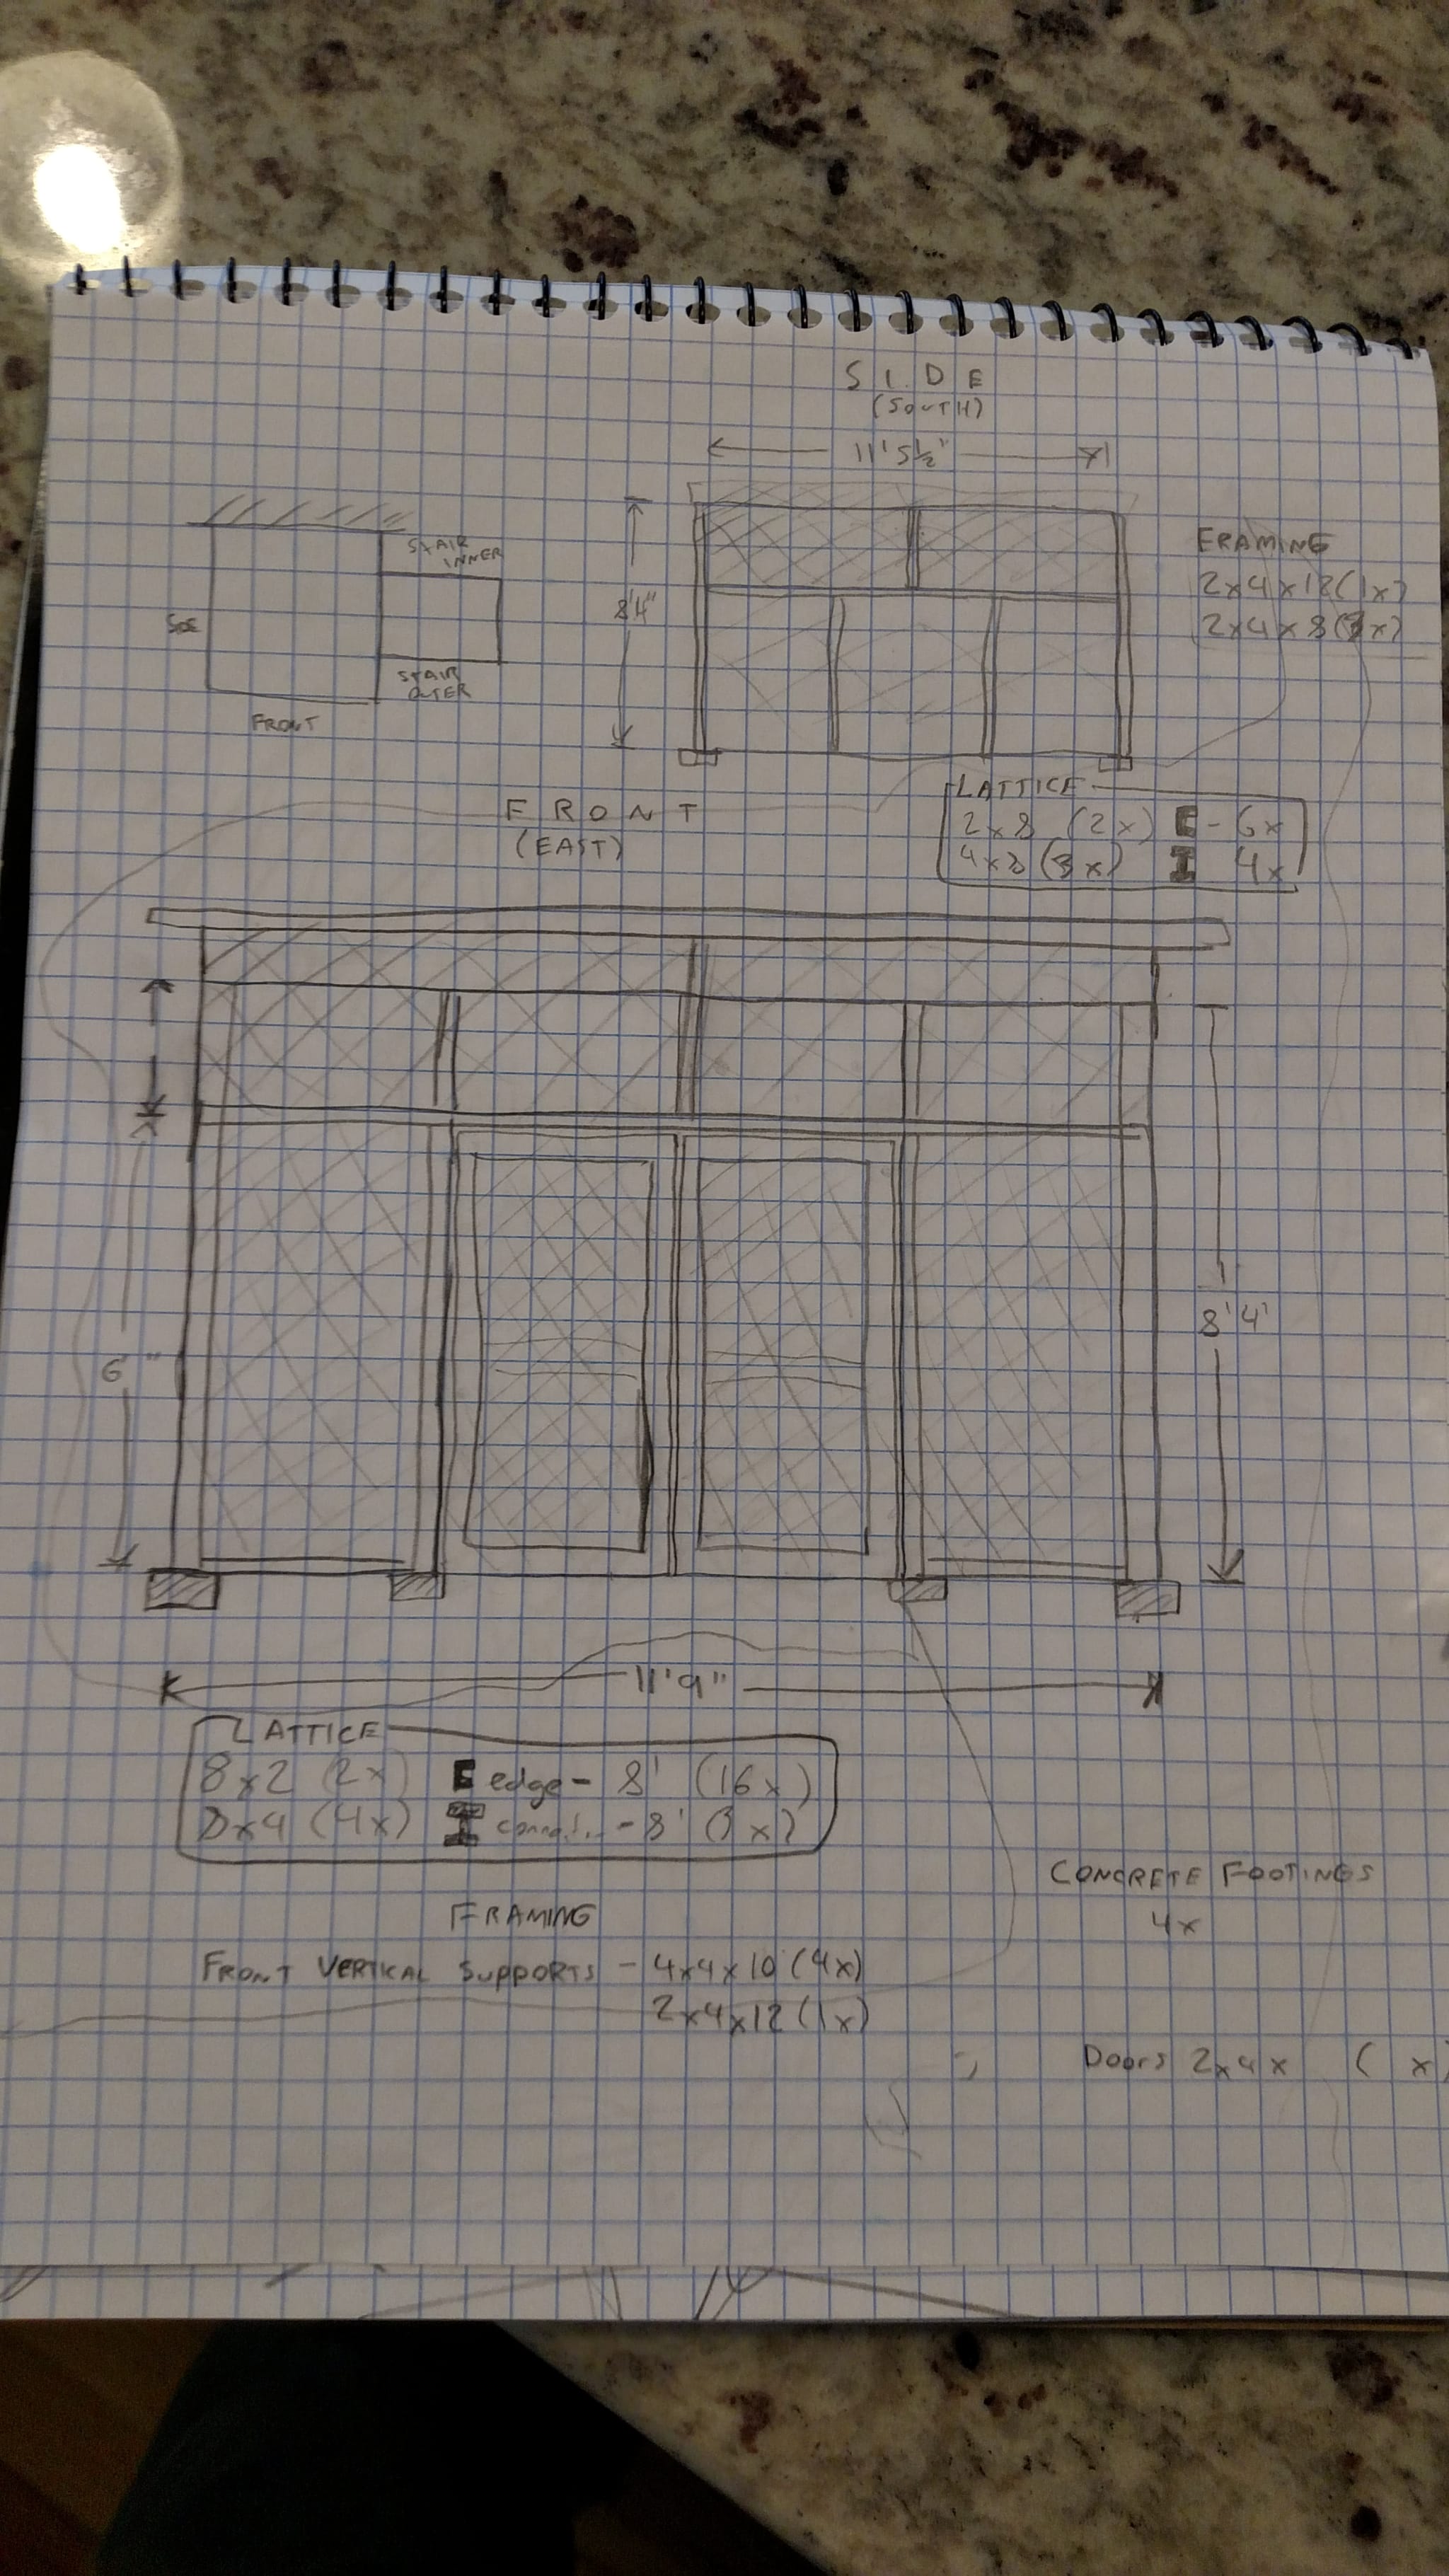
I figured that I would also be able to improve the overall strength of the deck by giving it some proper footings while I was at it with the new structural work, even if it wasn't necessary to make it load-bearing.
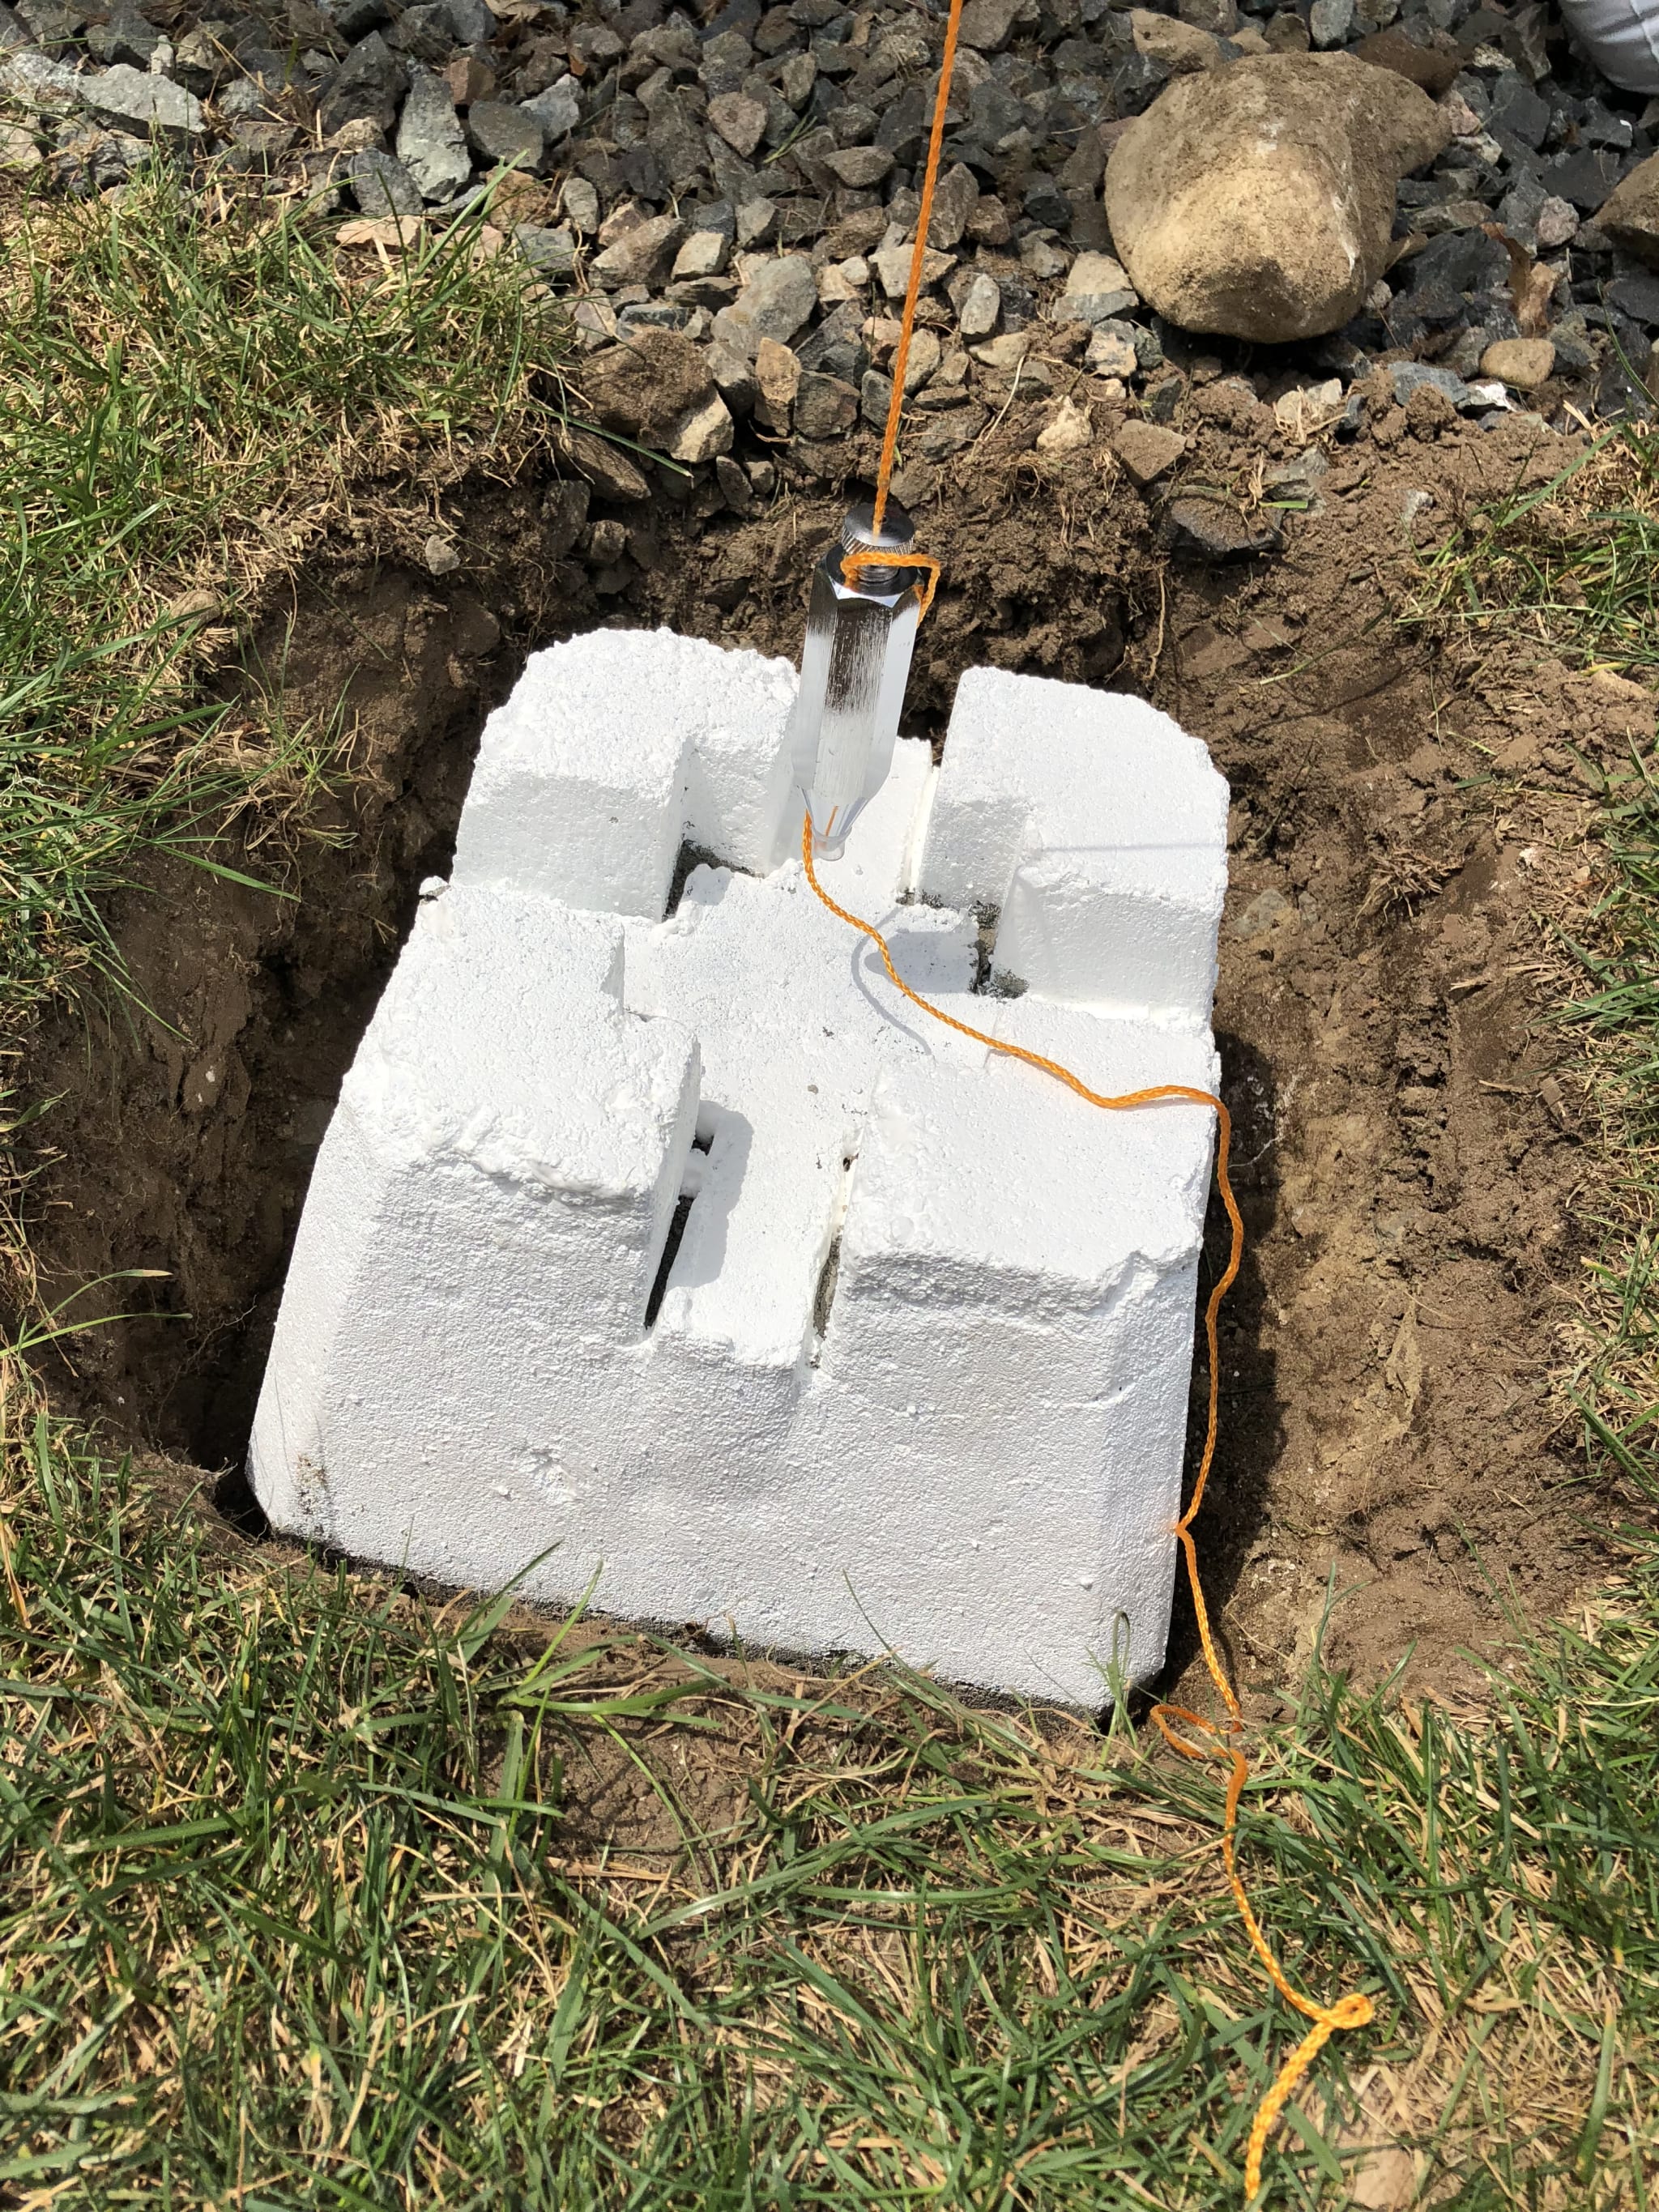
Using a plumb-bob is surprisingly straight-forward, and allows you to get a perfect vertical from ground to where ever you're hanging from. I used that to get the main posts set, then worked from there to build out the rest of the structure. All of the rest of structure was based around providing sufficient support for the vinyl lattice.
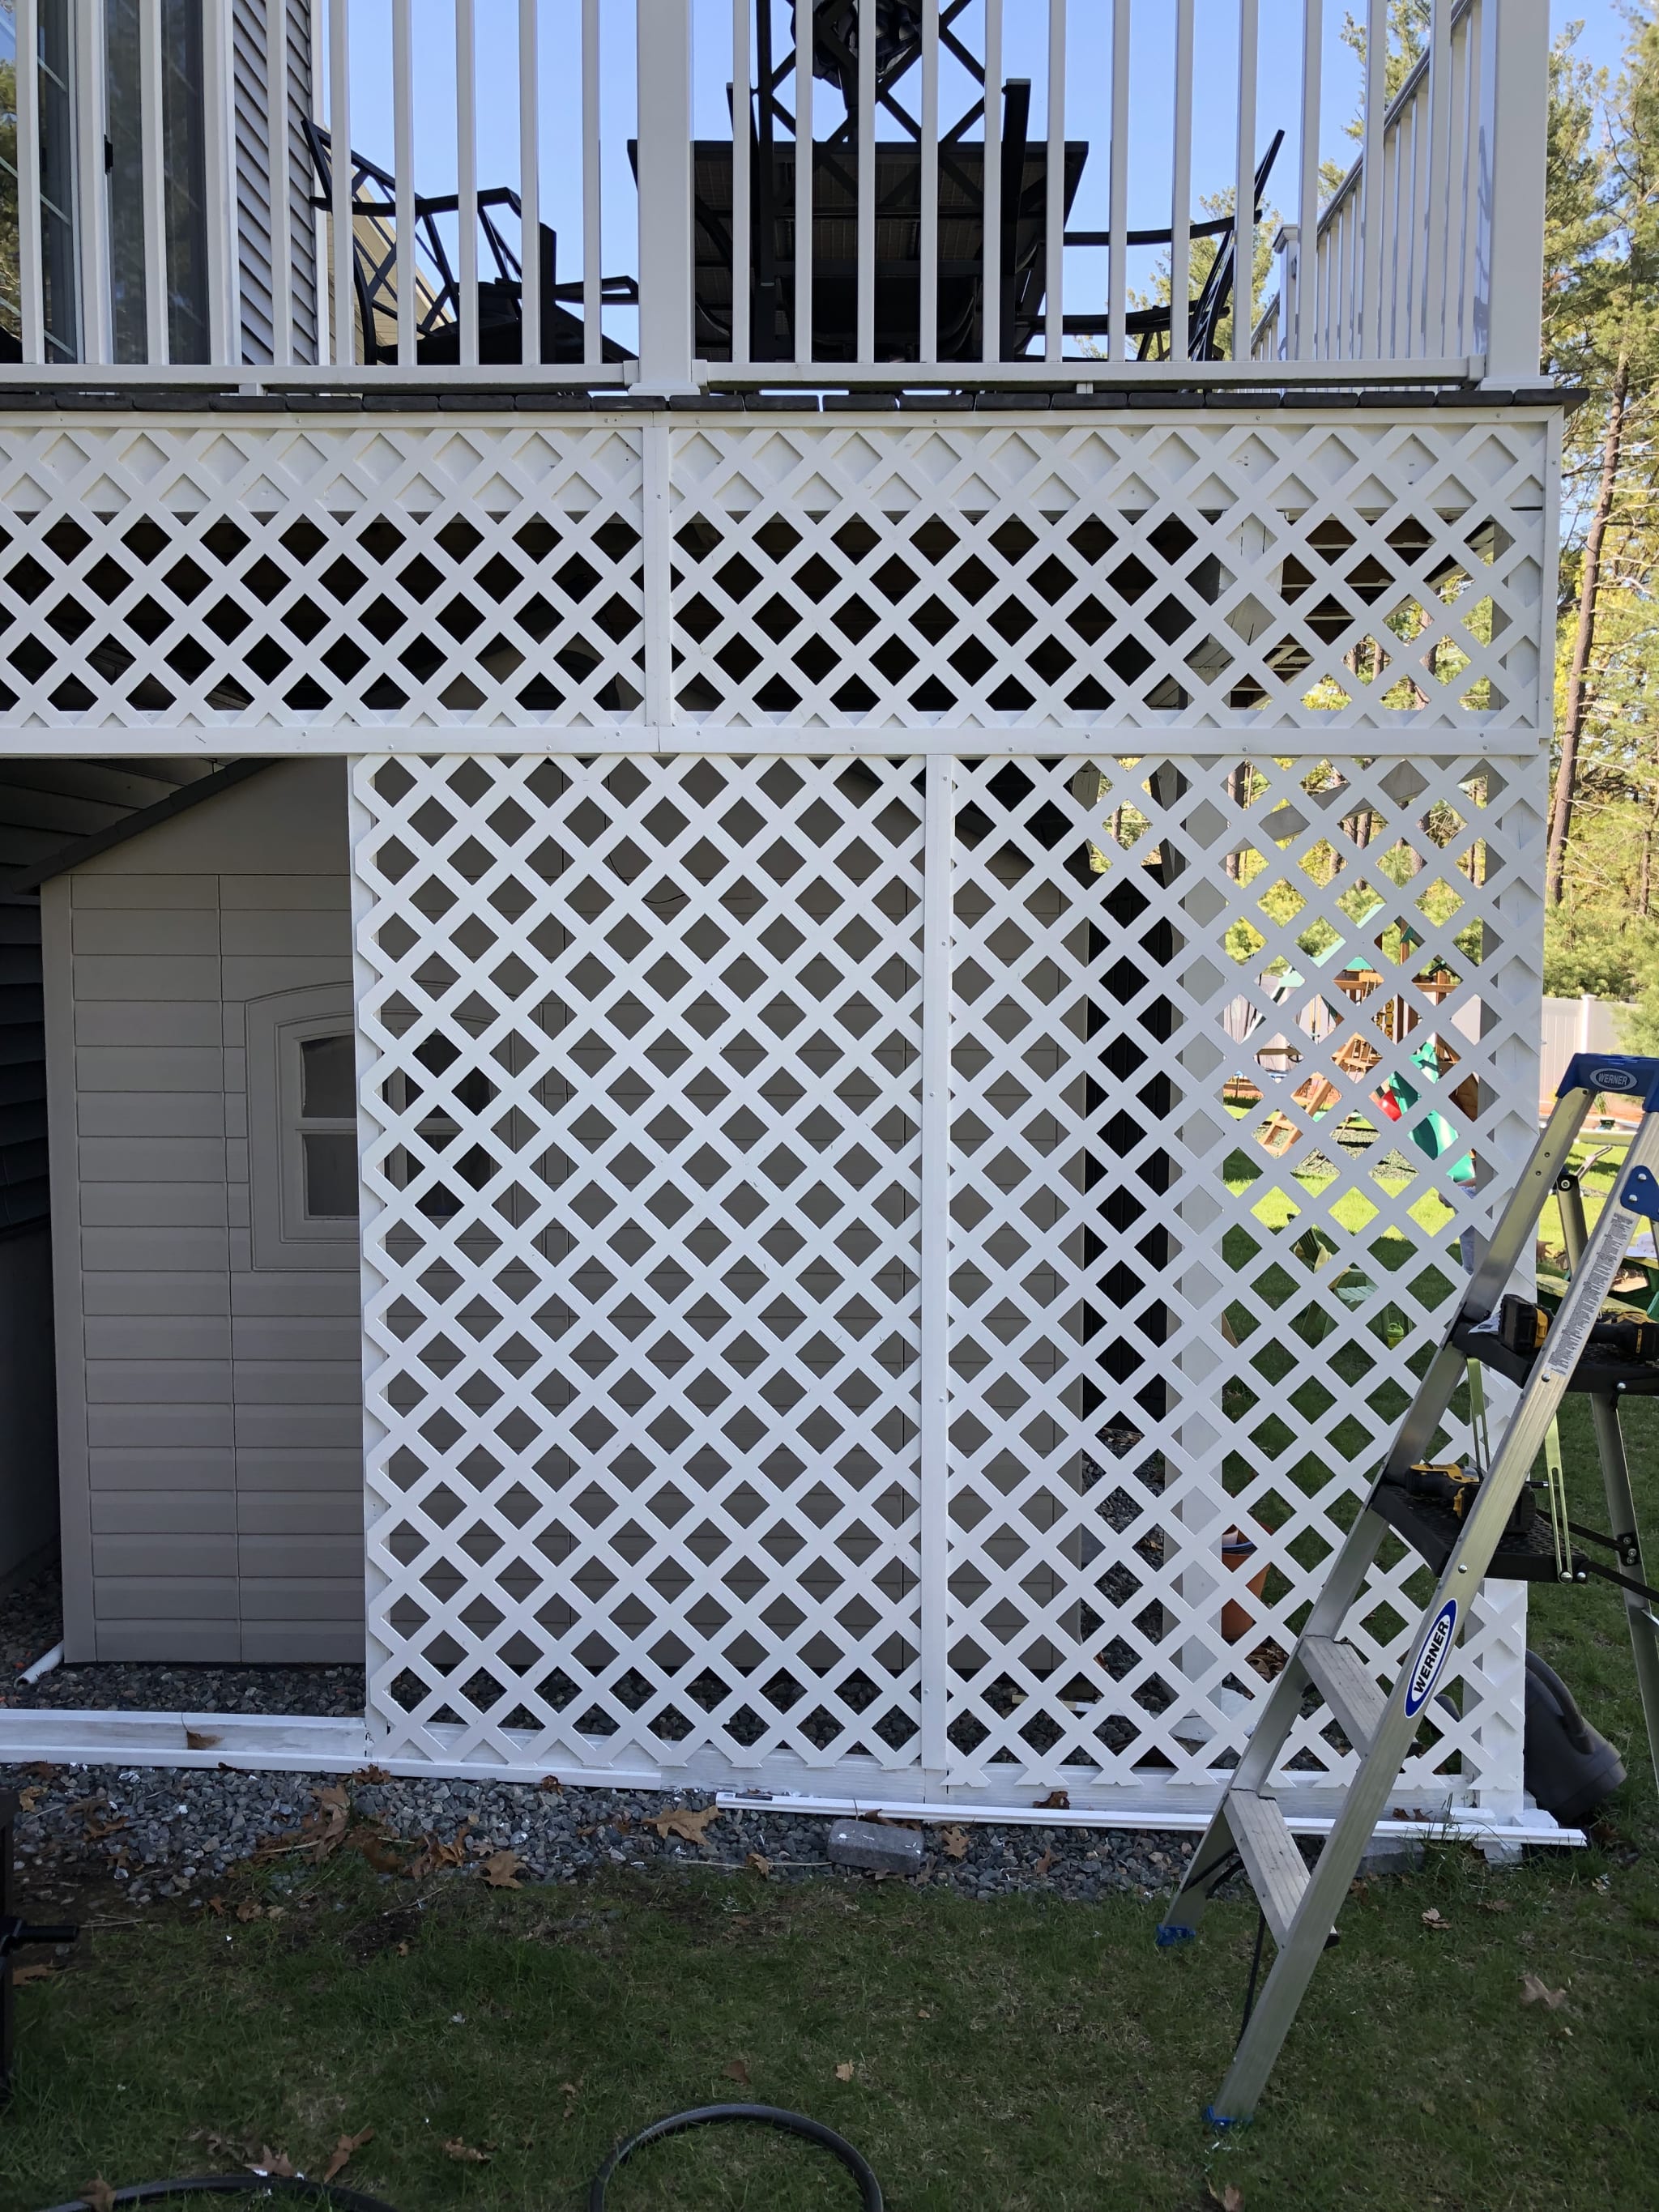
One of the major challenges with this work was getting all the lattice crisscrosses to line up nicely
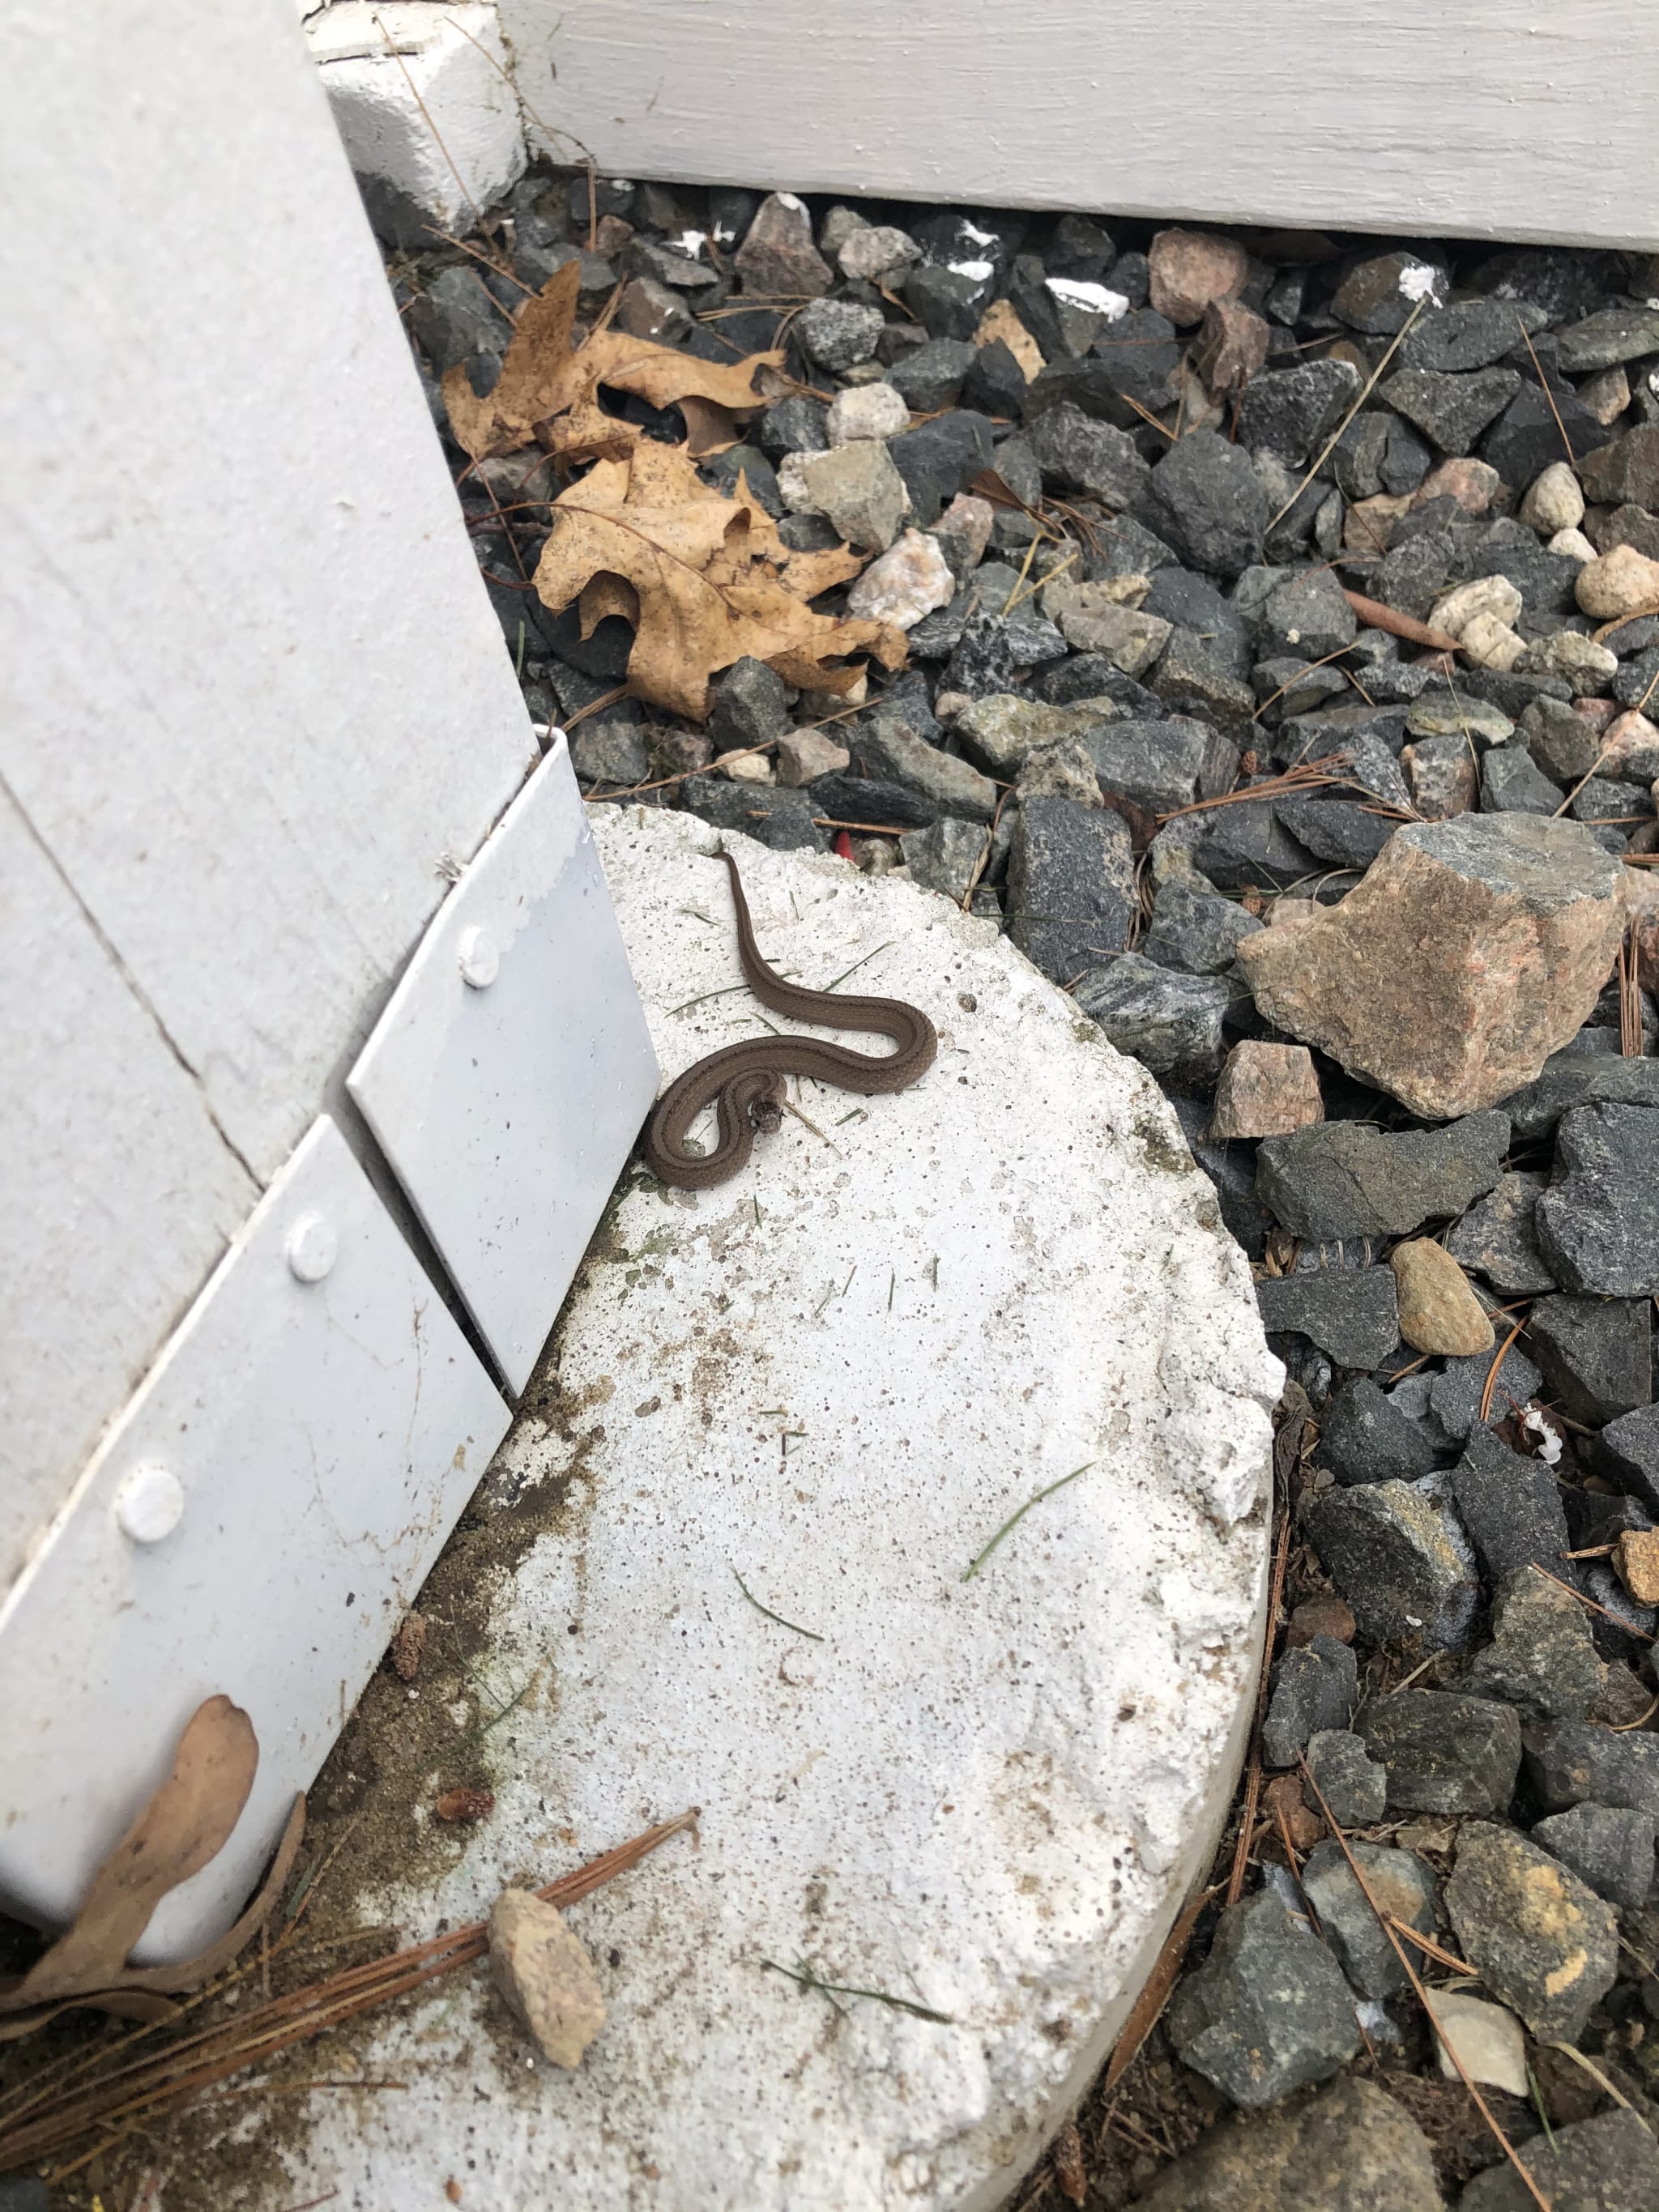
Sometimes when you work you upset the residents. I disturbed this little snake while working, but did my best to leave him alone to live his life.
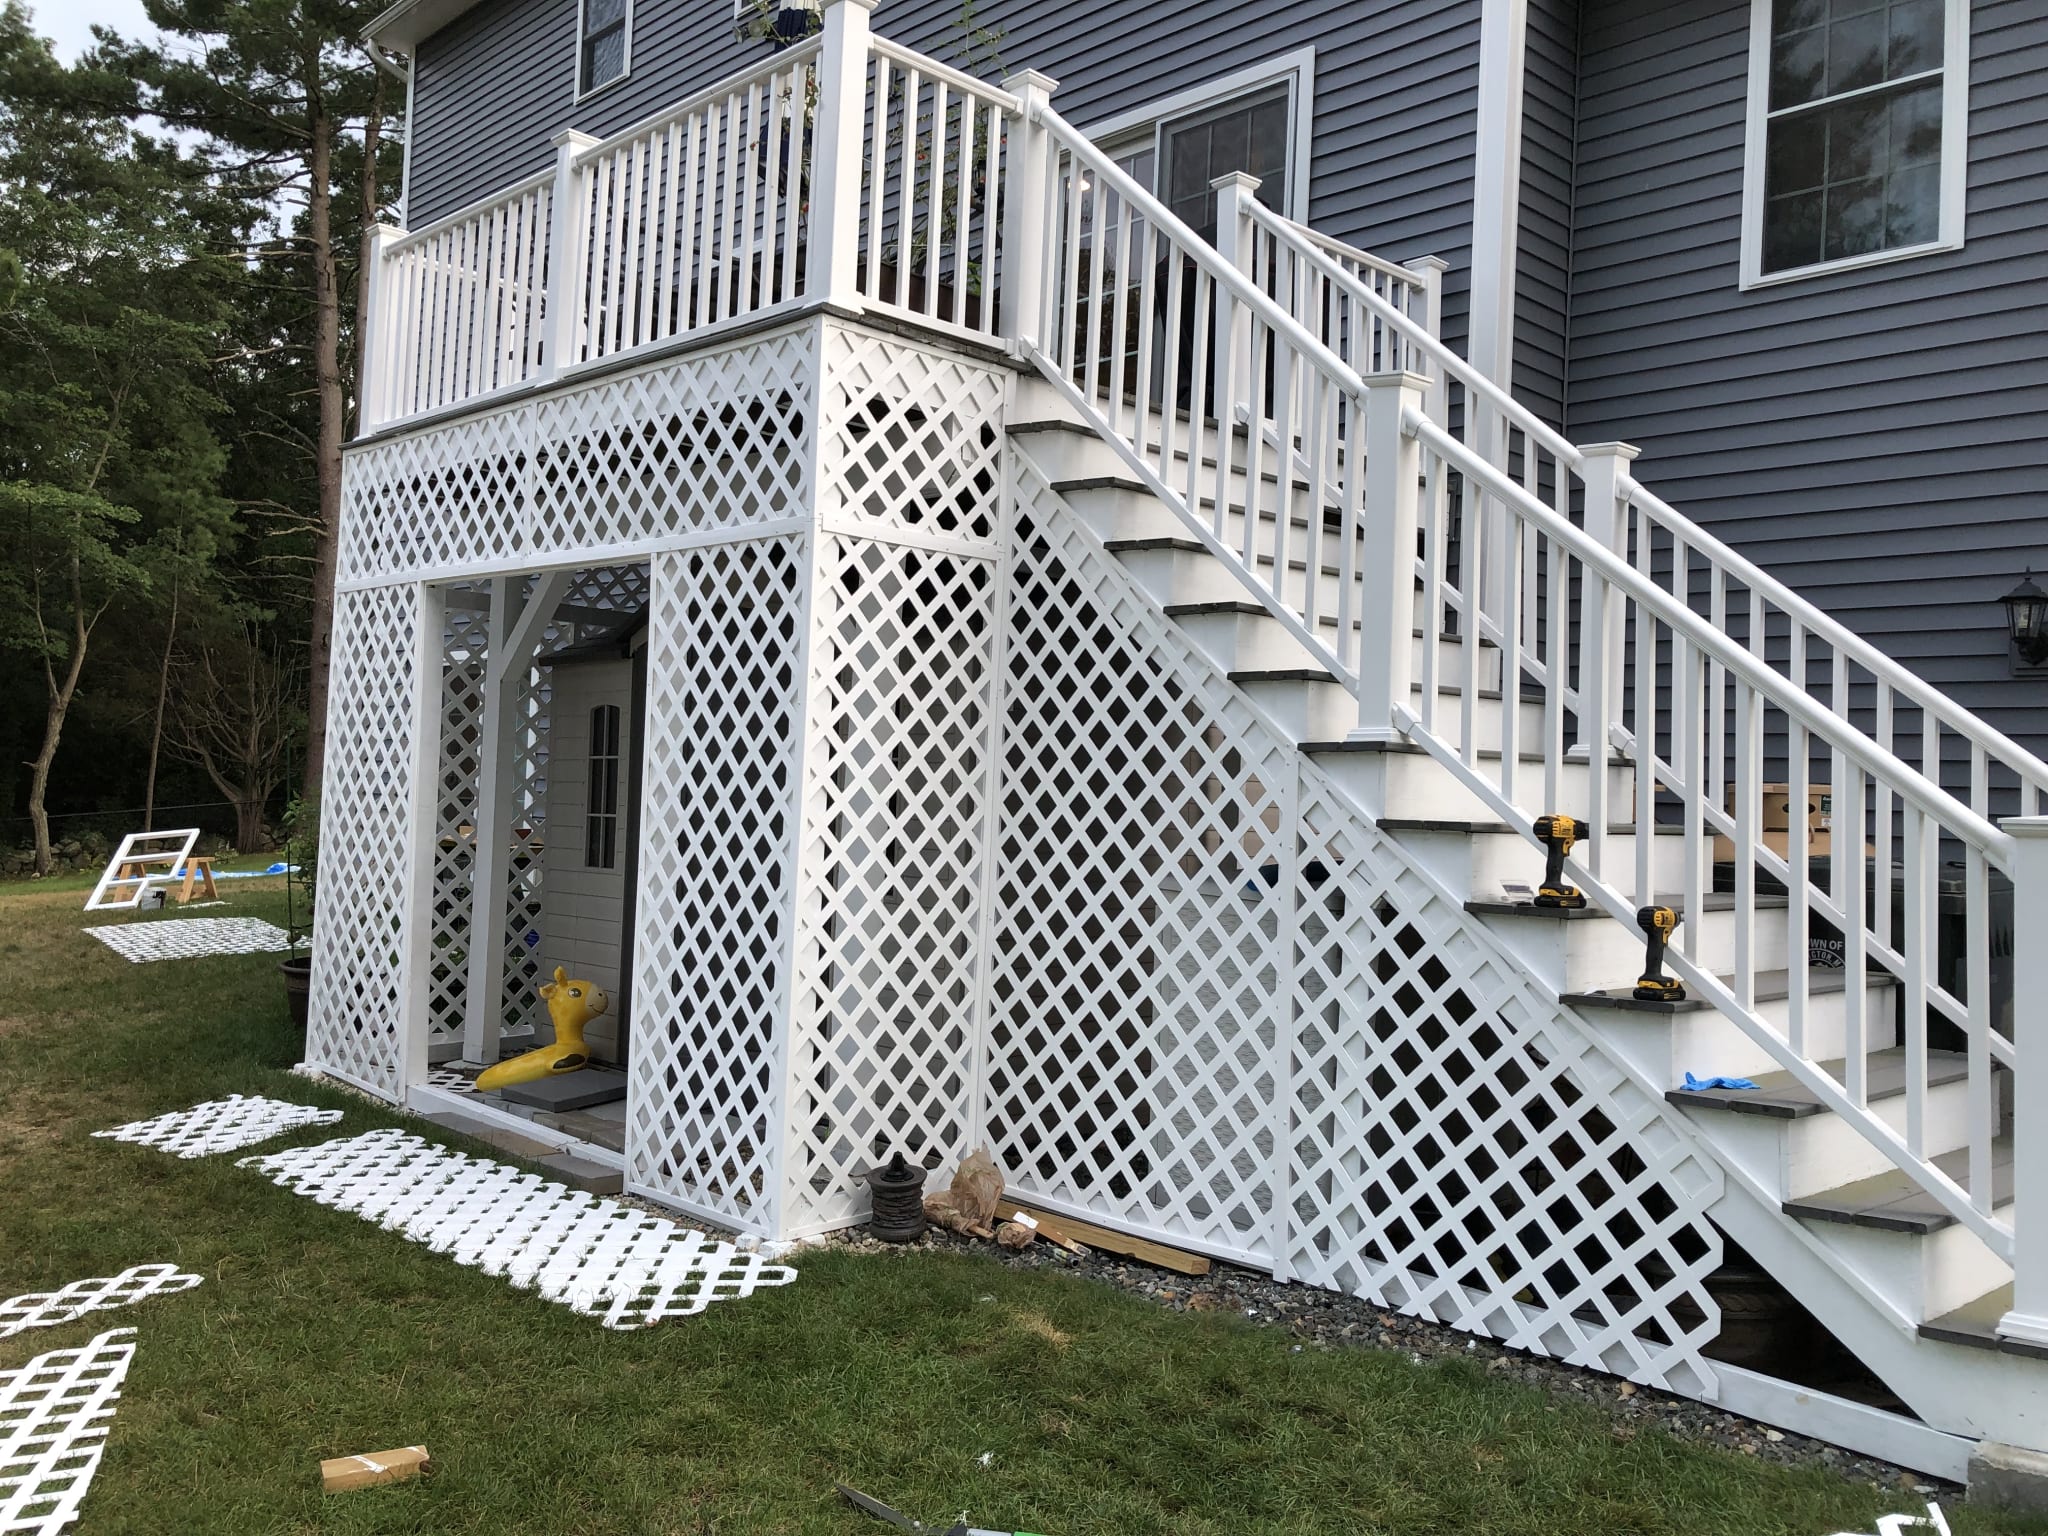
I started on the easiest side and worked my way around. I knew the front would be tricky because I was going to put a double door in, and the stairs would be tricky because of the angles involved.
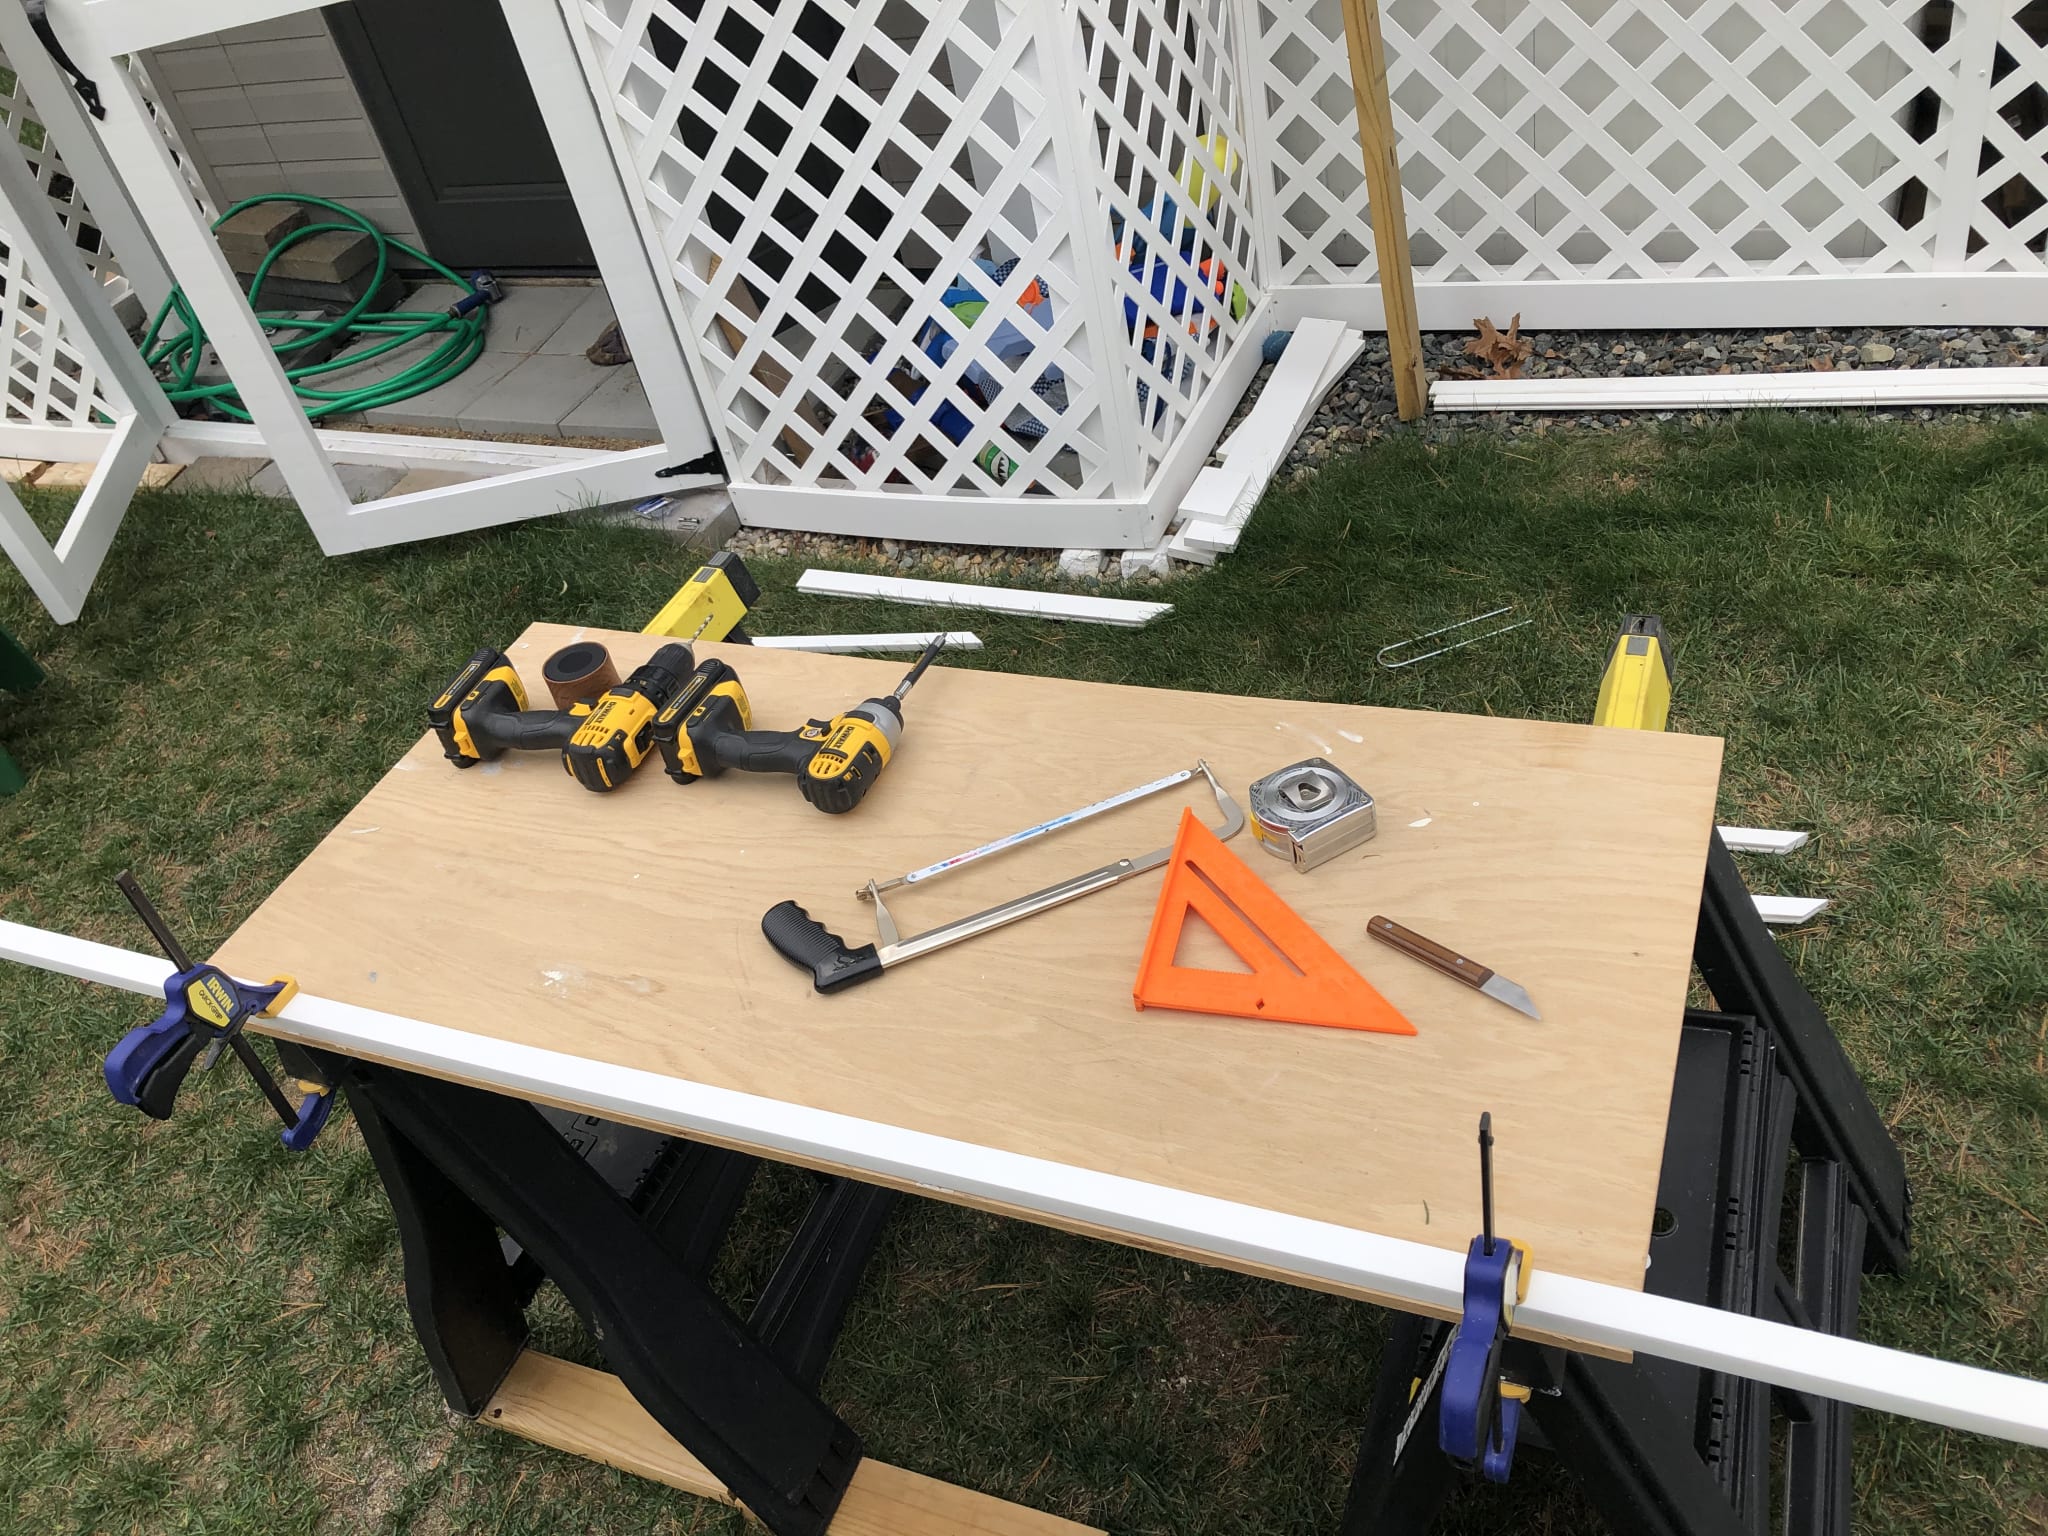
Sometimes putting the lattice in can be a pain because it is floppy and tries to move around on you. Measure. Check. Trim. Measure. Check. Trim. And maybe finally drill the holes and screw it in - hope it works!
It was a total pain to cut everything to the right size. I used hedge trimmer shears to cut the lattice in most cases, and had to measure-and-check often. What I thought I could get done quickly frequently took far longer than I had hoped.
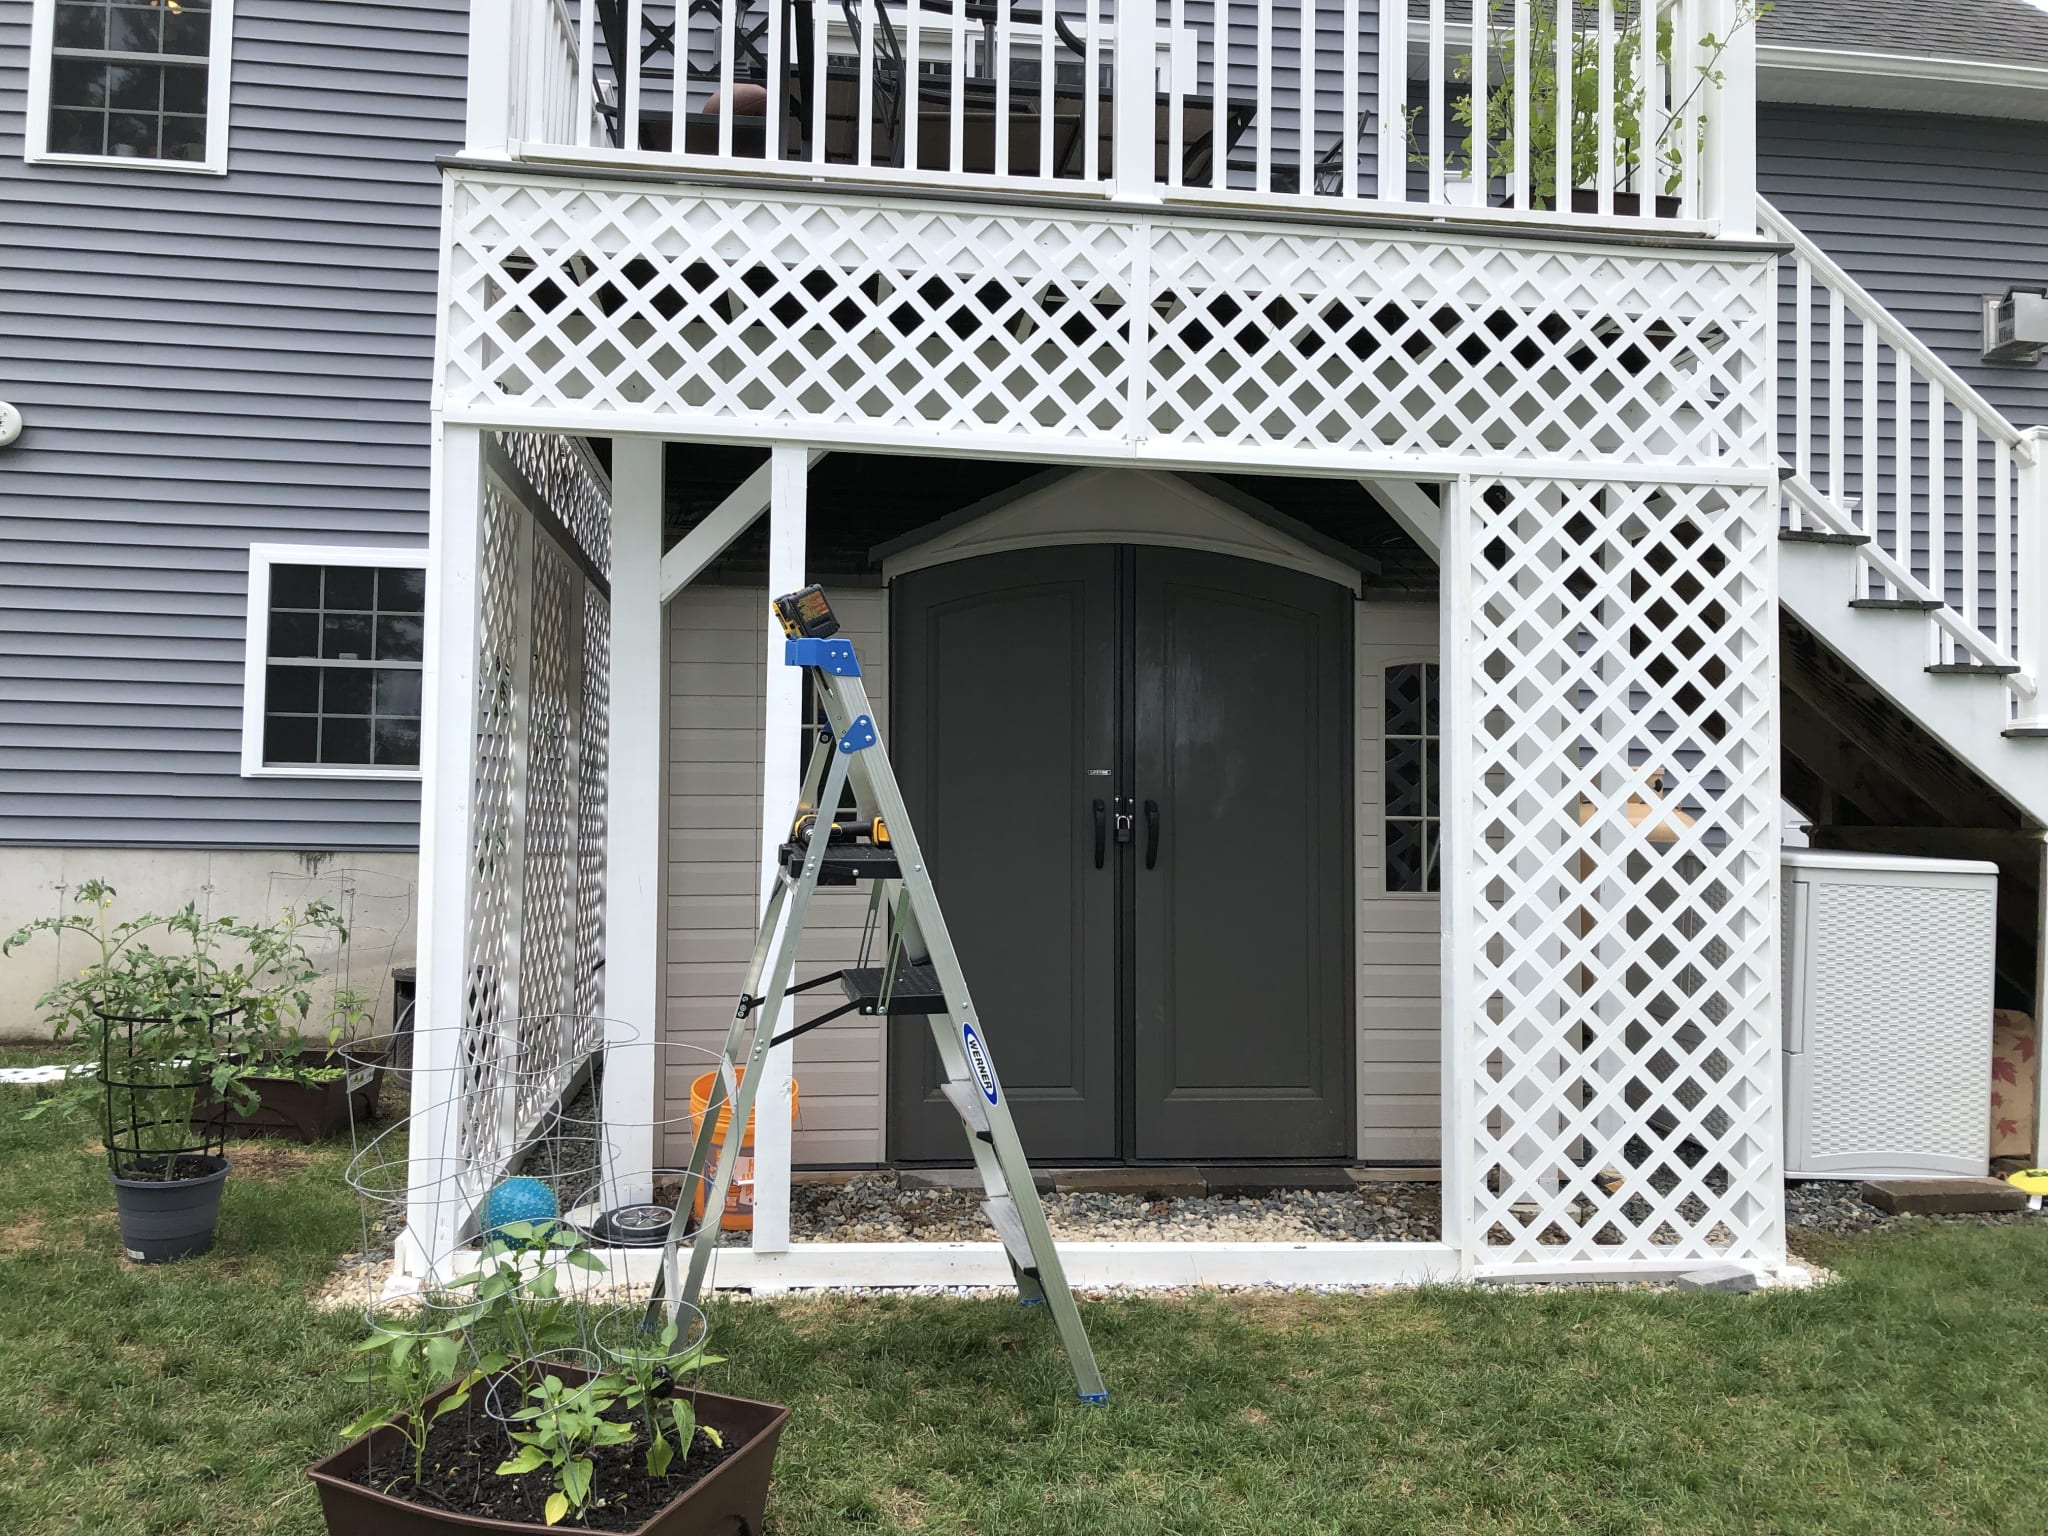
After the front was done, I wanted to get the back side done, so it looked good, leaving a little door to access behind the shed, and a large space to access under the stairs storage.
The rectangle by the shed on the back side was pretty easy.
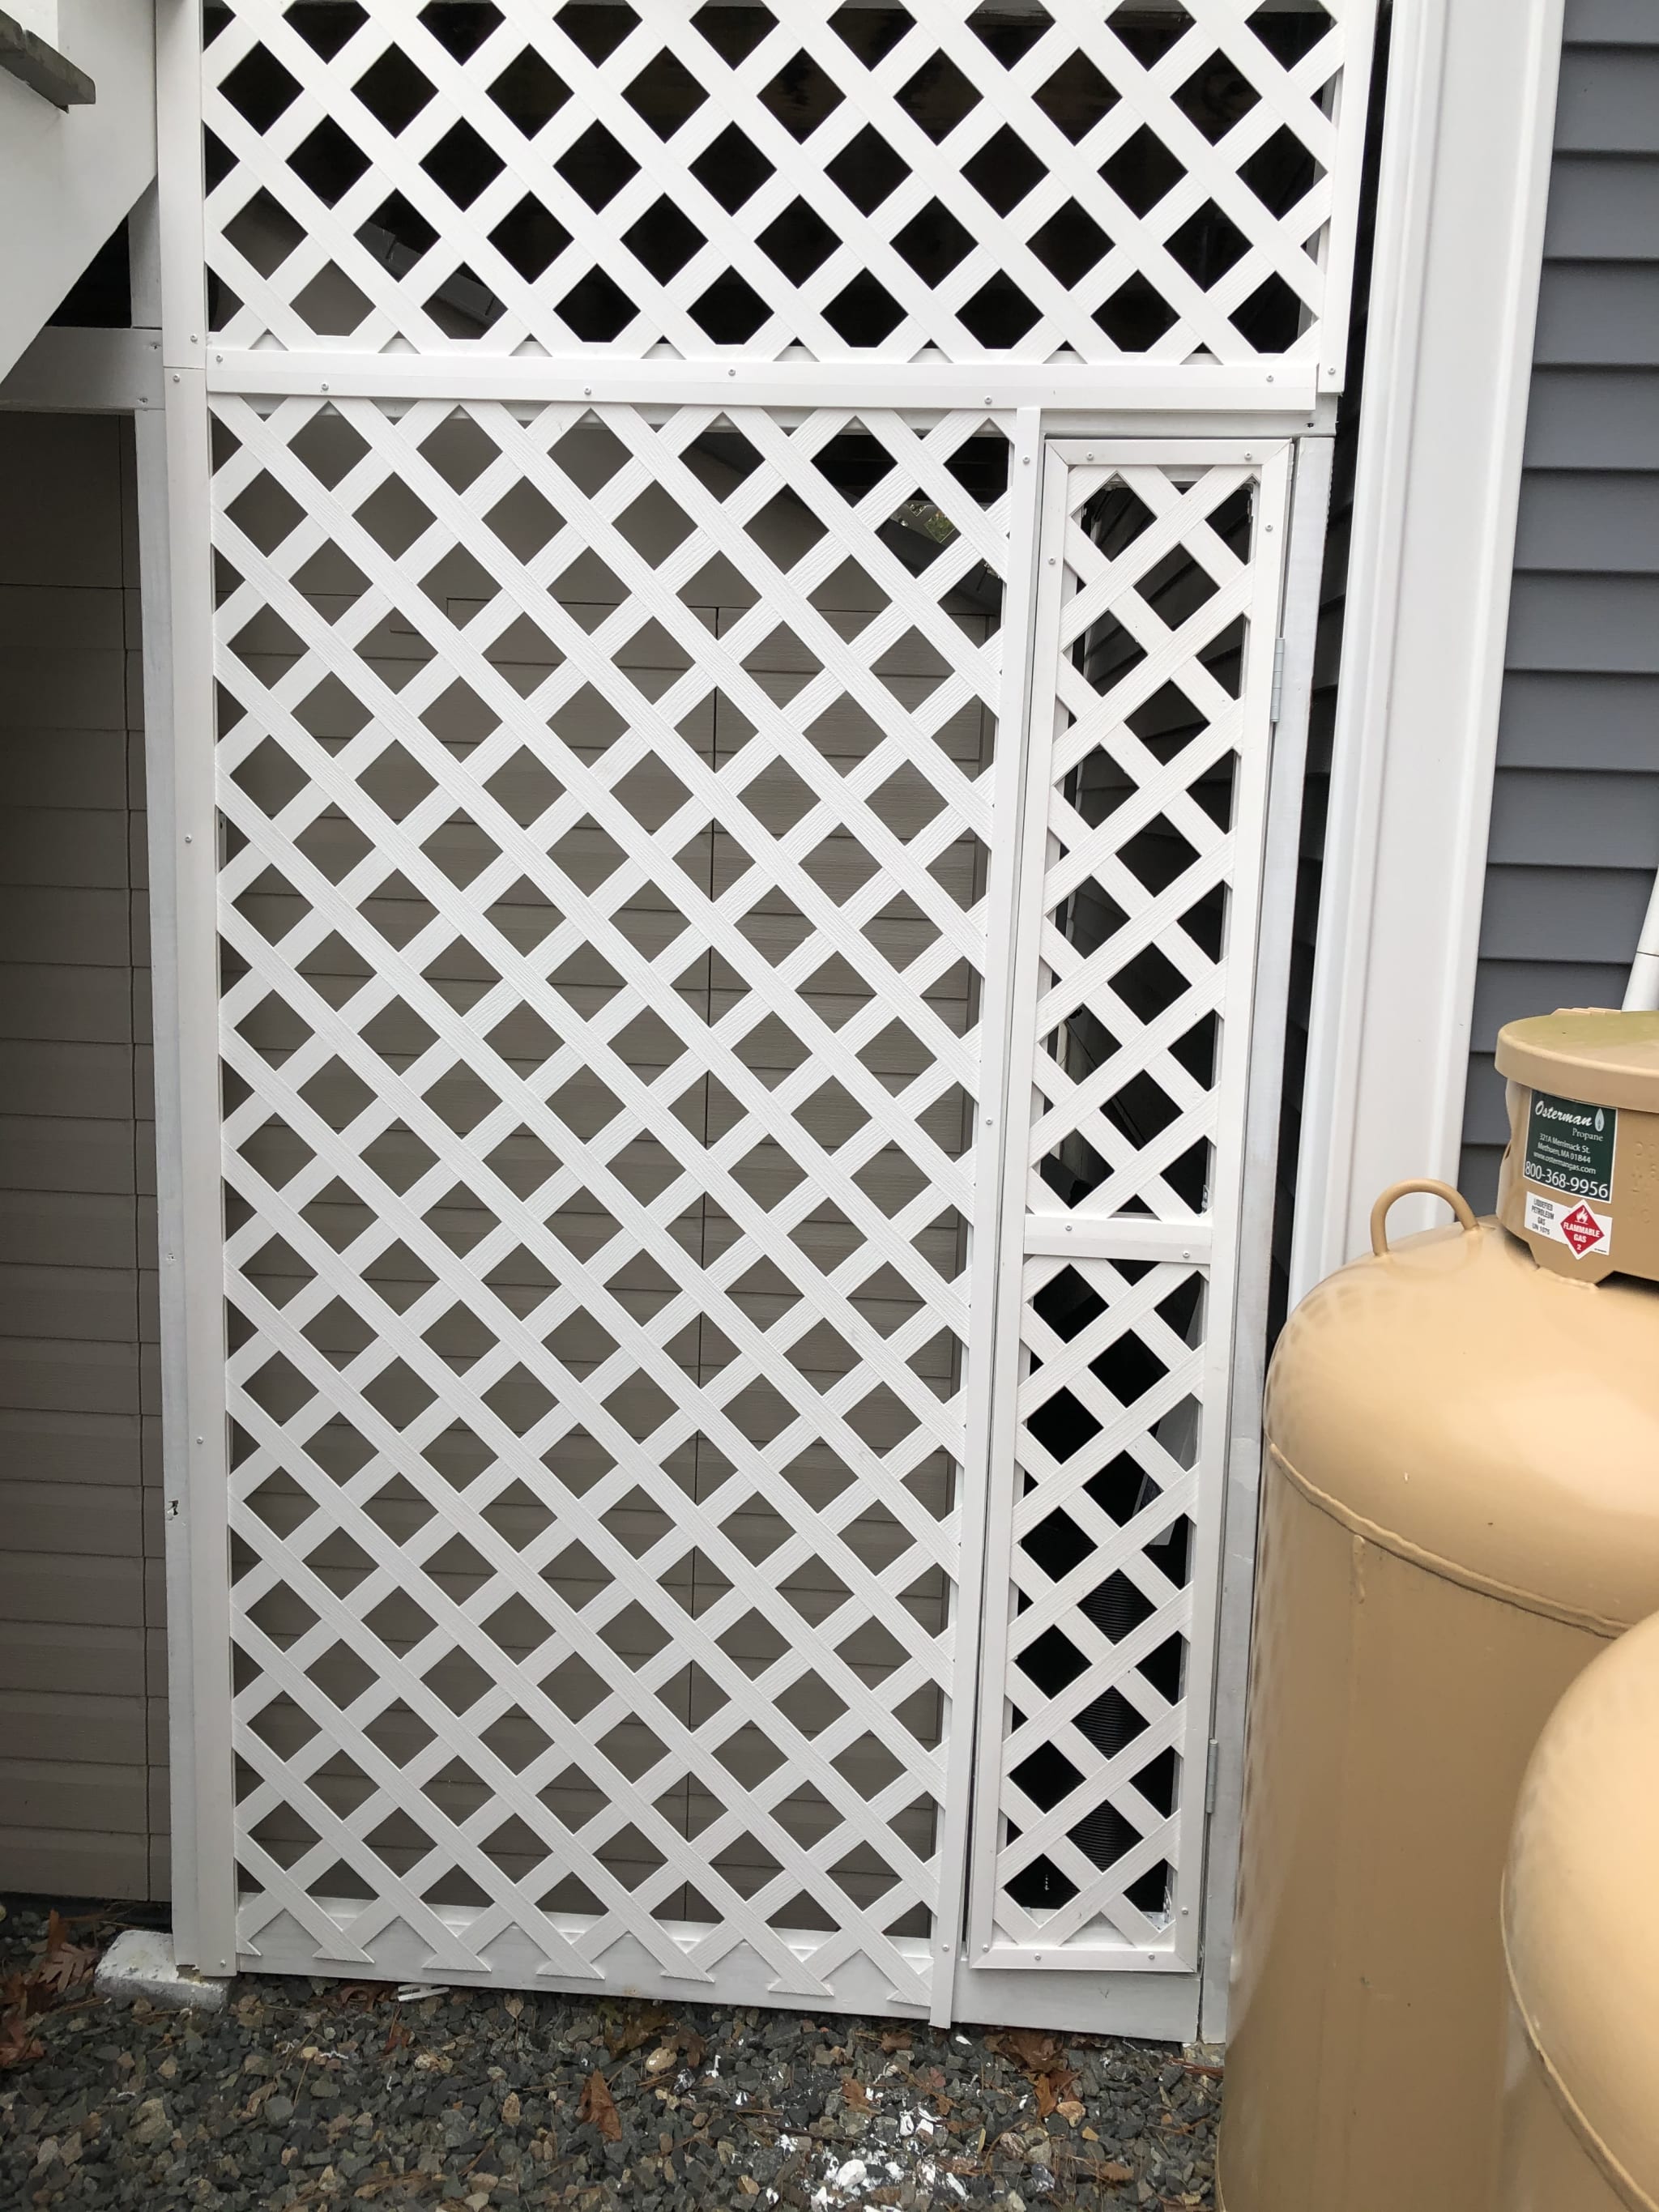
I was really annoyed that the simple door I built warped badly and racked out of square almost immediately after I installed it. I put it in to make it easy to slide long things behind the shed to store them. The next challenge I had was to put the lattice in on the side of the stairs where we access the under-stairs-storage. I wasn't sure if a door was a good idea, so I left it as an opening. Everything else got lattice.
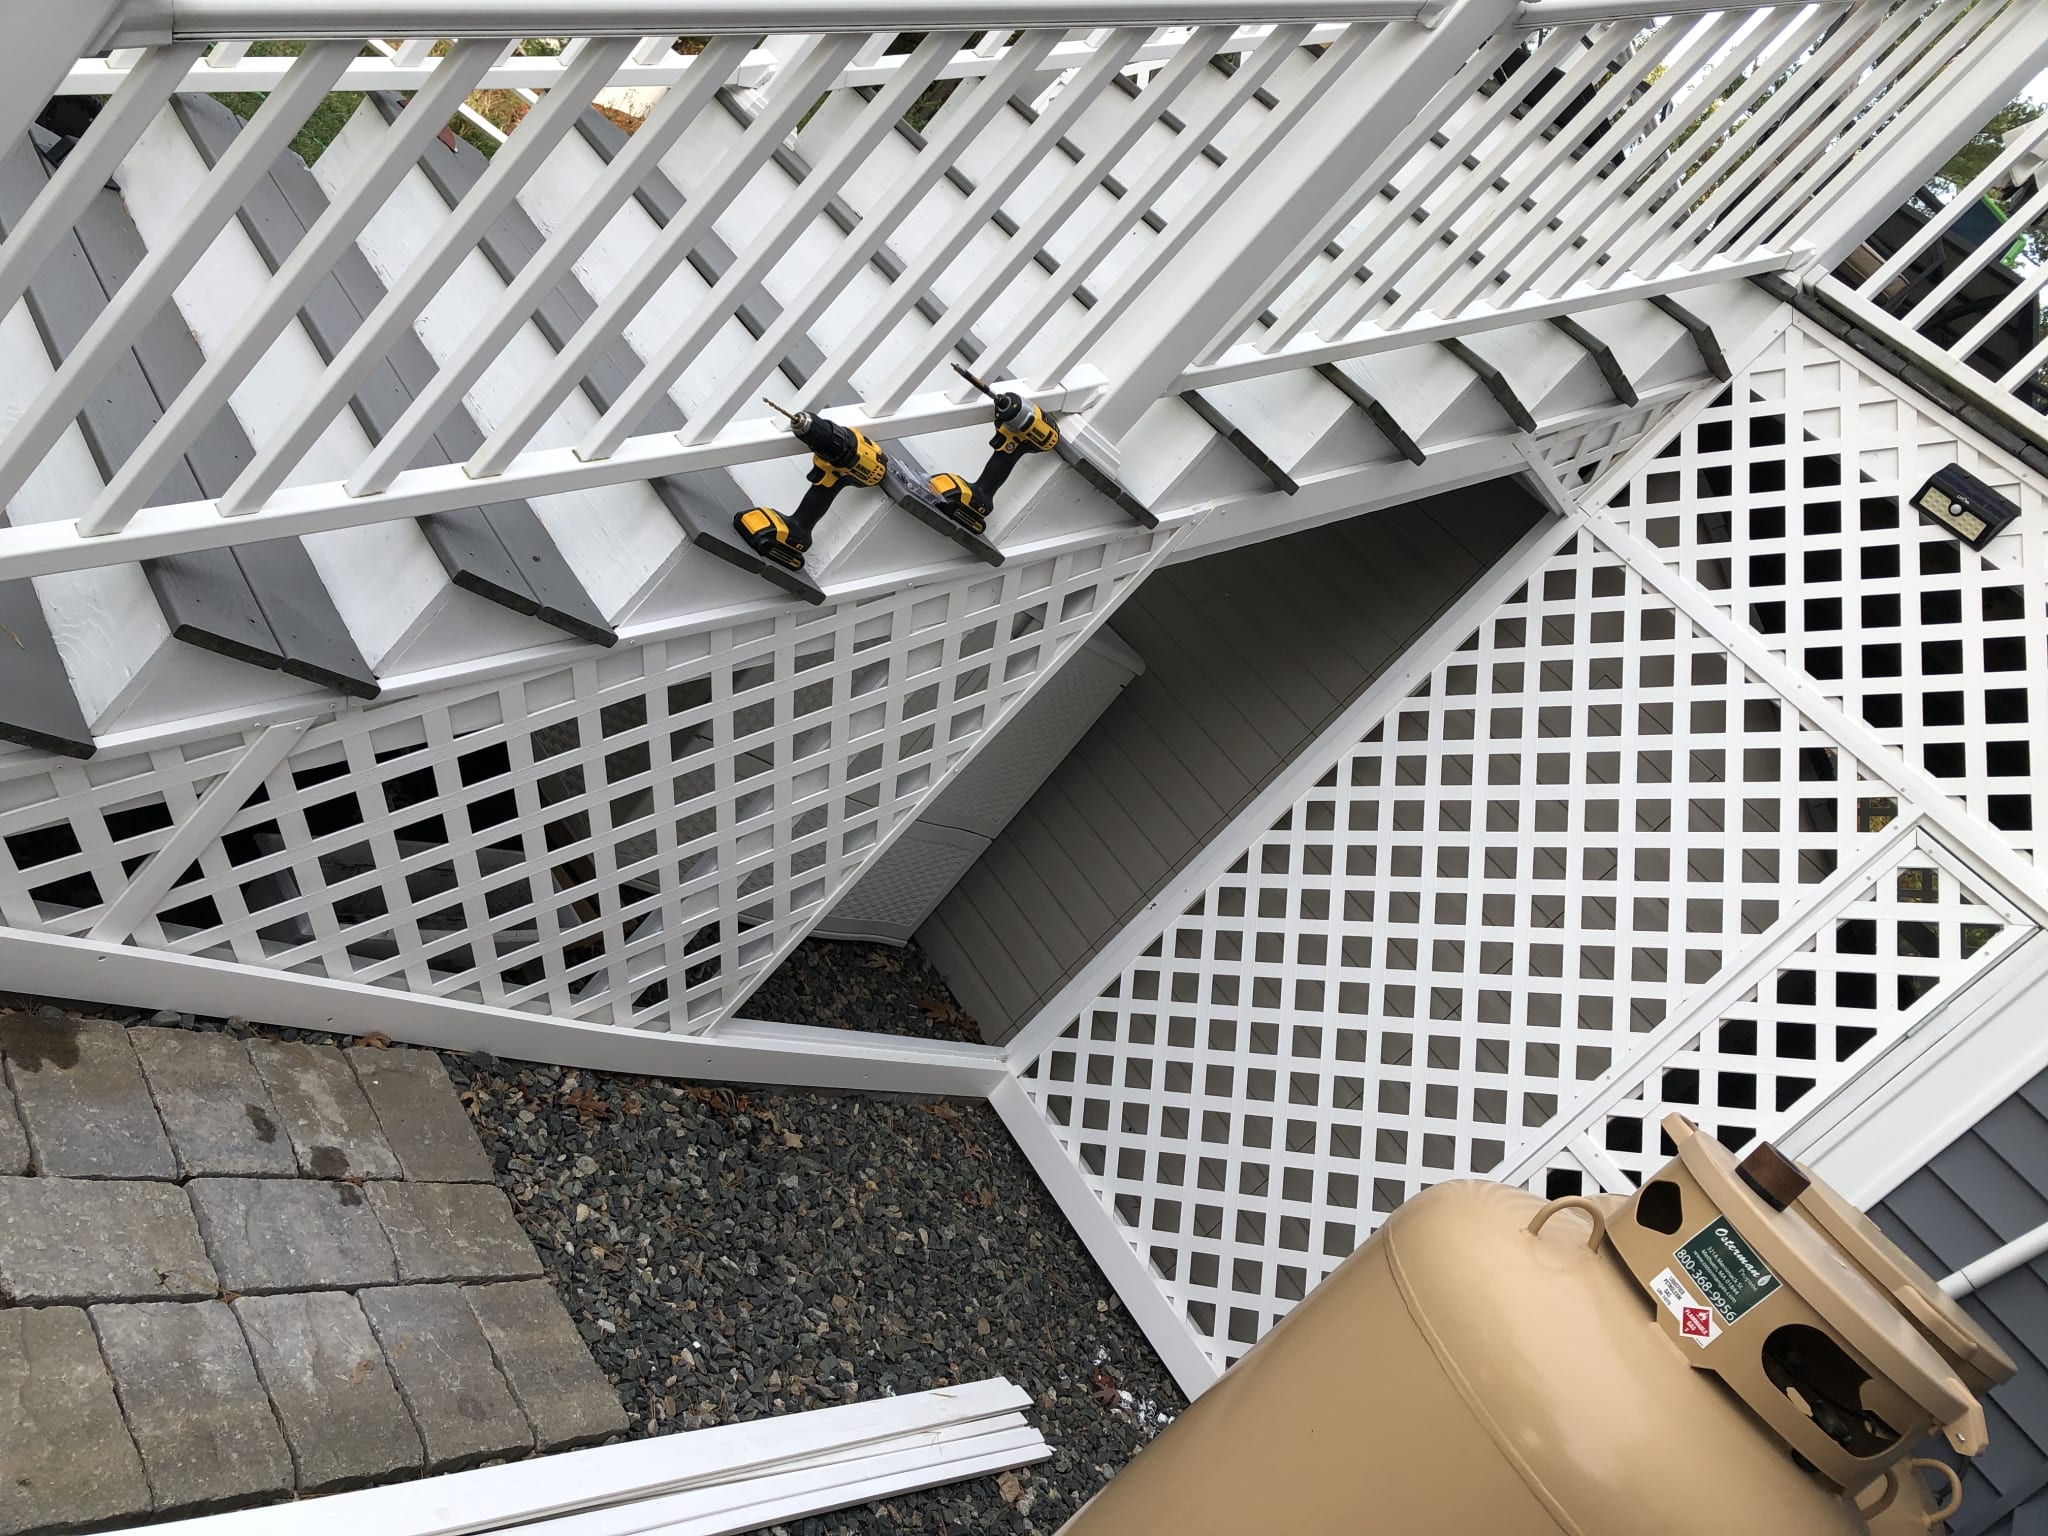
You'll notice that I also put in a vinyl floor board "moulding" on all the edges. It was a nice way to hide variations, plus I plan on filling in more stone in a lot of places.
While working in this area I found some fun friends.
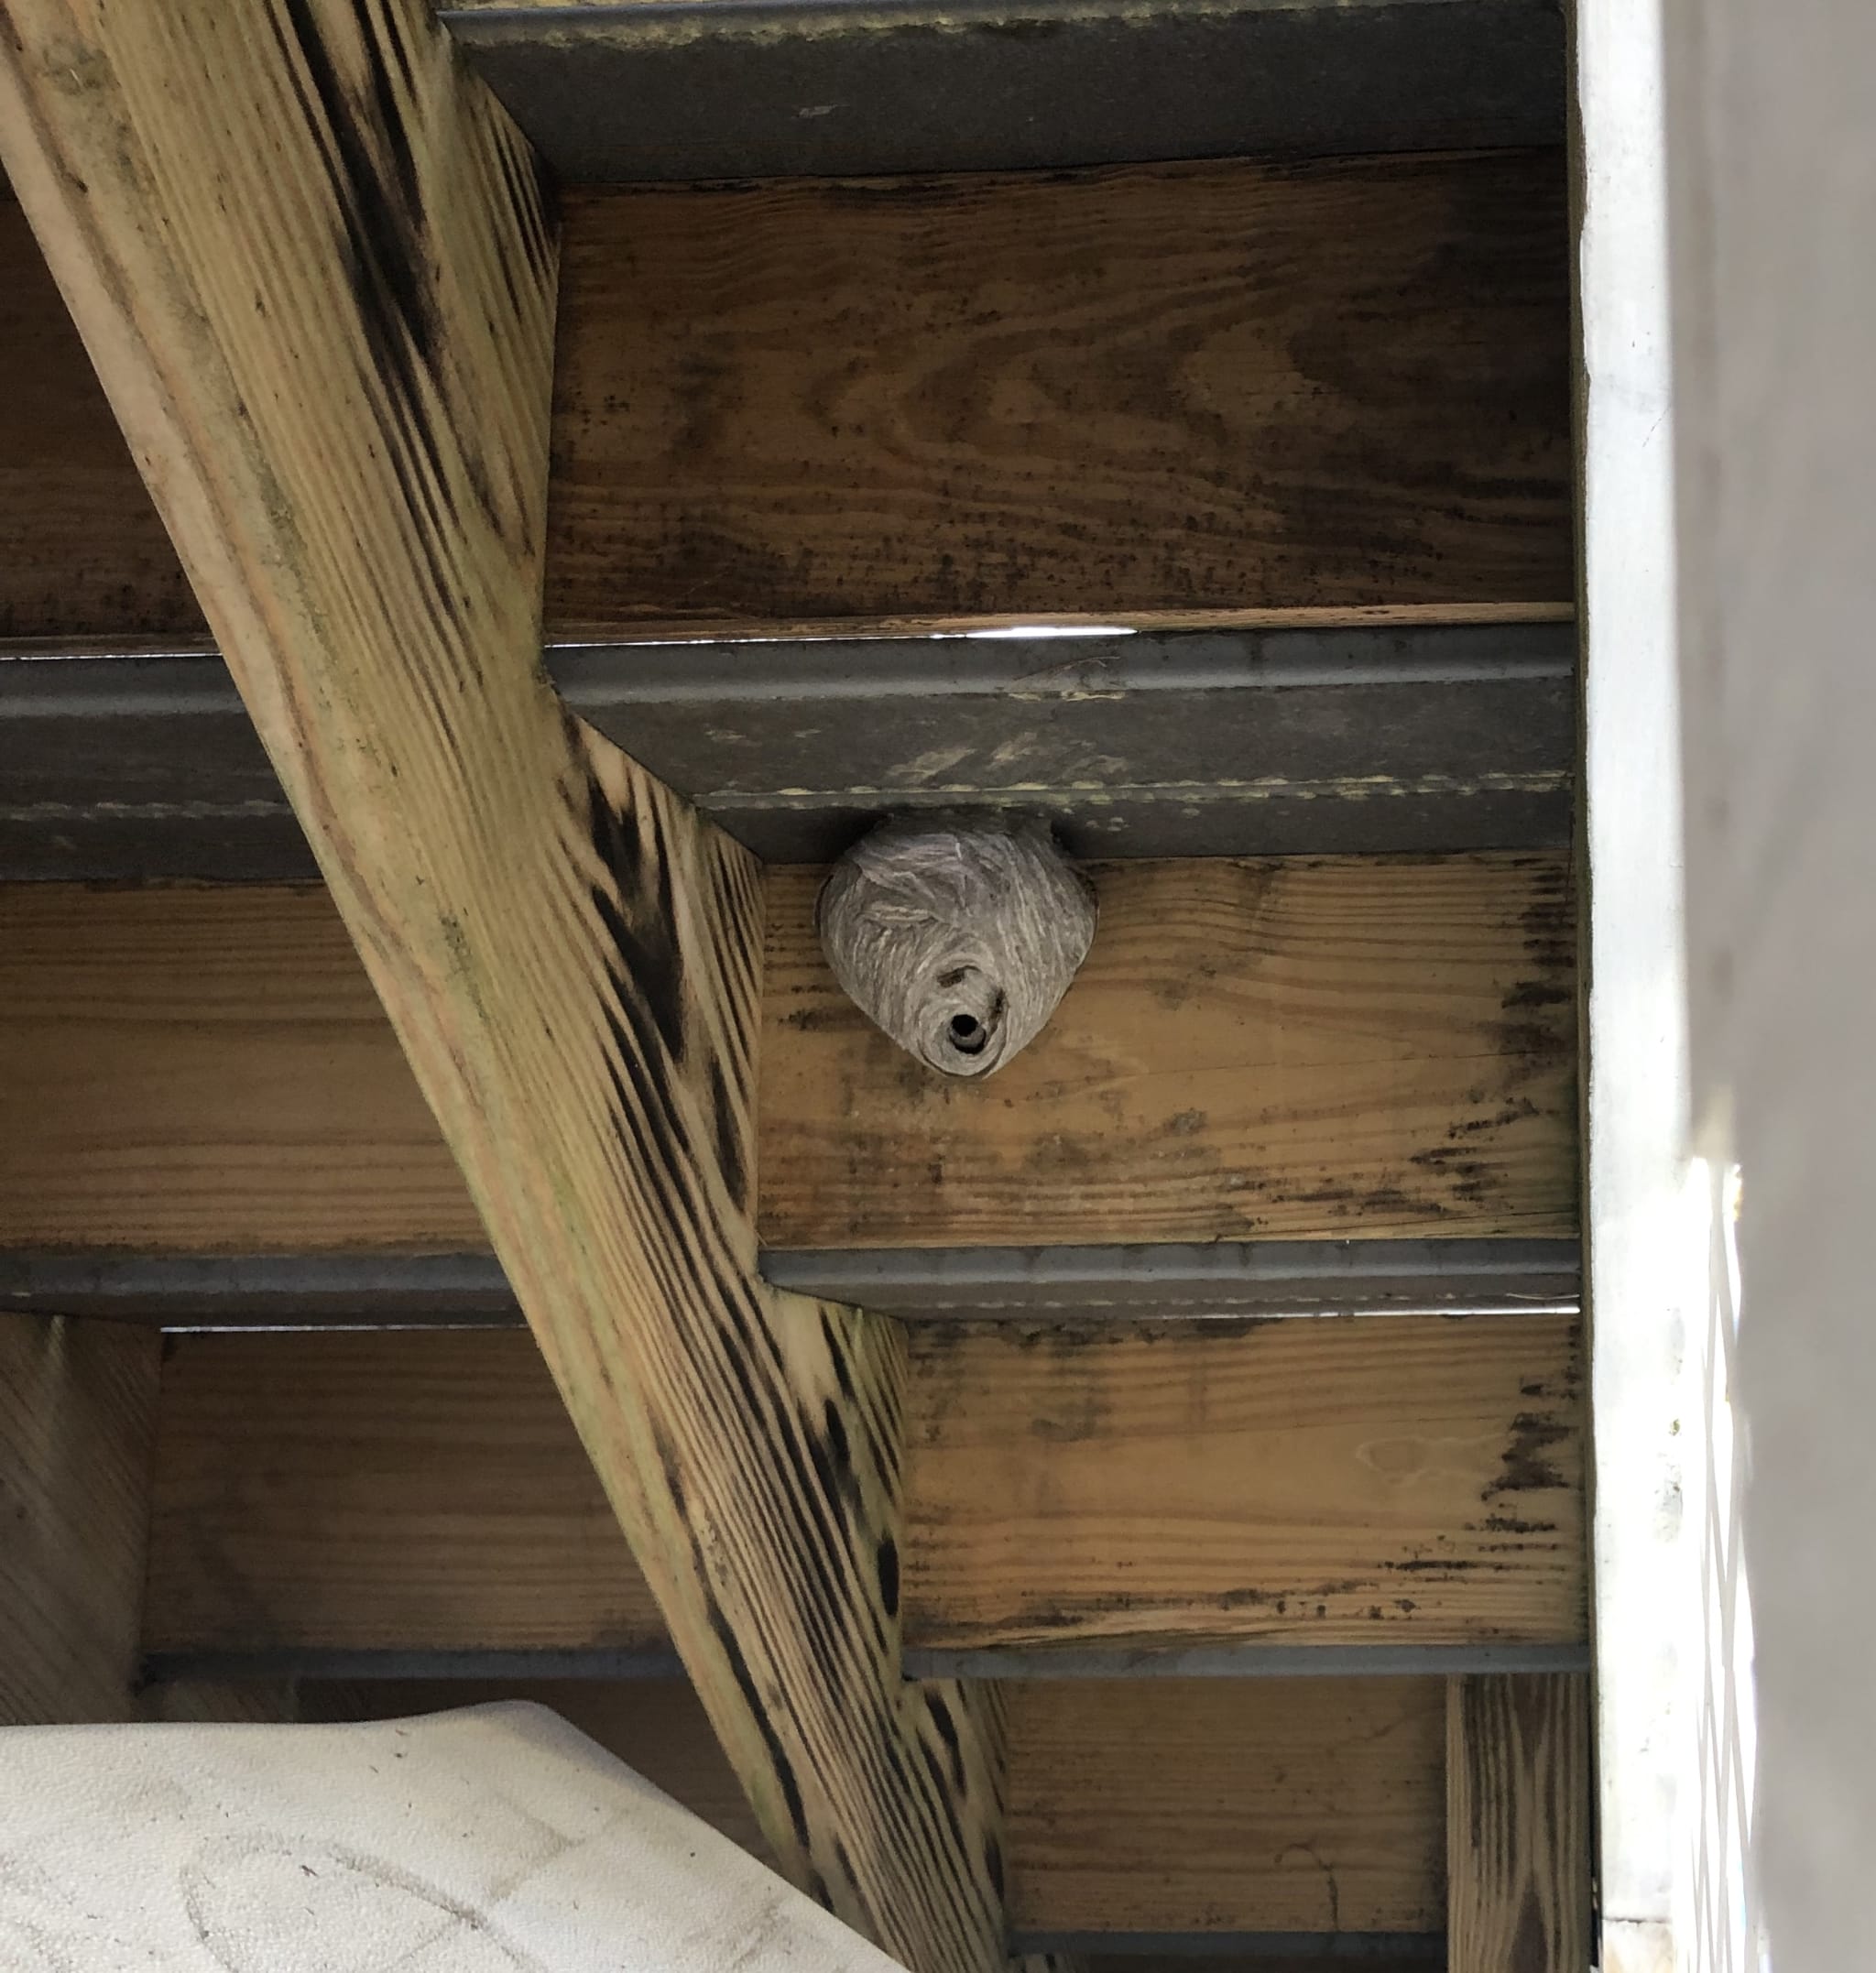
I would have left them alone and not even noticed had they not endeavored to sting me first. Ugh.
I had worked my way through everything except the double doors in the front, so I couldn't put it off any longer. I decided to use a pretty simple mortise-and-tenon rectangle build for my doors. After I measured once, twice, and thrice I got to work cutting the component boards to size.
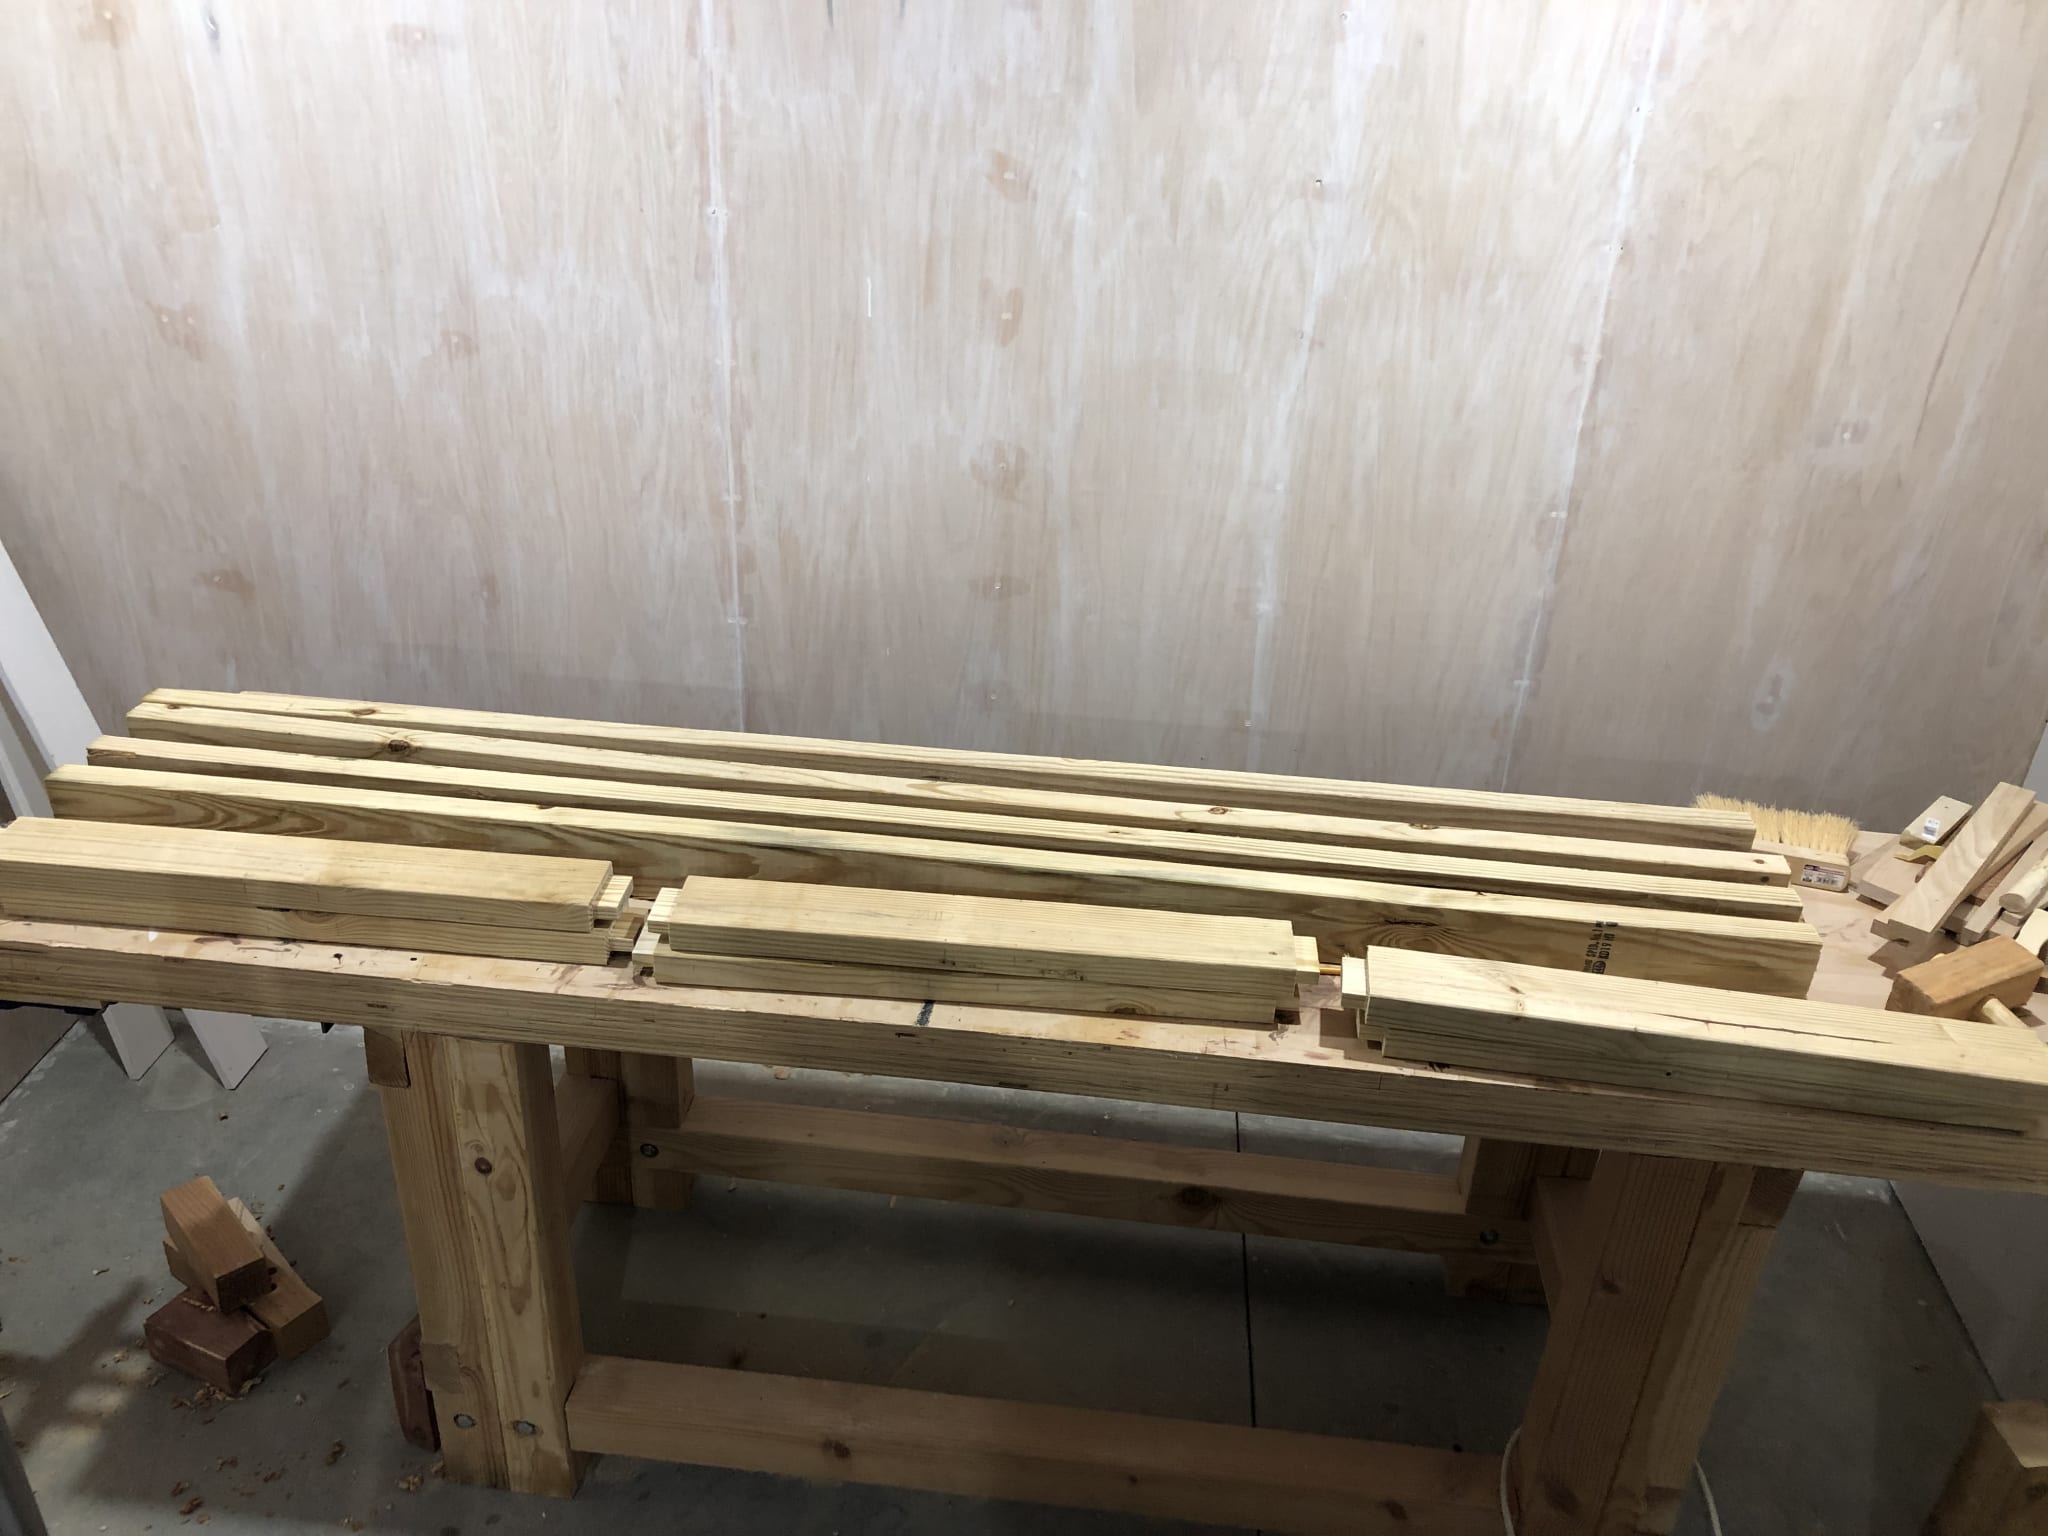
Once cut to length, I used my table saw to cut the tenons, but chopped all the mortises by hand. Fortunately pressure treated pine is easy to work.
Doors are pretty straight-forward. Make a sturdy rectangle and hang it on something. In this case I made a glued mortise-and-tenon joint, but added a screw just for added security.
Once the doors were painted and hung, it was time to get to work with the final lattice work.
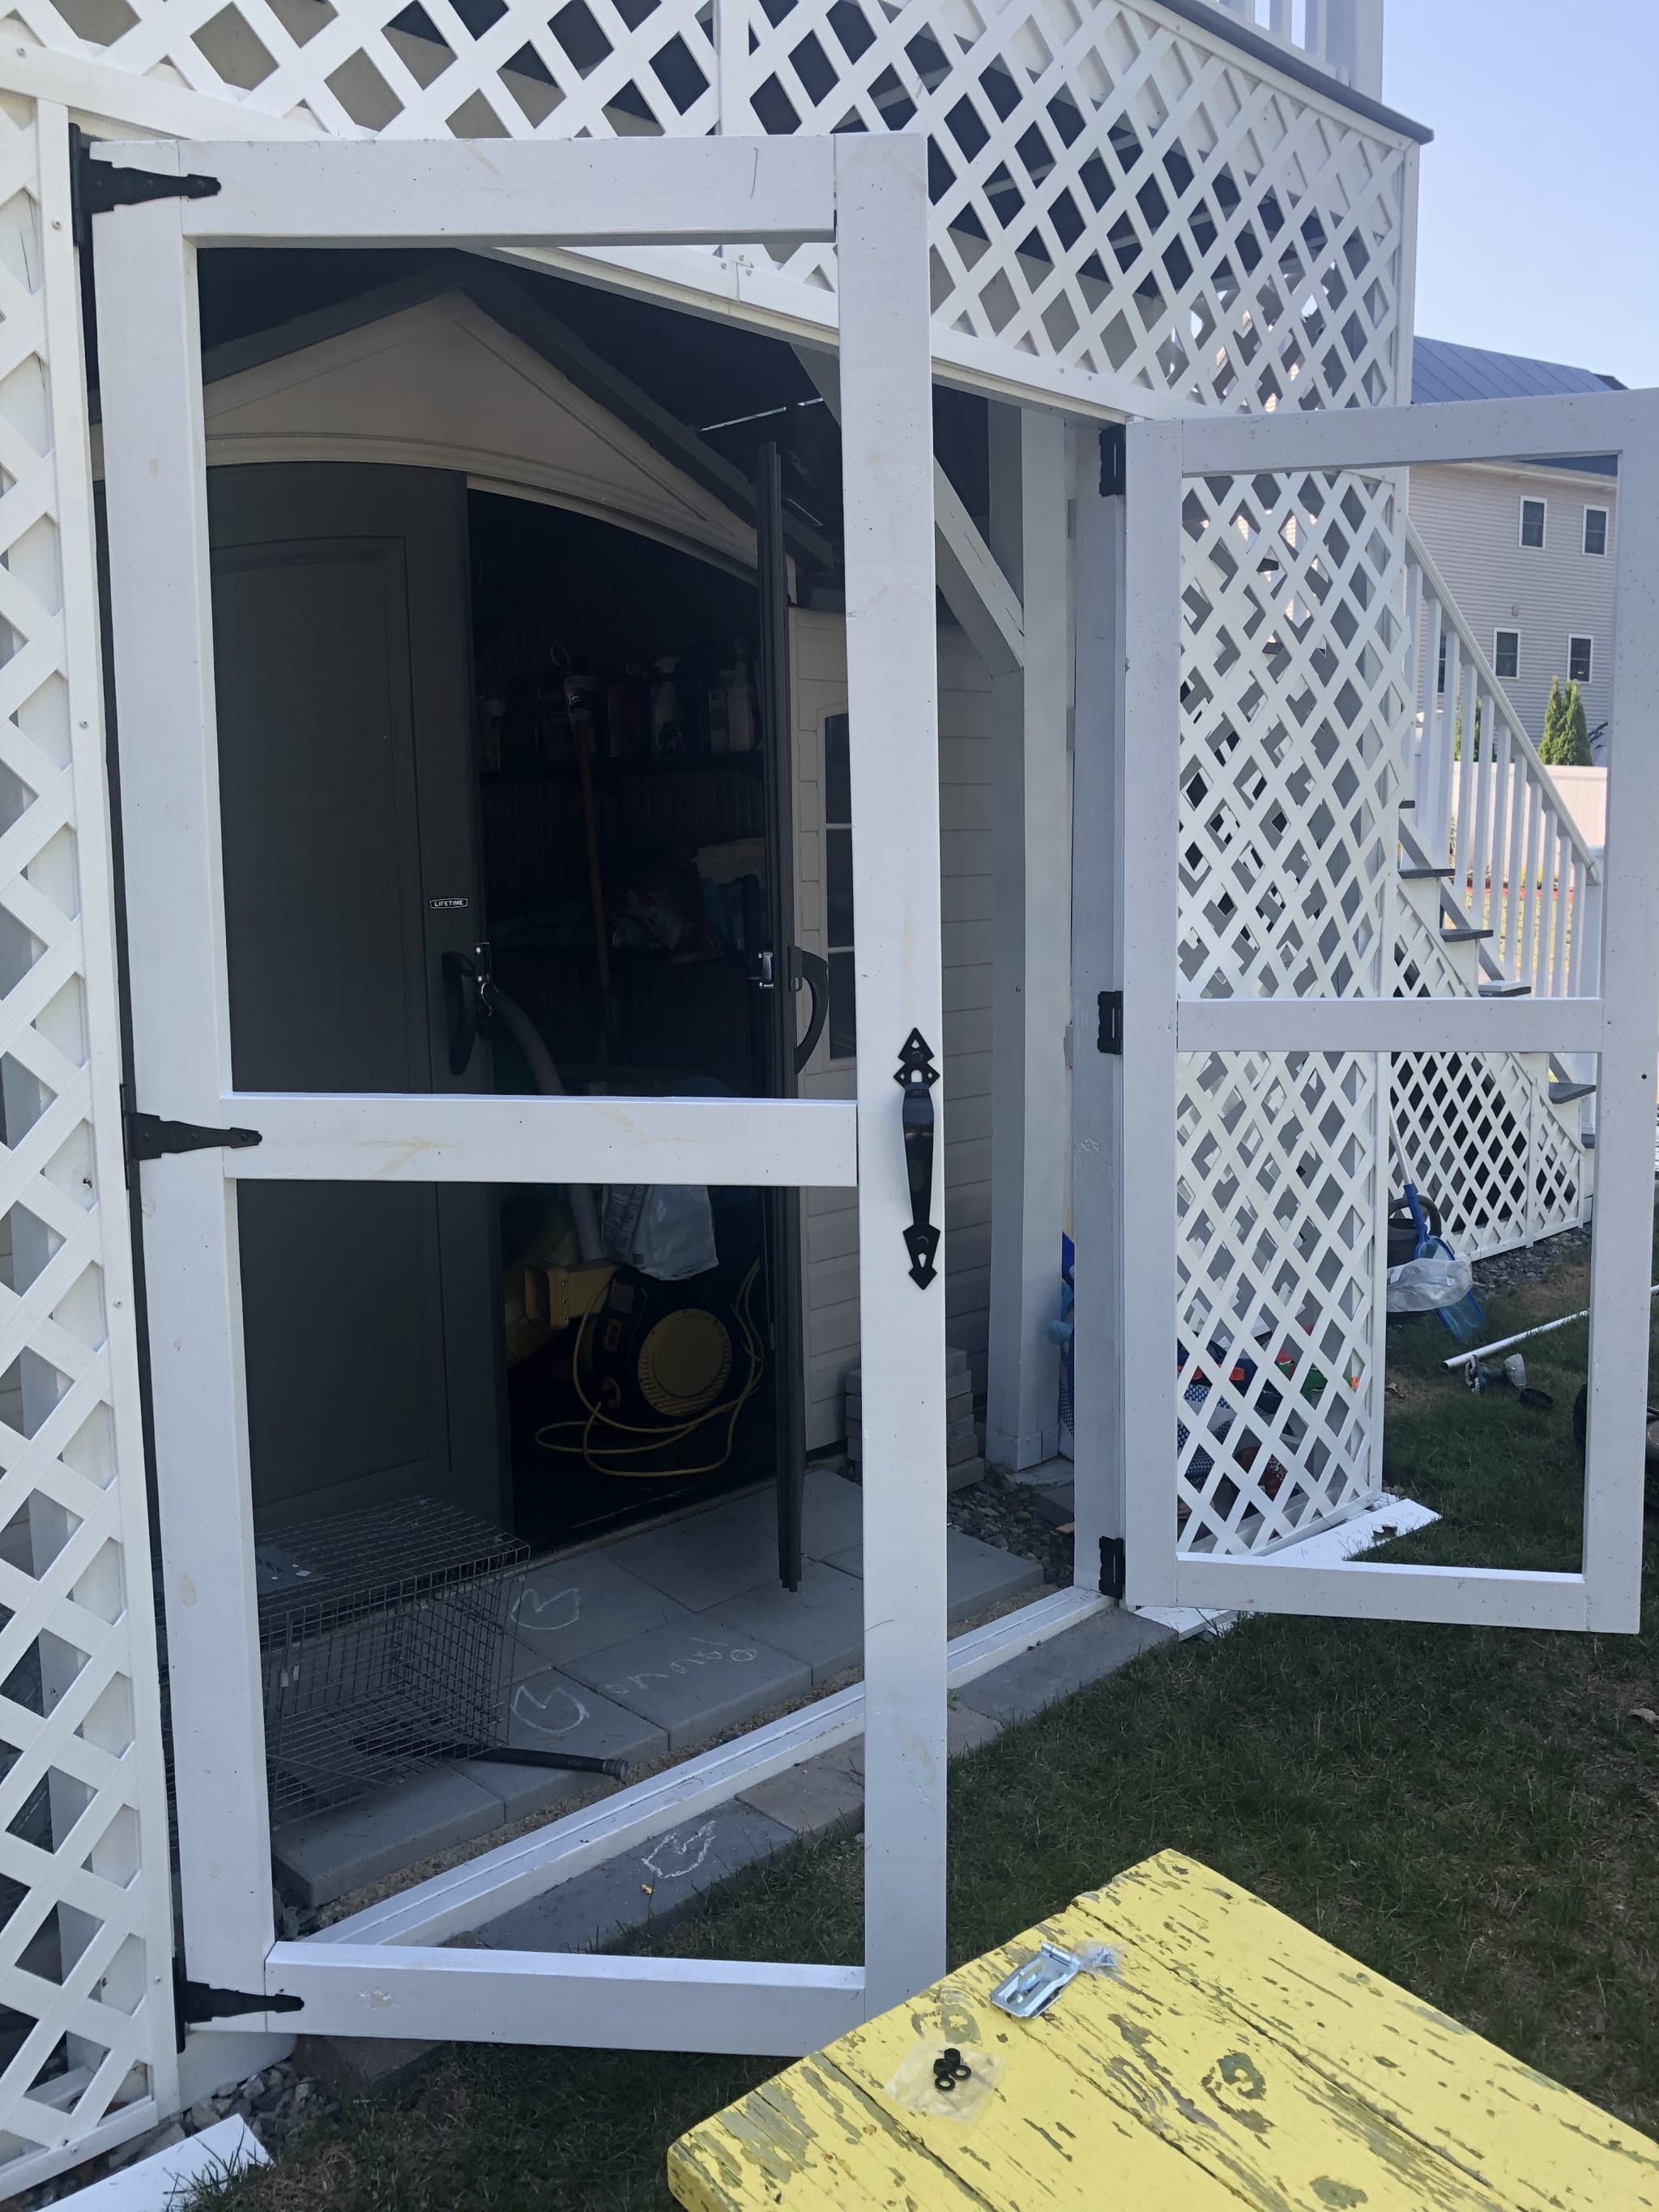
So after all of my hard work and measurement the doors aren't perfect. My latch almost fits, but doesn't quite reach. None to worry, I have a dremel with a carbide cutting disc. All I need to do is a little bit of metal trimming.
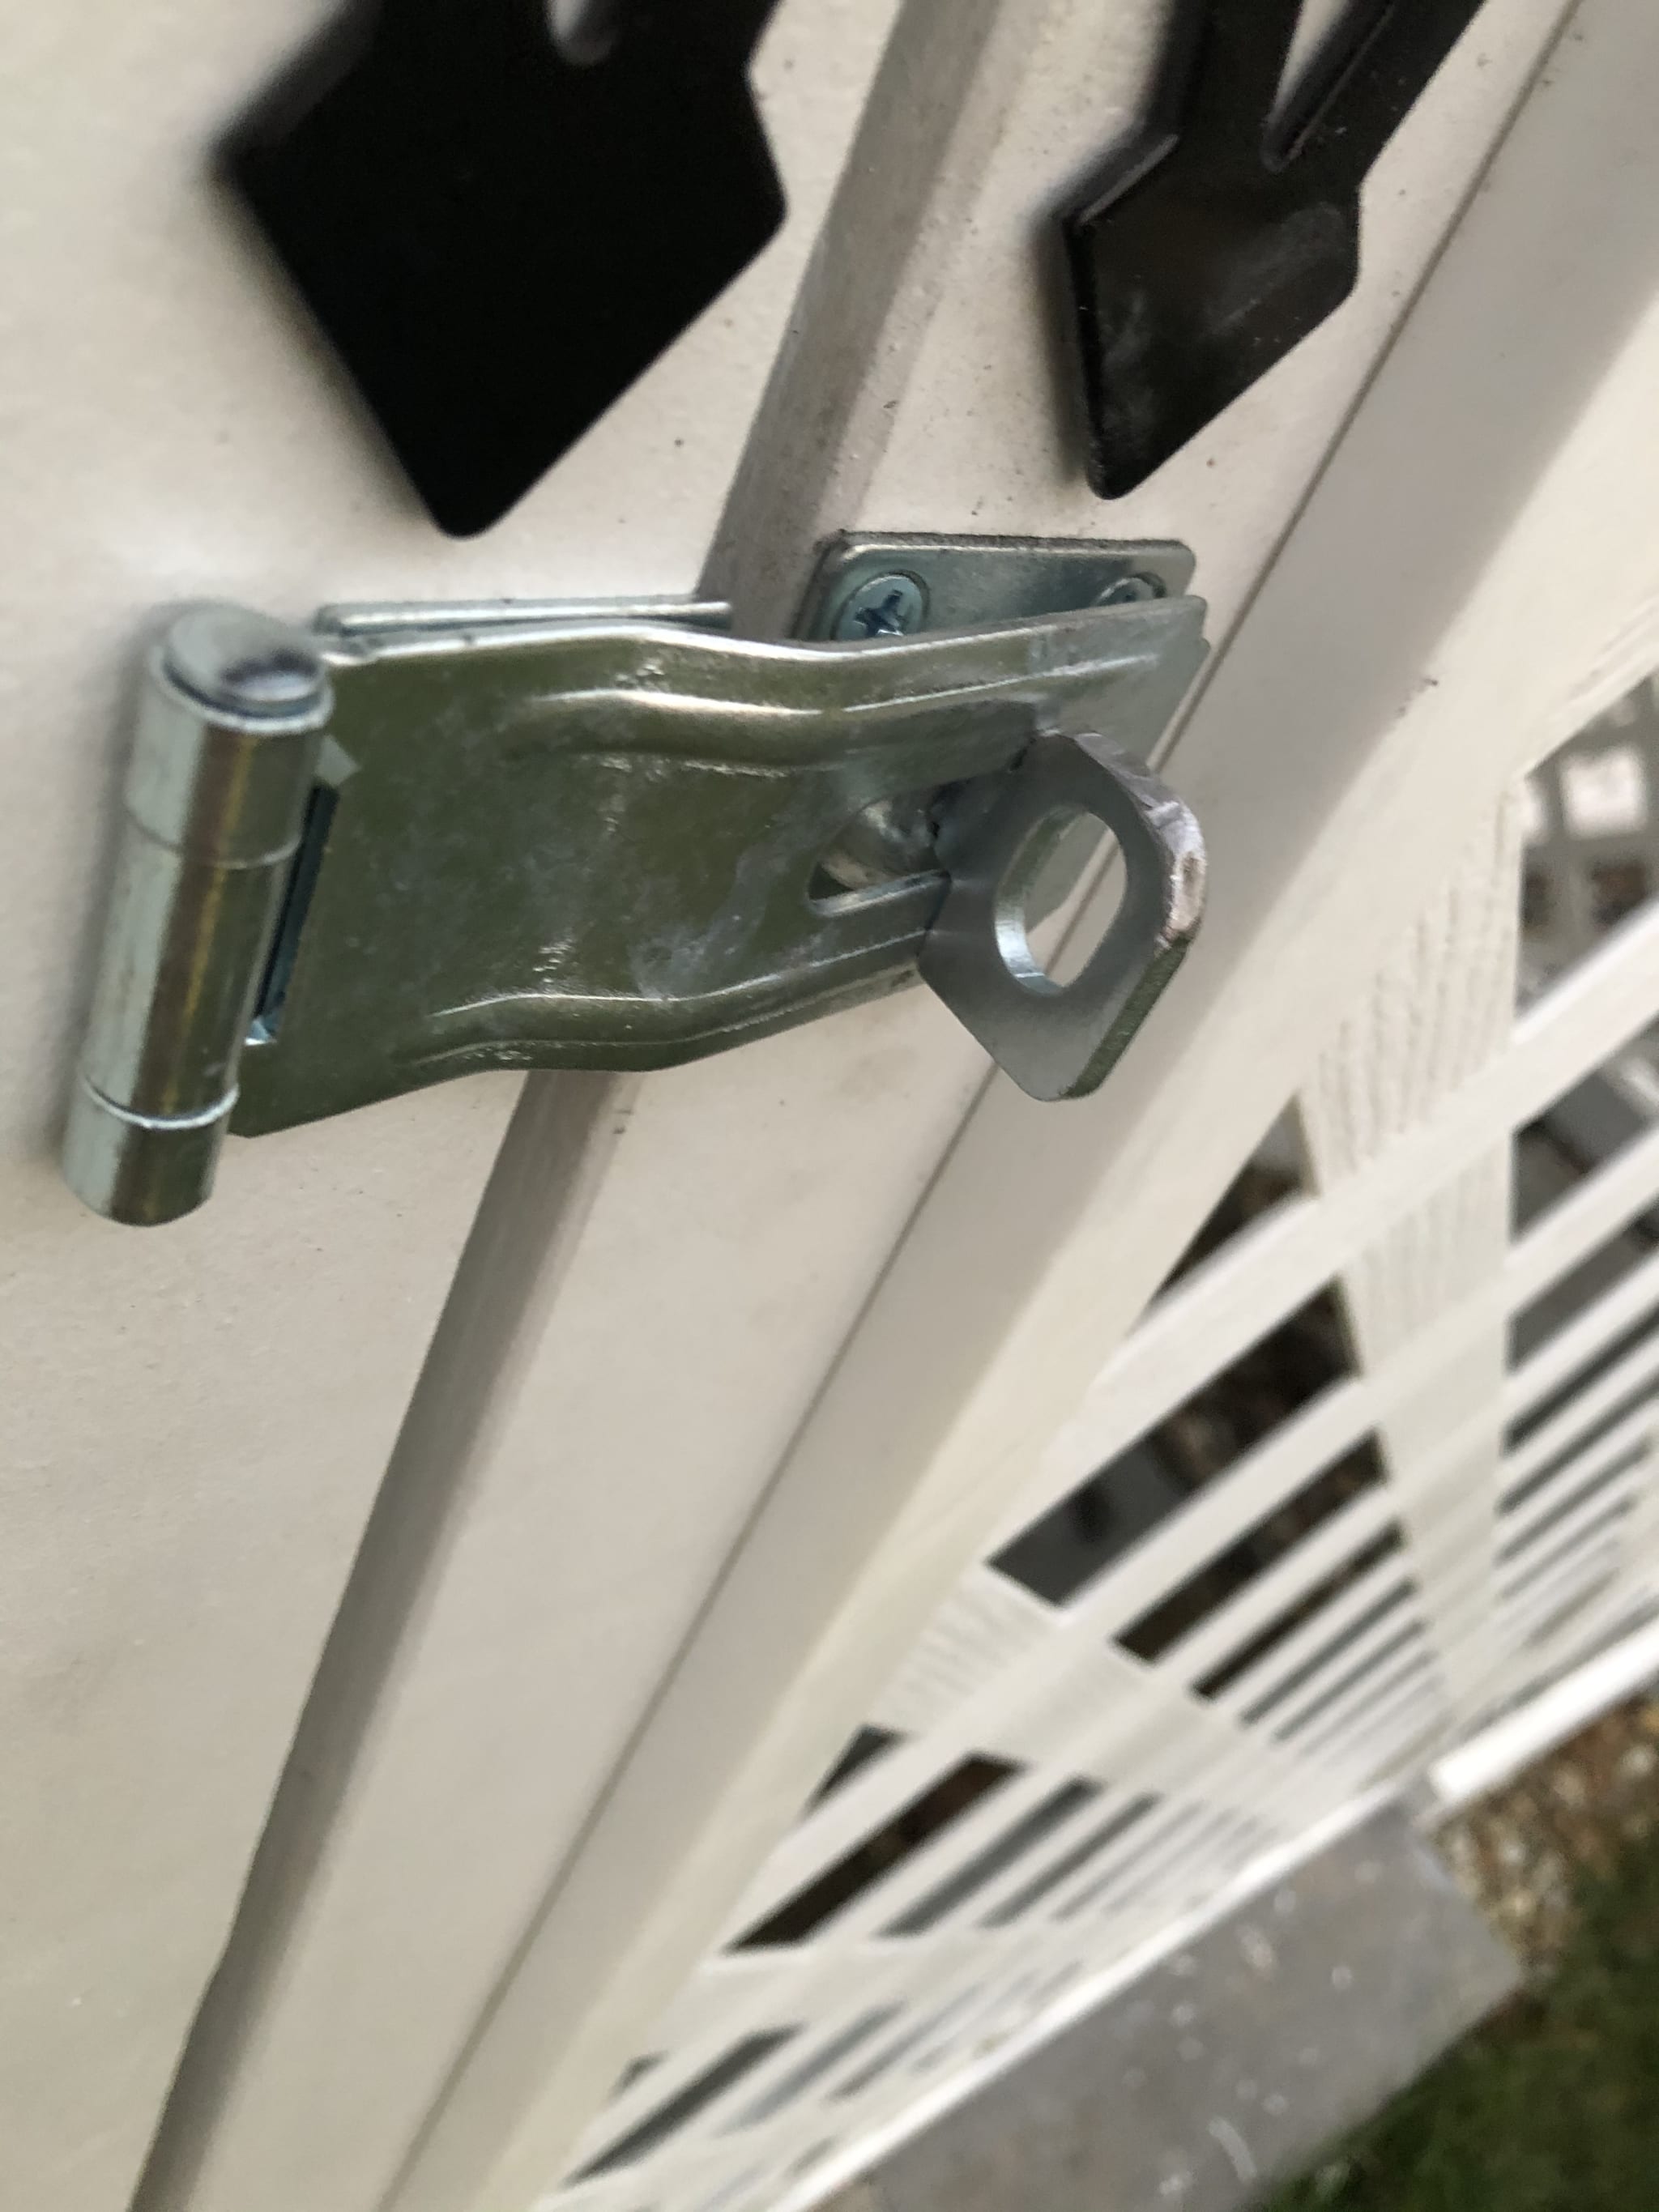
I also added a dead bolt on the top of the left door to keep it stable, so it wouldn't move relative to the rest of the frame. This allows the regular latch to work nicely.
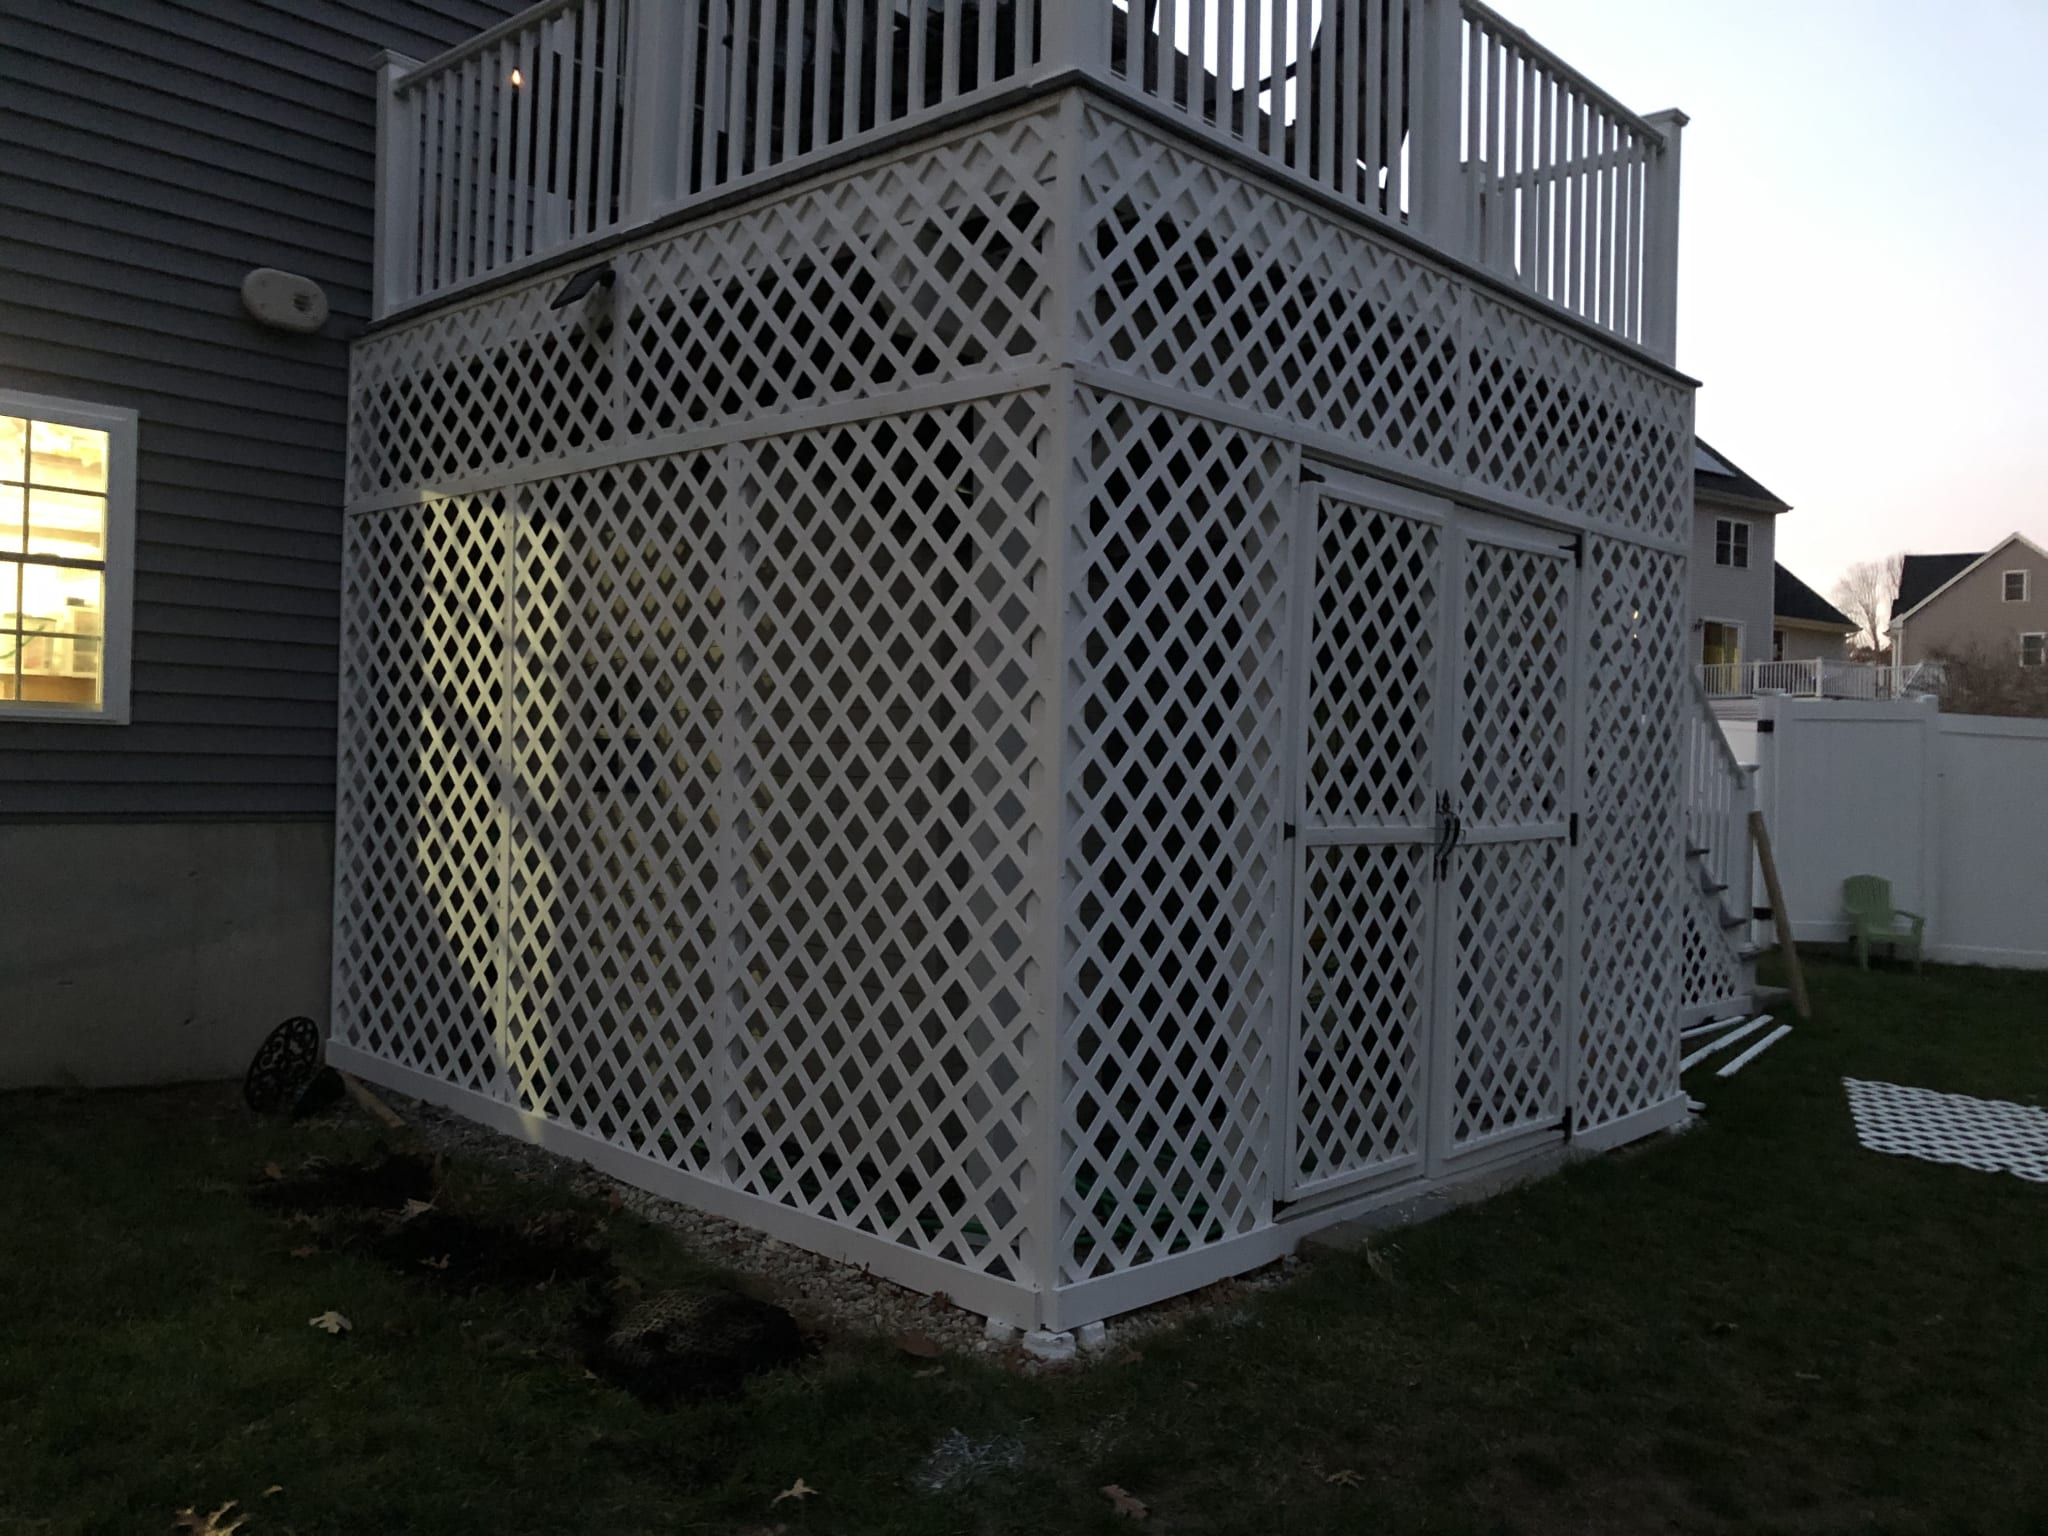
Finally I was done with the lattice work!

The pavers
Of course we aren't done! I want to be able to wheel things in and out of the shed, so I should put some pavers down, right? Right.
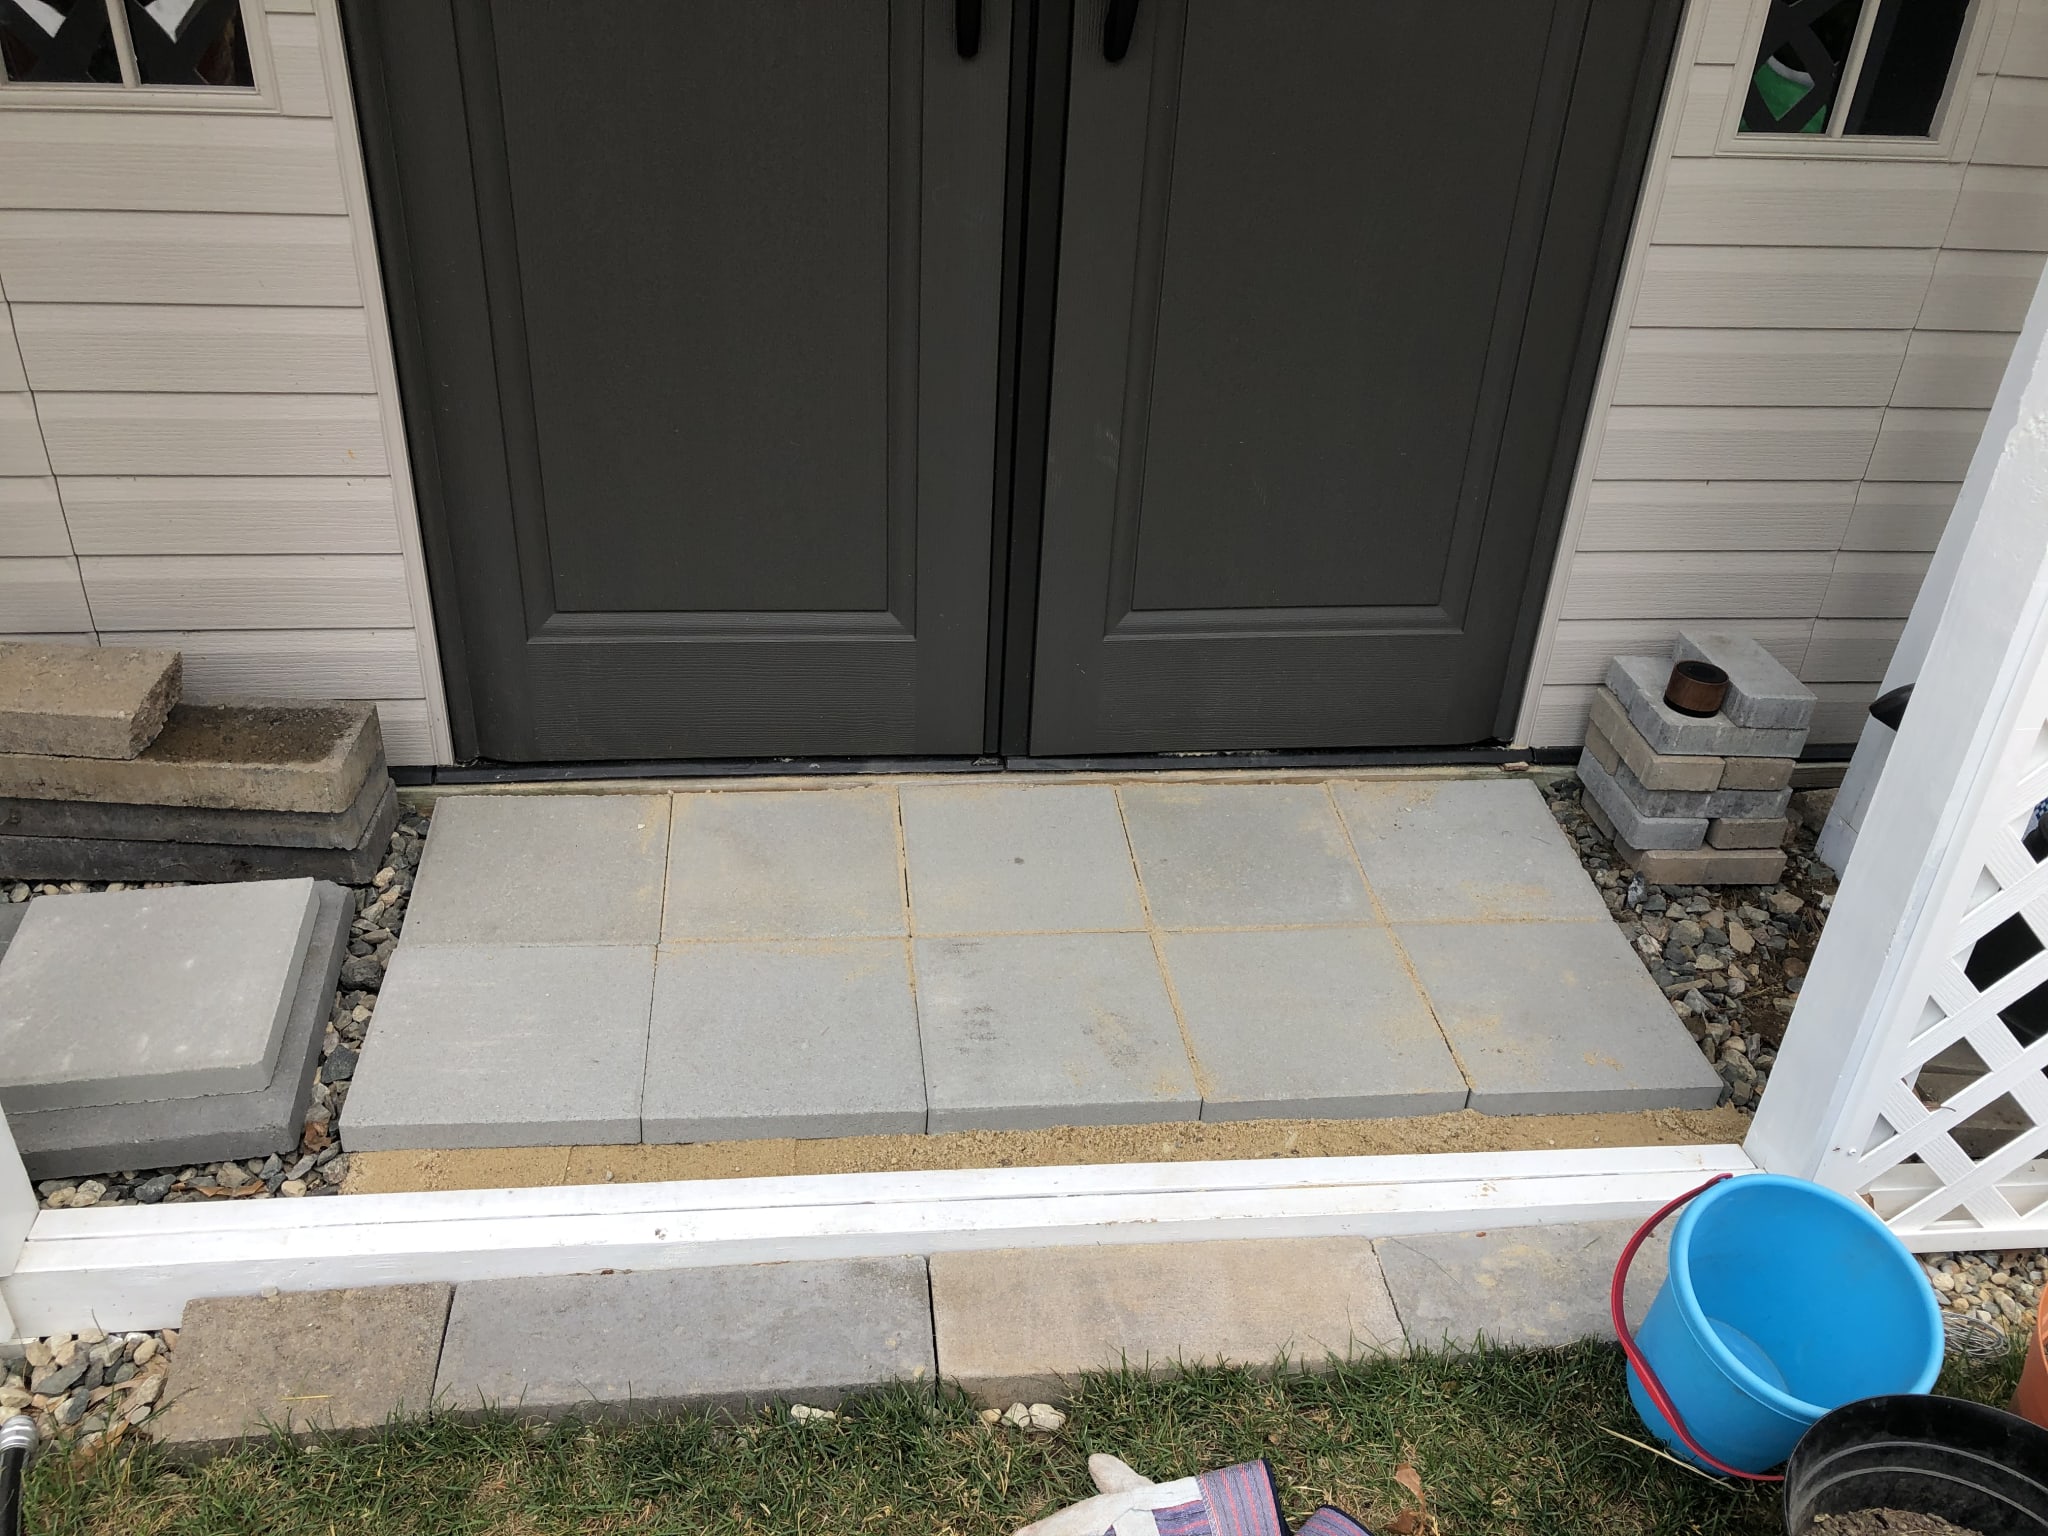
The plain ol' pavers from Lowes almost do the trick. Fortunately I bought two extra and happen to have an angle grinder with a diamond cutting wheel.
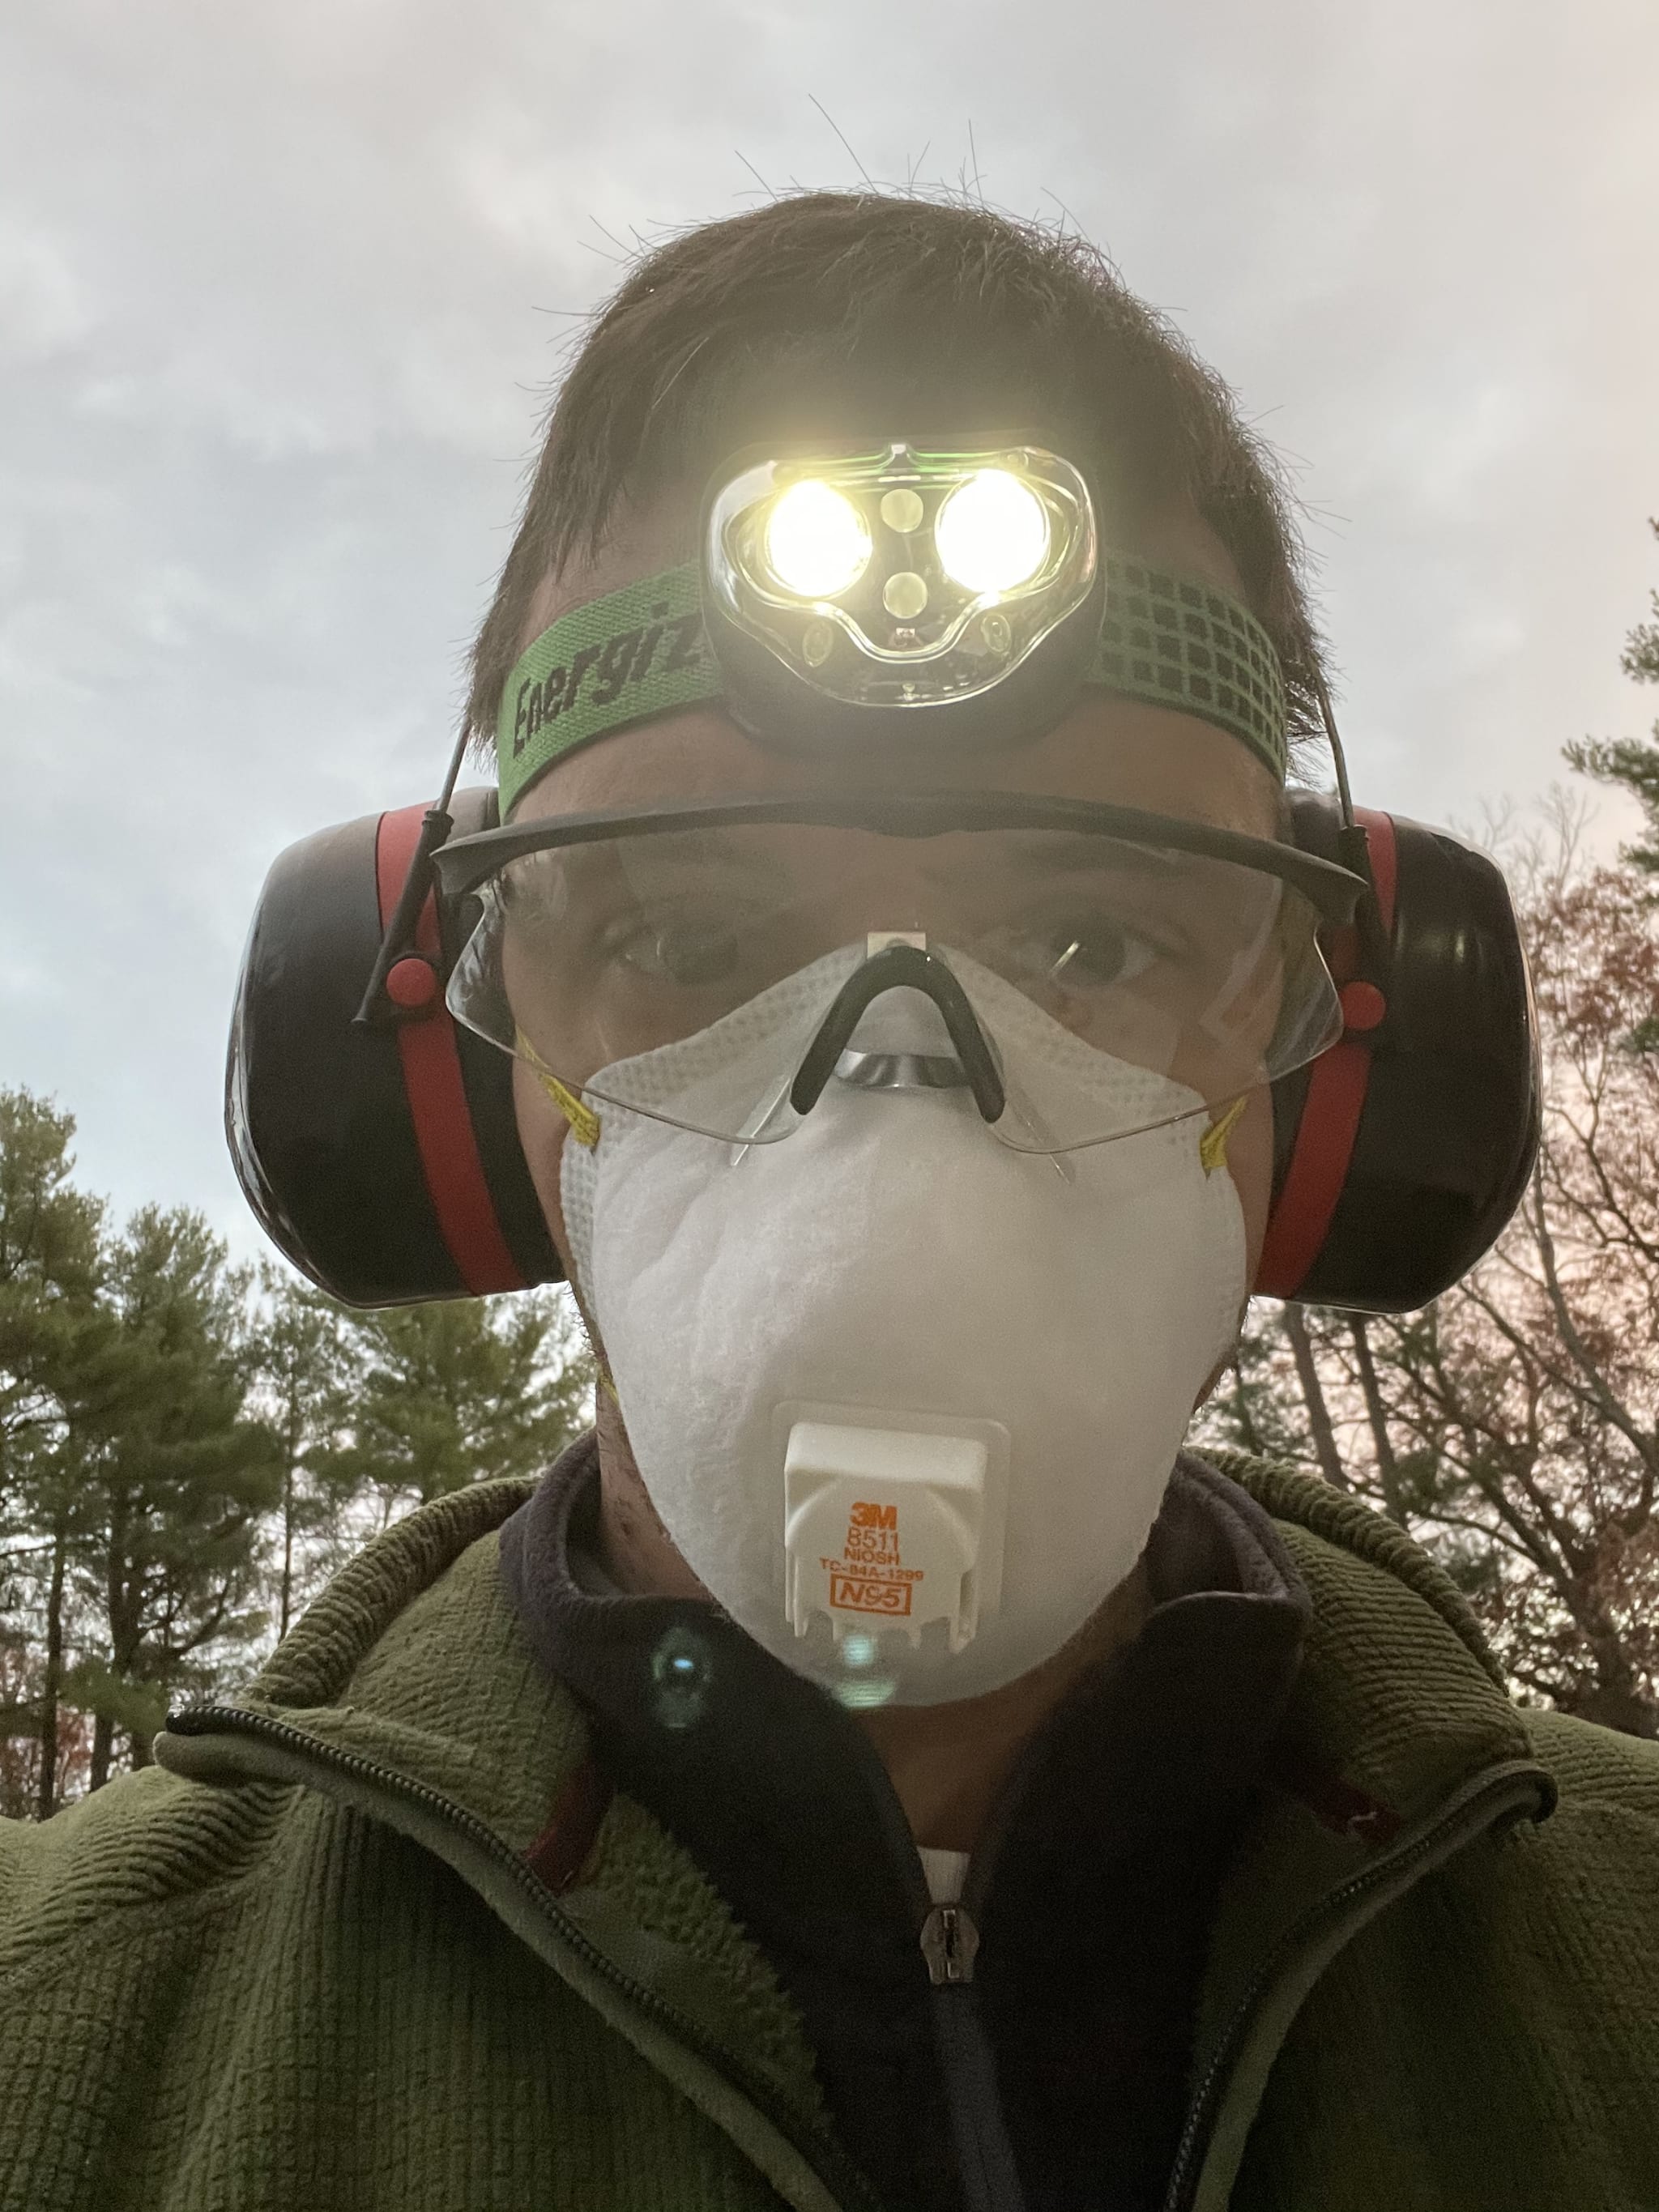
Cutting masonry or stone is very dusty work. If you ever try it make sure you're outside and wearing all the appropriate safety gear.
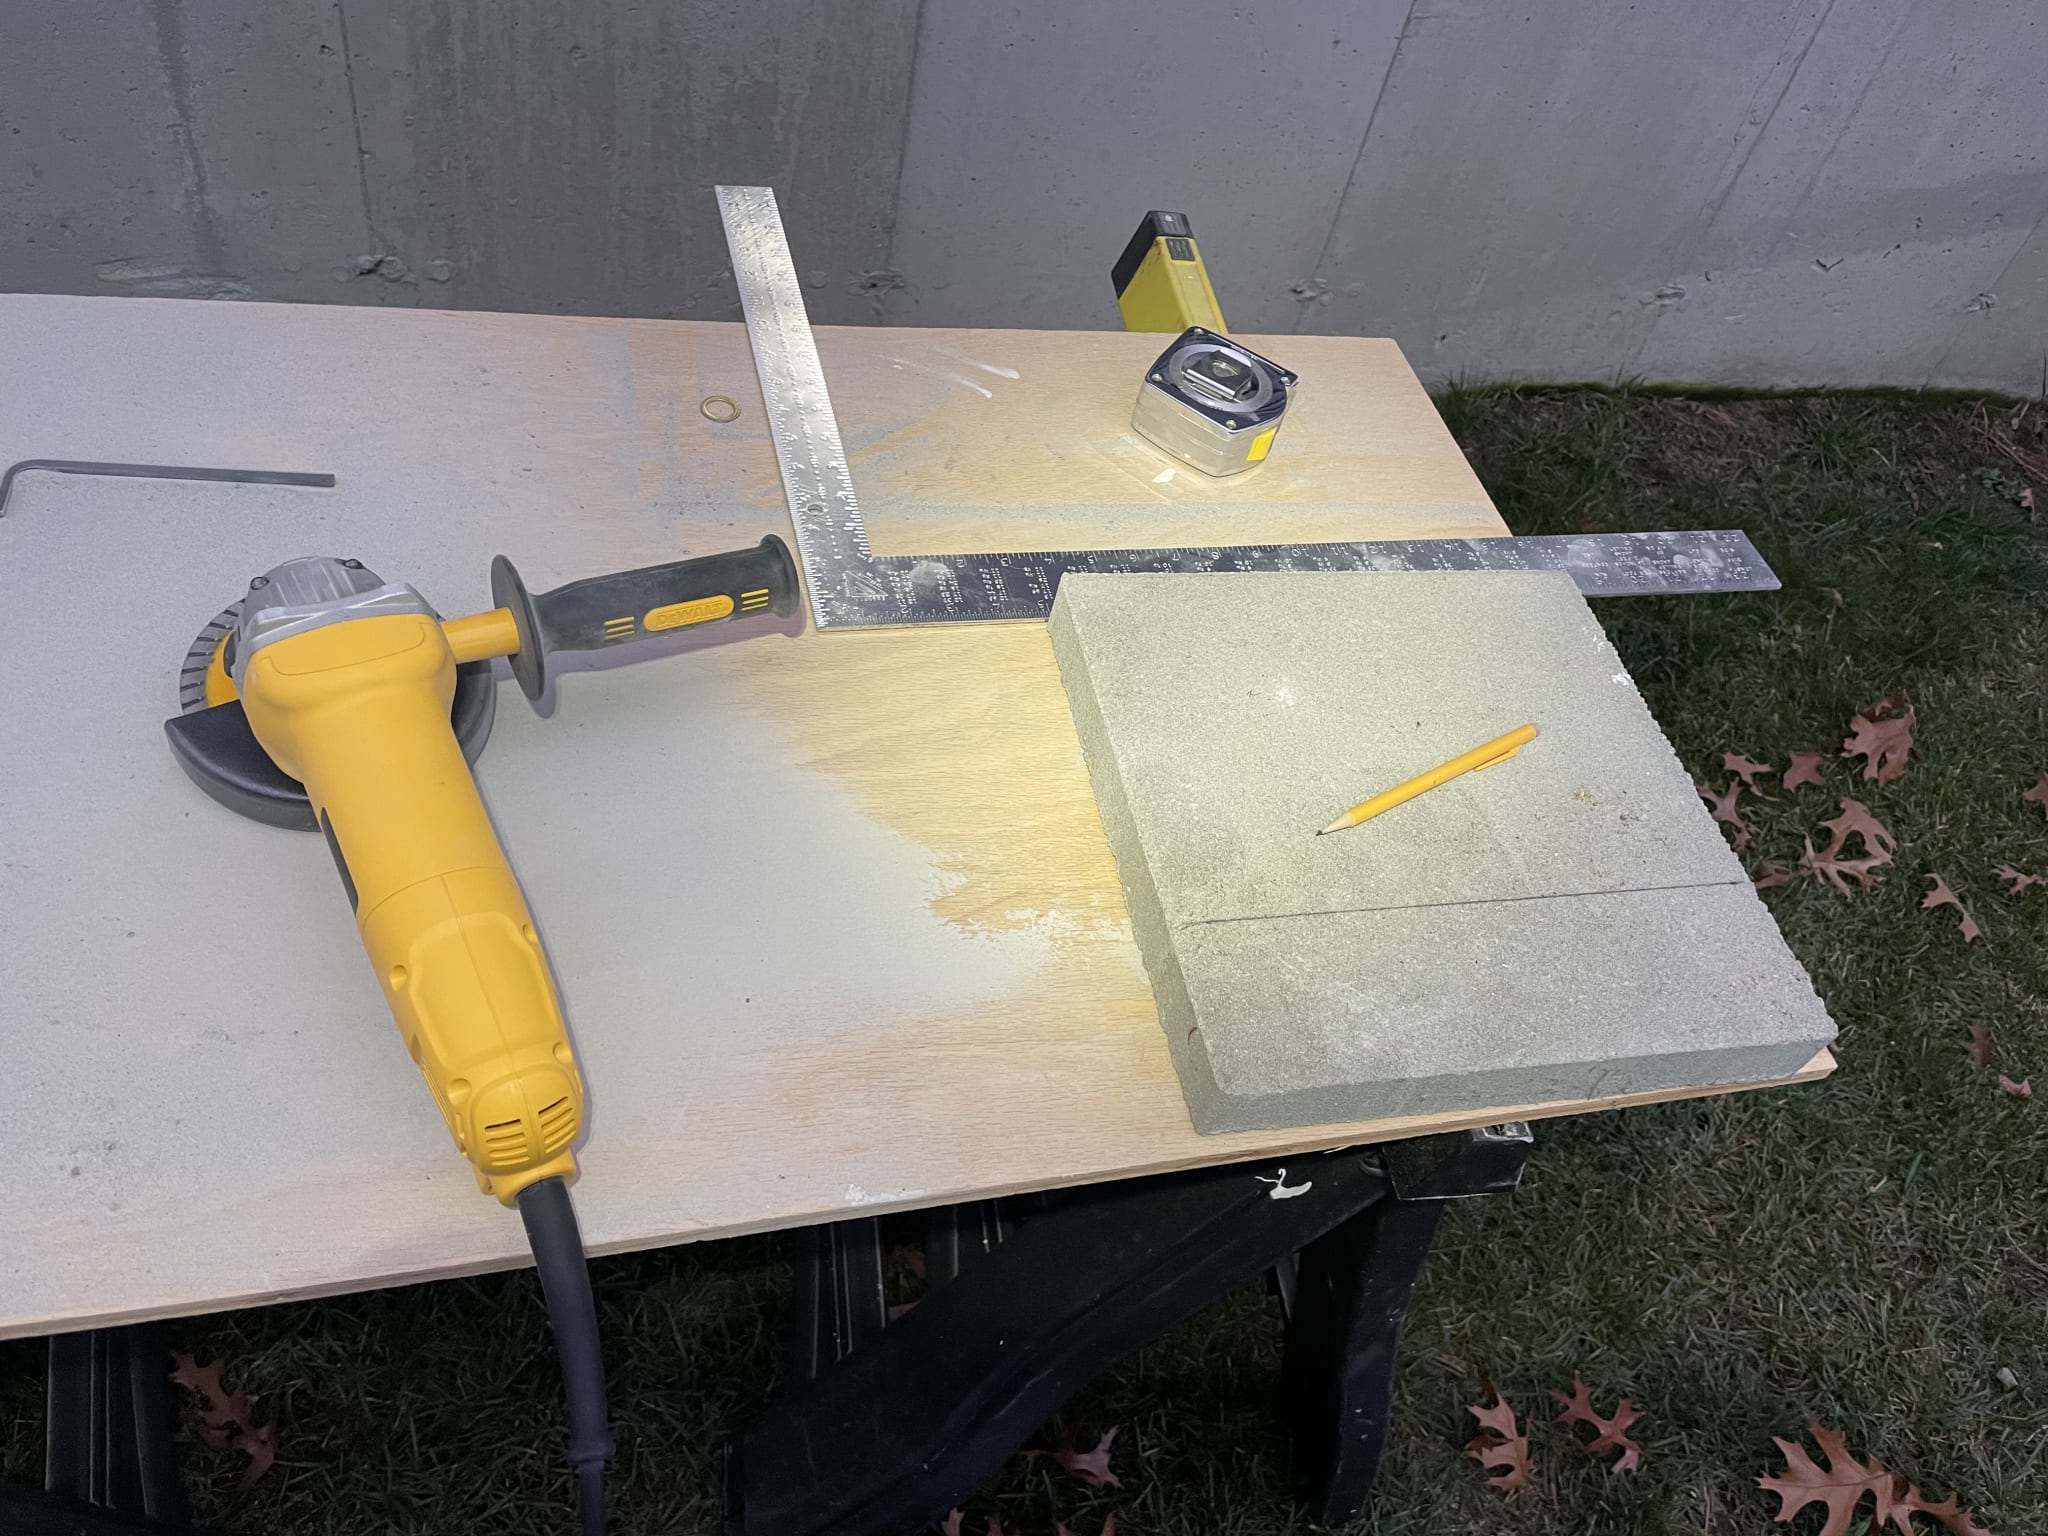
For this part I just measured the remaining gap and drew a line to cut. The angle grinder made quick work of the paver.
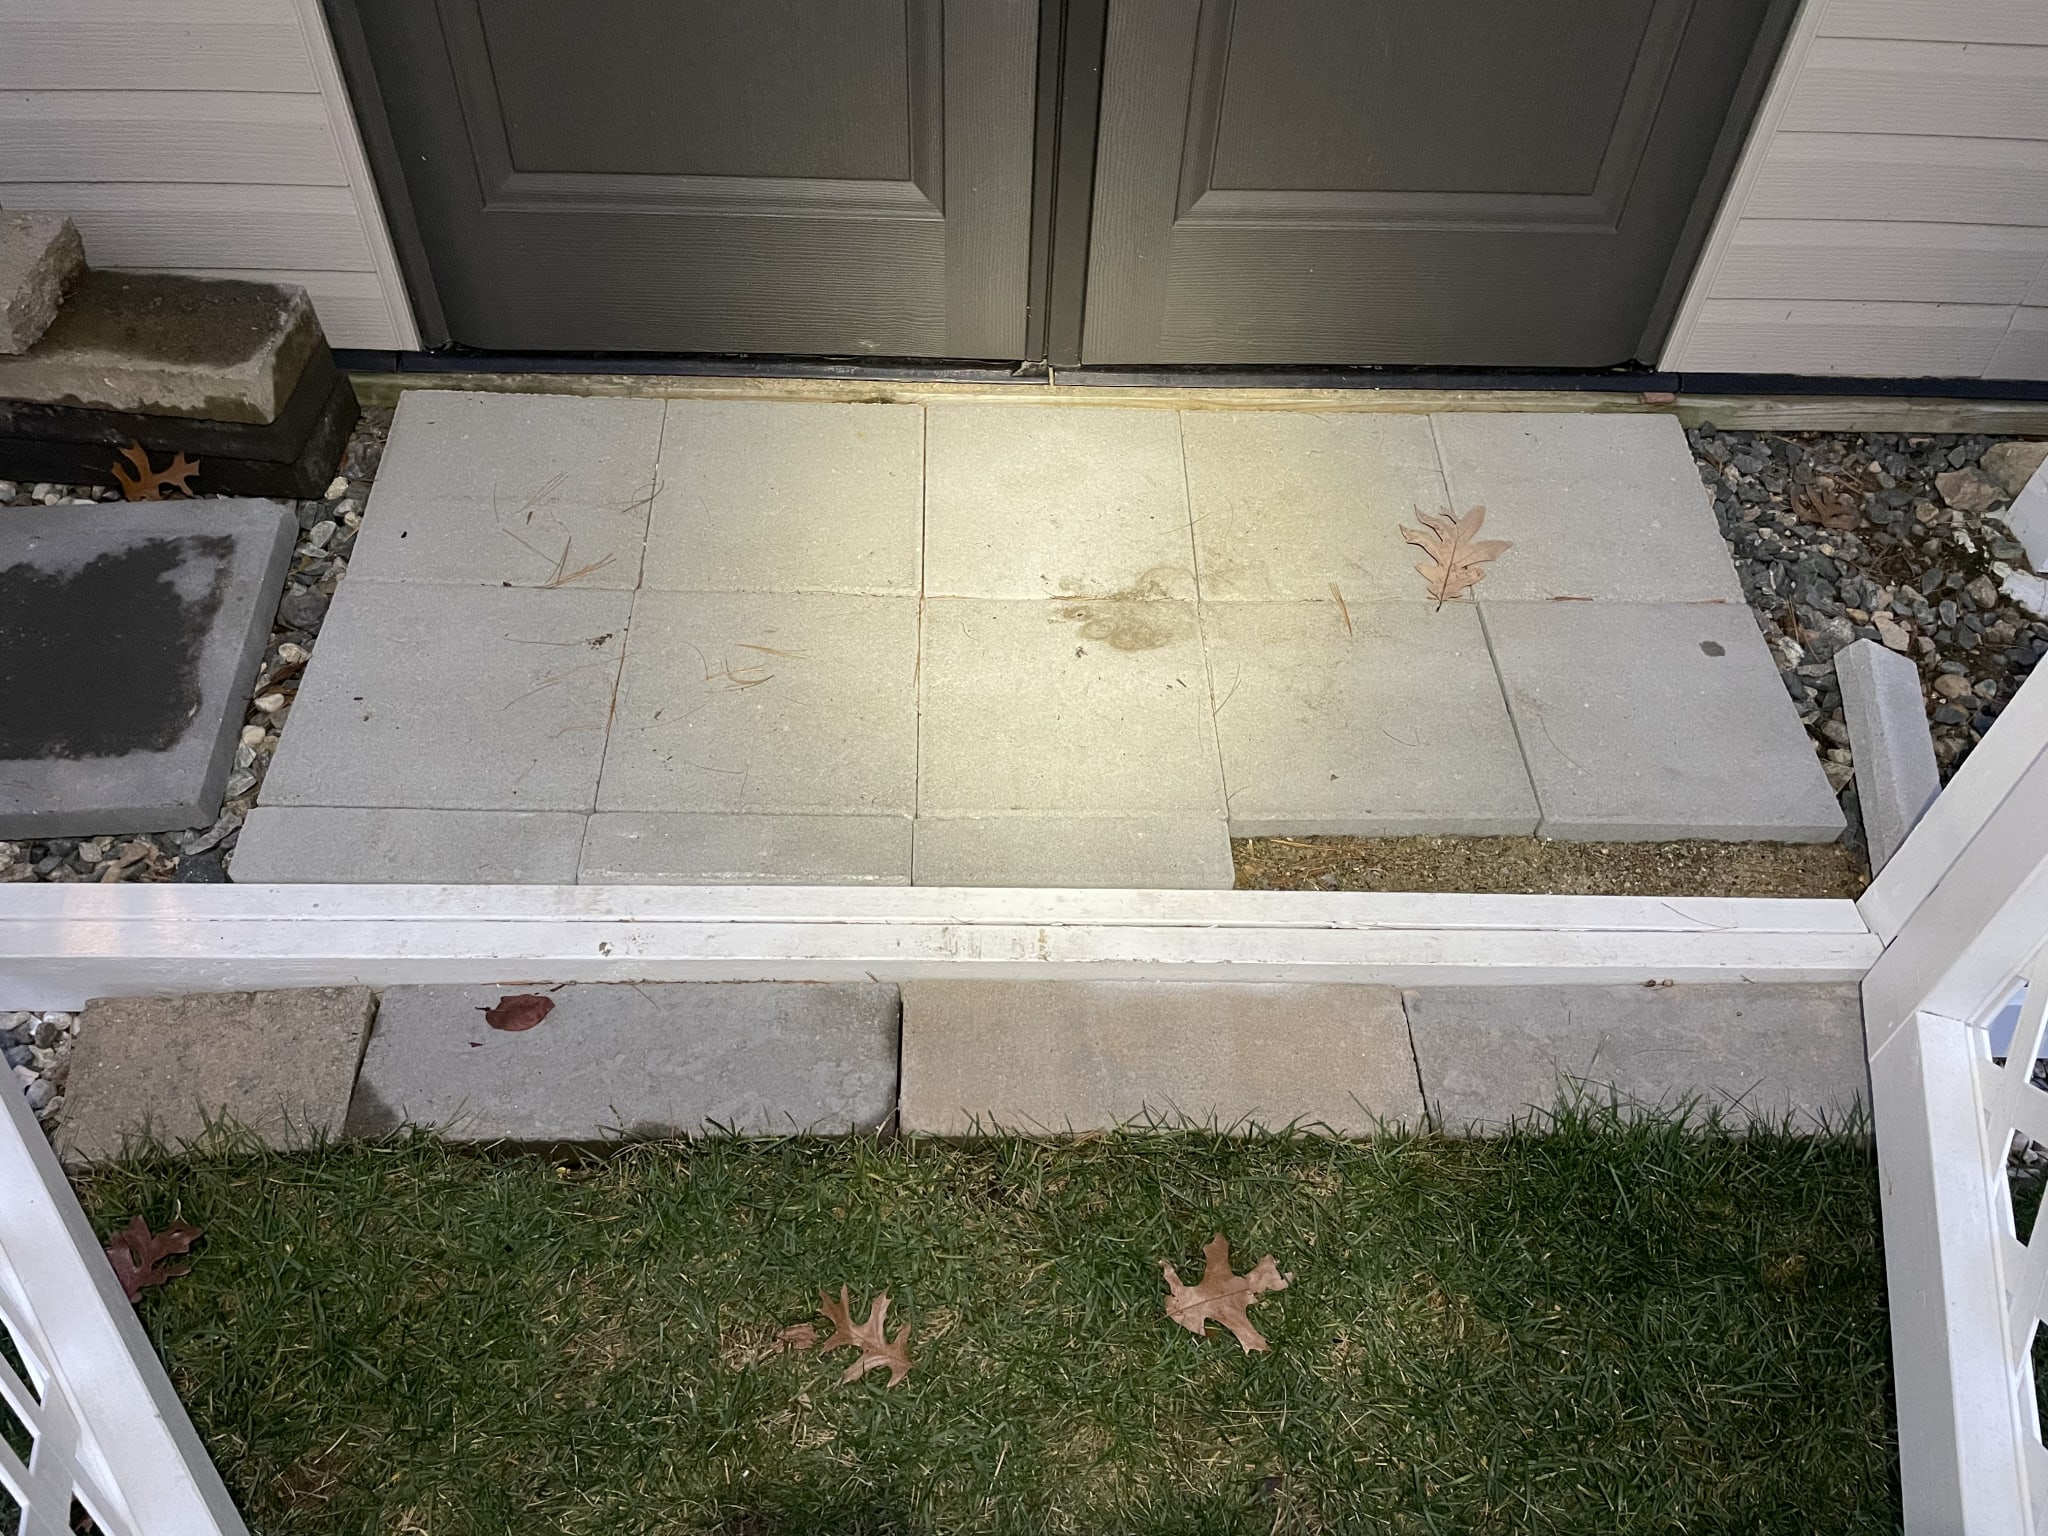
I might put polymeric sand in the gaps to hold it all together. We'll see.
The End?
This project took several years and who knows if it is done! I made tons of mistakes and learned a lot in this build. I just hope it stands up to the test of time.